You have a creative itch that just won’t quit. You’ve watched potters shape clay into beautiful bowls and mugs on a spinning wheel, and something in you thinks: I could do that.
But then reality sets in: studio memberships are expensive, class schedules are rigid, and you want to create on your own terms.
That’s exactly why setting up a home pottery wheel and kiln is becoming the choice for so many artists.
The idea of throwing clay and firing pottery right in your own space sounds ideal, but is it really possible?
What does it actually take to pull this off without wasting money on the wrong equipment? The answer depends on a few things you might not have considered yet.
What Is a Pottery Wheel?
A pottery wheel is a rotating platform that allows a potter to shape clay using centrifugal force and hand pressure. I
t’s the cornerstone tool of wheel-thrown pottery and the reason those smooth, symmetrical shapes are achievable at all.
Without a wheel, producing consistently round, centred forms by hand is incredibly difficult.
How a Pottery Wheel Works
The wheel spins horizontally, driven either by a foot pedal or an electric motor.
The potter places a lump of clay at the centre of the spinning wheel head, then uses both hands to centre it, pressing inward and downward simultaneously.
Once centred, the clay is opened, pulled up, and shaped through a series of deliberate hand movements. The rotation does the heavy lifting; the hands guide the form.
Types of Pottery Wheels for Home Use
Electric pottery wheels are the most practical for home use; they’re consistent, adjustable, and require less physical effort.
Kick wheels are traditional, foot-powered, and beloved for their quiet operation and tactile rhythm, though they take up more space.
Tabletop pottery wheels are compact and affordable, ideal for small spaces or beginners who want to test the craft before committing to a full-sized wheel.
What Is a Pottery Kiln?
A pottery kiln is a high-temperature oven specifically designed to fire clay into permanent ceramic.
It’s what transforms your raw wheel-thrown piece, still fragile and water-soluble, into durable, hardened pottery. Without a kiln, the process is incomplete.
Pottery Kiln
Kilns work by heating clay to temperatures that trigger permanent chemical changes.
The clay’s structure vitrifies, moisture is eliminated, and the material fuses into something fundamentally different from what it started as.
Most pottery requires two separate firings: a bisque firing to harden the clay, followed by a glaze firing to seal and finish the surface.
Understanding how to manage these firing cycles is one of the most important skills a home potter can develop.
For a deeper look at the full firing process, the guide on home clay firing covers everything from pit firing to oven methods in detail.
Types of Kilns for Home Pottery
Electric kilns are the standard for home potters — they’re clean, controllable, and compatible with standard studio setups.
Gas kilns produce distinctive atmospheric effects through flame and reduction but require outdoor space and careful setup.
Small tabletop kilns are entry-level options great for testing glazes, firing small pieces, or working with low-fire clay.
Each type has its place depending on your goals, available space, and budget.
Why You Need Both a Pottery Wheel and a Kiln
The wheel shapes; the kiln finishes. These two tools exist in a dependent relationship; neither is fully useful without the other if your goal is durable, functional pottery.

You can throw beautiful forms on the wheel, but without firing them, they’ll never be more than fragile clay.
The Pottery-Making Process
The workflow follows a clear sequence. Clay is thrown on the wheel and shaped into the desired form. Once shaped, it’s left to dry to a leather-hard state, then trimmed and refined.
After that, it dries completely to bone-dry before its first firing (bisque). Once the bisque is fired, glaze is applied, and the piece goes back into the kiln for the glaze firing.
That’s the complete cycle from raw clay to finished ceramic.
Can You Do Pottery Without a Kiln?
Yes, with some trade-offs. Air-dry clay is a genuine alternative for decorative pieces — it hardens at room temperature without any firing at all, though it’s not waterproof or food-safe.
Community kiln options are another route: many local art centres, ceramic studios, and makerspaces offer kiln access by the hour or shelf space.
For those in Australia, exploring Pottery ceramic kilns Australia resources can help locate suppliers, community kilns, and studio-grade equipment within reach.
Choosing the Right Home Pottery Wheel
Not all pottery wheels are built the same, and the right choice depends heavily on your skill level, available space, and how seriously you plan to pursue the craft.
Making the wrong call here is an expensive lesson, so it’s worth taking the time to understand what actually matters.
What Is the Best Pottery Wheel for Beginners?
For beginners, the priority is simplicity, reliability, and reasonable cost. Entry-level electric wheels in the 1/3 to 1/2 horsepower range are more than sufficient for learning.
Portable and tabletop models work well if space is tight. Budget options from reputable brands typically cost between $400–$700 and handle the basics well.
Avoid the cheapest no-brand options — inconsistent motor performance makes learning centring even harder than it already is.
Pottery Wheel for Adults
Adult learners often benefit from a full-sized, floor-standing electric wheel with a sturdy wheel head (around 11–12 inches) and variable speed control.
Adults tend to apply more pressure when learning to centre, so motor torque matters more than raw speed. A wheel with a reversible direction feature is also a nice advantage.
Seating height and ergonomics are worth considering, too — an uncomfortable setup makes long throwing sessions genuinely difficult.
Brent Pottery Wheel
Brent is one of the most trusted names in pottery wheels and has been for decades.
Their wheels are known for exceptional build quality, powerful and consistent motors, and longevity — a well-maintained Brent wheel can last 20–30 years.
The Brent CXC and Brent IE models are popular mid-range and professional choices, respectively.
They’re not the cheapest option on the market, but for serious home potters, the investment pays off over time.
Shimpo Pottery Wheel
Shimpo is another widely respected brand, particularly popular for its quiet motors and smooth speed control.
The Shimpo RK-Whisper lives up to its name — it runs remarkably quietly compared to other electric wheels, which matters a great deal in a home setting where noise is a concern.
Shimpo wheels also tend to be more compact than comparable Brent models, making them a good fit for smaller home studios.
Professional Pottery Wheel
A professional-grade pottery wheel typically offers a motor of 1 horsepower or more, a large wheel head (12–14 inches), heavy-duty construction, and precise variable speed from near-zero to full speed.
Professional wheels are built for sustained daily use and can handle large clay loads — 25 pounds or more.
If you’re planning to sell work or throw production pottery at home, investing in a professional wheel from the start saves money in the long run.
Choosing the Right Kiln for Home Use
Choosing a kiln is arguably a bigger decision than choosing a wheel. Kilns require more space, more electrical planning, and more safety considerations.
Getting this right from the start matters.
Home Pottery Kiln
A home pottery kiln needs to balance capacity, temperature range, and practical installation requirements.
Most home potters start with a small front-loading or top-loading electric kiln in the 2–7 cubic foot range.
These are manageable in size, don’t require an industrial electrical supply, and can handle low to mid-fire work comfortably.
A dedicated kiln space with good ventilation is essential, even electric kilns release fumes during firing that shouldn’t be inhaled.
Mini Kiln for Pottery at Home
Mini kilns (also called test kilns or tabletop kilns) are compact units designed for small-scale firing.
They’re perfect for glaze testing, small jewellery pieces, tiles, or polymer clay. Most mini kilns reach temperatures of up to 1,100–1,300°C and run on standard household power.
They’re an excellent low-commitment entry point — affordable, space-efficient, and surprisingly capable for the right type of work.
Best Home Kiln for Pottery
The best home kiln depends on what you’re making. For low-fire earthenware and glaze work, a small electric top-loader with digital controls is ideal.
Brands like Skutt, Paragon, and L&L are consistently well-regarded. For mid-fire stoneware, you’ll want a kiln rated to at least Cone 6 (around 1,220°C).
Digital controllers with programmable firing schedules make the process far more consistent and beginner-friendly than manual kilns.
Kiln Size and Capacity
Test kilns (under 1 cubic foot) suit glaze testing and small decorative pieces.
Small studio kilns (2–5 cubic feet) are the sweet spot for most serious home potters — large enough to fire a meaningful batch, small enough to manage at home.
Production kilns (7+ cubic feet) are for potters running a home business and require significant electrical and space planning before installation.
Temperature and Firing Range
Low-fire kilns reach up to around 1,100°C (Cone 06–1) and are suitable for earthenware and bright commercial glazes.
Mid-range kilns fire to approximately 1,200°C (Cone 6) and work well for stoneware and most studio glazes.
High-fire kilns reach 1,300°C and above (Cone 10+) for porcelain and traditional stoneware.
For home use, Cone 6 is the practical sweet spot, broad enough in clay and glaze compatibility, achievable without an industrial-grade electrical supply.
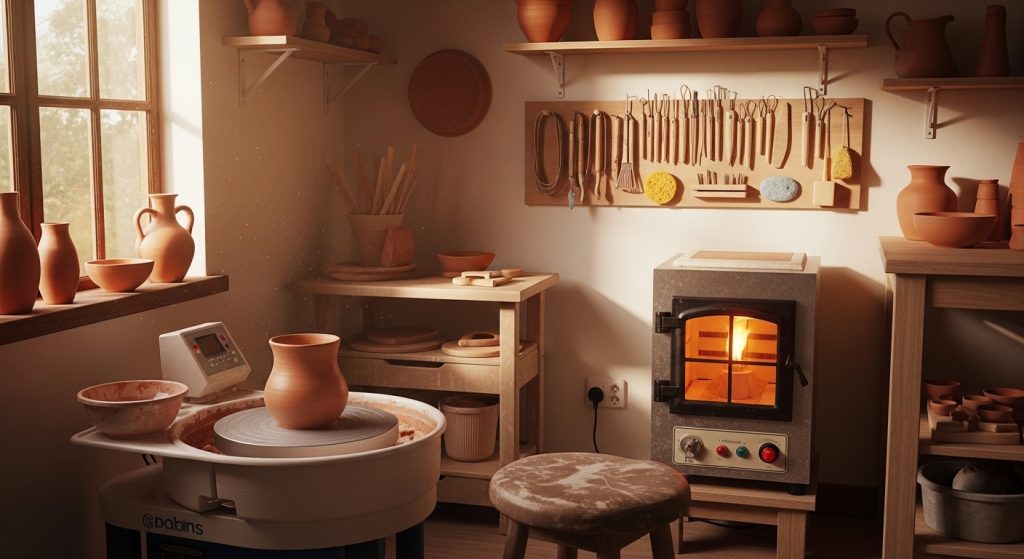
Setting Up a Home Pottery Studio
A home pottery studio doesn’t require a lot of space, but it does require thoughtful planning. Getting the setup right from the start prevents headaches later.
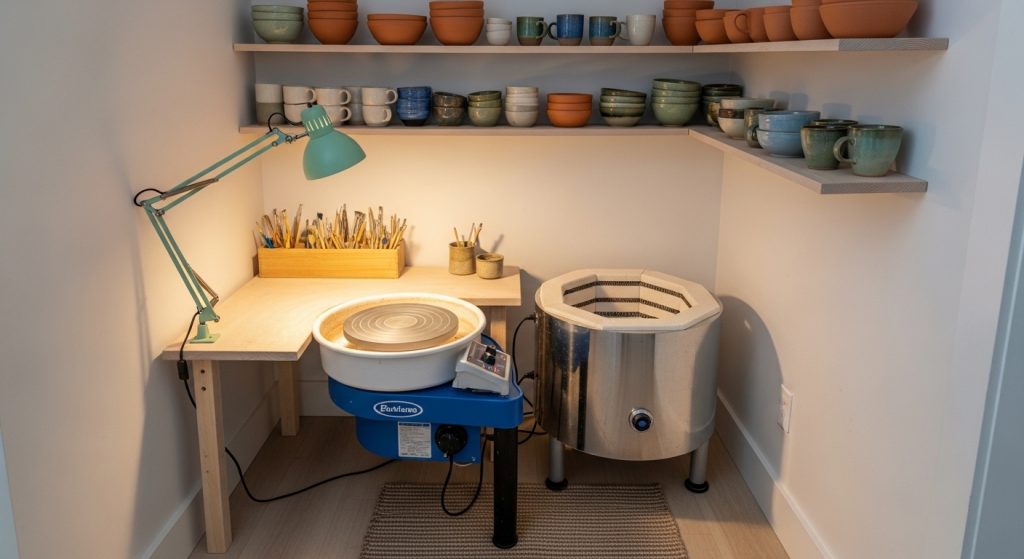
Can I Use a Pottery Wheel in My House?
Yes — a pottery wheel can absolutely be used indoors.
Electric wheels are quiet enough for home use, especially models like the Shimpo Whisper. The main considerations are flooring (clay and water will get everywhere — tile or concrete is ideal), drainage access nearby, and ceiling clearance.
A dedicated room or garage corner works well. Some potters even work in apartments, using portable wheels and managing mess with rubber mats and covered storage.
Electrical Requirements for Kilns
This is where home kiln installation gets serious. Most small home kilns require a dedicated 240V circuit — the same type used for electric ovens or dryers.
Larger kilns may require 50–60 amp service. Always have a licensed electrician install the circuit and check your home’s panel capacity before purchasing a kiln.
Running a kiln on an inadequate circuit is a fire hazard and will damage the kiln’s controller over time.
Organizing Your Workspace
Place the wheel near a water source and with enough room to walk around it comfortably, about 3 feet of clearance on each side.
Store clay in sealed bins to prevent drying. Keep tools within arm’s reach of the wheel: a simple pegboard or wall-mounted tool rack works perfectly.
Position the kiln away from flammable materials, with at least 12 inches of clearance on all sides, and in a space with ventilation or an exhaust fan.
Safety Tips for Using a Pottery Wheel and Kiln at Home
Kiln Safety
Always install a kiln vent or work in a space with strong ventilation. Kilns release carbon monoxide, sulfur compounds, and other fumes during firing, especially during glaze firing.
Never leave an active kiln unattended for extended periods. Use heat-resistant gloves when handling elements or loading a warm kiln.
Keep a fire extinguisher in the studio and ensure the kiln has an automatic shutoff or a kiln sitter to prevent overfiring.
Studio Safety
Dry clay dust is a genuine health hazard. Silica particles from clay can cause long-term respiratory damage if inhaled regularly.
Wet mop or wet wipe all surfaces rather than sweeping dry dust. Wear an N95 respirator when mixing dry glazes or reclaiming clay.
Wash your hands thoroughly before eating or touching your face. These habits feel minor, but they matter a lot over the course of years in the studio.
Cost of Setting Up a Home Pottery Wheel and Kiln
Average Price of Pottery Wheels
Entry-level electric wheels: $400–$700. Mid-range models (Shimpo, Brent entry): $800–$1,200.
Professional-grade wheels (Brent CXC, Shimpo RK-Whisper): $1,400–$2,000+. Kick wheels: $600–$1,500 depending on construction and brand.
Tabletop or portable mini wheels: $200–$450.
Average Price of Kilns
Mini/test kilns: $300–$600. Small home studio kilns (2–4 cubic feet): $700–$1,500. Mid-size kilns (5–7 cubic feet): $1,500–$3,000.
Larger production kilns: $3,000–$6,000+. Factor in $150–$400 for professional electrical installation on top of the kiln purchase price.
Additional Equipment Costs
Basic tool sets run $30–$80 and include wire tools, ribs, sponges, and trimming tools. Clay costs roughly $20–40 per 25 lb bag, depending on type.
Glazes range from $10–25 per pint for commercially prepared options. A kiln vent system adds $150–$300. Kiln shelves and posts are another $50–$200.
Budget around $300–$500 for consumables and accessories when setting up.
Beginner Tips for Home Pottery
Start with Small Projects
Small projects let you build skills faster without the frustration of failing on something ambitious. Pinch bowls, small mugs, simple plates, and coasters are all excellent starting points.
They dry faster, centre more easily, and fit multiple pieces in a single kiln firing.
Once centring and pulling walls feel natural, you’ll have the foundation to tackle larger, more complex forms.
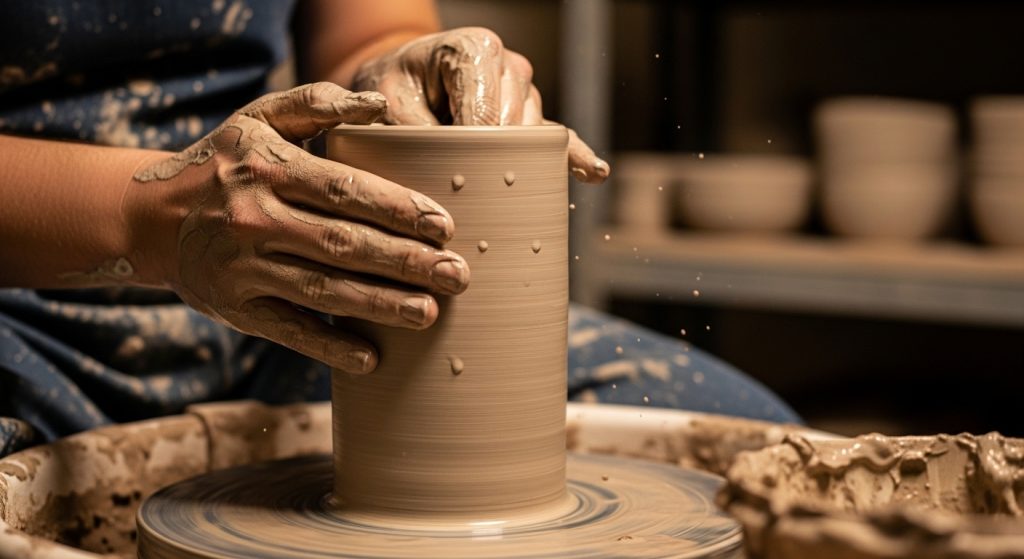
Practice Centering Clay
Centring is the single most important skill on the wheel, and it’s the one beginners struggle with most.
It requires simultaneous inward and downward pressure with both hands while the wheel spins. Don’t rush it.
A wobbly, uncentred lump will cause problems through every stage that follows. Spend the first several sessions doing nothing but centring and opening.
It’s not glamorous, but it’s the foundation everything else is built on.
Learn Basic Firing Techniques
Start with low-fire earthenware and simple commercial glazes.
Learn to read your kiln’s behaviour, how it heats, where the hot spots are, and how long it takes to cool.
Keep a firing log from day one. Note the clay type, glaze, firing temperature, and results after every session.
Over time, that log becomes one of your most valuable studio resources, saving you from repeating mistakes and helping you replicate successes.
Conclusion
A home pottery wheel and kiln setup is more achievable than most people think — but it works best when you go in with clear expectations.
The wheel and the kiln are partners in the same process: one shapes, one finishes.
Start with compact, reliable equipment suited to your space and budget, take ventilation and electrical requirements seriously, and give yourself time to build skills gradually.
Pottery rewards patience over perfection. Begin with small projects, use low-fire clay, and let each firing teach you something.
With the right setup and a little consistency, a productive home pottery studio is absolutely within reach.
Leave a Reply