Category: Dinnerware Sets

  • Identifying Pfaltzgraff Marks

    If you’ve inherited a set of sturdy stoneware dishes or picked up charming dinnerware at an estate sale, there’s a good chance you’re holding Pfaltzgraff.

    For generations, this American brand defined everyday dining with patterns like Yorktowne, Tea Rose, and Village that became kitchen staples.

    The backstamps on these pieces tell you when and where they were made, helping you authenticate what you own and understand its history.

    Pfaltzgraff marks evolved significantly over the decades, reflecting the company’s transition from domestic craftsmanship to international production.

    Learning to identify these marks means you can date your dishes, distinguish USA-made pieces from imports, spot rare patterns, and make informed decisions about value and safety all from a glance at the bottom of a plate.

    What Are Pfaltzgraff Marks?

    Pfaltzgraff marks are backstamps found on the underside of dinnerware that identify the manufacturer and often indicate where the piece was produced.

    These marks typically include the Pfaltzgraff name and may also show country of origin, pattern information, or production codes. They’re the manufacturer’s signature on each piece.

    Purpose of Backstamps on Dinnerware

    Backstamps serve multiple purposes: they authenticate the manufacturer, establish brand identity, and provide production information.

    For consumers, marks confirm you’re buying genuine Pfaltzgraff rather than a copycat.

    For collectors, backstamps become essential tools for dating pieces, tracing manufacturing changes, and verifying authenticity when building or valuing collections.

    Marks vs Decorative Patterns

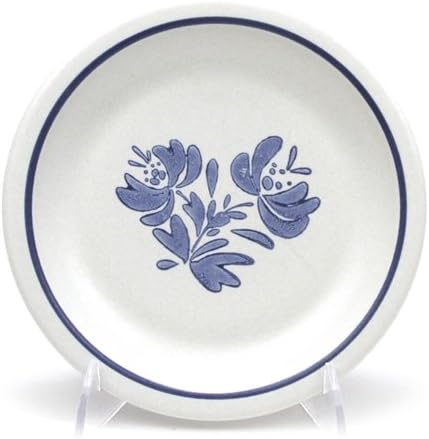
    The backstamp is different from the decorative pattern on the front of the dish. The pattern, like Yorktowne’s iconic folk art design, is the visual element you see when using the piece.

    The mark is purely functional identification on the bottom. Both matter for identification, but the backstamp specifically confirms the manufacturer.

    Why Pfaltzgraff Marks Changed Over Time

    Pfaltzgraff’s marks evolved to reflect manufacturing changes, particularly the shift from American production to overseas facilities.

    Early marks emphasized USA origins, while later ones indicated China, Mexico, or Indonesia.

    Changes in printing technology, corporate ownership transitions, and legal requirements for country-of-origin labeling all influenced how marks appeared across different eras.

    Overview of Pfaltzgraff Dinnerware

    Pfaltzgraff built its reputation on durable, attractive stoneware that served American families for decades.

    Pfaltzgraff Yorktowne Stoneware dinner plate

    Understanding the company’s background and product evolution helps you contextualize the marks you’ll find and explains why certain backstamps indicate more desirable pieces to collectors.

    History of Pfaltzgraff (USA)

    Founded in 1811 in York, Pennsylvania, Pfaltzgraff started as a small pottery making simple redware and stoneware crocks.

    The company evolved into a major dinnerware manufacturer during the 20th century, creating beloved patterns that defined casual American dining.

    While production shifted overseas in later years, the Pfaltzgraff name remains synonymous with quality everyday dishes.

    Stoneware vs Earthenware Lines

    Pfaltzgraff primarily produced stoneware—heavy, durable ceramic fired at high temperatures.

    Pfaltzgraff village pattern stoneware salad plate

    Their stoneware is thicker and more chip-resistant than standard earthenware, which explains why so many pieces survive in good condition decades later.

    Some later lines used earthenware, which is lighter but less durable than their traditional stoneware.

    Transition From USA-Made to Imported Production

    Through the 1980s, most Pfaltzgraff was manufactured domestically in Pennsylvania.

    Economic pressures led the company to move production overseas starting in the 1990s, with facilities in China, Mexico, and Indonesia producing pieces for the American market.

    This transition is clearly documented in the backstamps, making marks crucial for determining where pieces originated.

    Common Types of Pfaltzgraff Marks

    Identifying Pfaltzgraff Marks

    Pfaltzgraff used several distinct backstamp styles throughout its production history.

    Recognizing these common marks helps you quickly identify genuine pieces and narrow down their production period.

    The mark style often reveals more about a piece than just the manufacturer’s name.

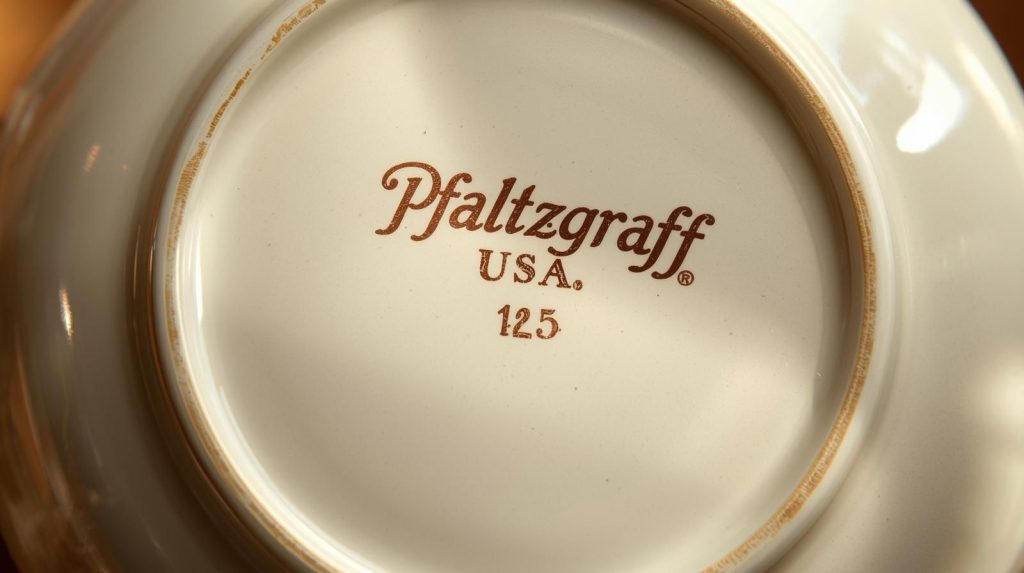
    “Pfaltzgraff USA” Backstamp

    The “Pfaltzgraff USA” mark is the most desirable to collectors because it confirms American manufacturing.

    This backstamp typically appears in various fonts—sometimes stamped in ink, sometimes molded into the clay.

    USA marks generally indicate pieces made before the 1990s and represent the company’s domestic production era, when quality control was entirely in-house.

    “Pfaltzgraff” Name-Only Marks

    Some pieces carry just “Pfaltzgraff” without country designation, often appearing during transitional periods when manufacturing locations were changing.

    These marks require additional investigation—you’ll need to examine the pattern, glaze quality, and weight to determine origin.

    Name-only marks sometimes appear on pieces made for specific retailers or promotional lines.

    Country-of-Origin Marks

    Later, Pfaltzgraff carries explicit country names like “China,” “Mexico,” or “Indonesia” alongside the brand name.

    These marks reflect manufacturing after the overseas transition and typically appear as printed backstamps rather than impressed marks.

    While imported pieces maintain the Pfaltzgraff patterns and designs, collectors often distinguish them from USA-made examples.

    How Pfaltzgraff Marks Changed Over Time

    Understanding the temporal evolution of Pfaltzgraff marks helps you date pieces accurately and recognize which production era they represent.

    These changes mirror the company’s manufacturing history and broader shifts in American ceramic production.

    Early Pfaltzgraff (1930s–1960s)

    Early Pfaltzgraff marks were often hand-stamped or impressed directly into the clay before glazing, creating marks that are sometimes less clear than later printed versions.

    These pieces feature heavy stoneware construction with simple marks that might only say “Pfaltzgraff” or include basic model numbers.

    The marks can be quite faint or partially obscured by glaze.

    Mid-Century to 1980s

    This era represents Pfaltzgraff’s golden age, with clear “Pfaltzgraff USA” backstamps becoming standard.

    Pattern names often appeared alongside the mark, and printing quality improved significantly.

    This period saw the massive expansion of popular patterns like Yorktowne, making these marked pieces abundant in the secondary market but still desirable for their domestic origin.

    1990s–Present

    The shift to imported production brought country-specific marks that clearly state where pieces were manufactured.

    Modern marks are typically printed or inked rather than impressed, appearing crisper and more uniform.

    Contemporary pieces sometimes include additional codes, barcodes, or symbols that earlier domestic production never carried.

    Where to Find Pfaltzgraff Marks

    Knowing where to look for backstamps saves time and prevents you from missing subtle marks.

    Pfaltzgraff consistently placed marks in predictable locations, though glaze coverage and wear patterns can affect visibility.

    Bottom of Plates and Bowls

    Flip any Pfaltzgraff piece over and check the center of the base—this is where you’ll find the backstamp on plates, bowls, mugs, and serving pieces.

    The mark sits in the unglazed or lightly glazed area called the foot ring. Clean the bottom if needed, as food residue or staining can obscure marks.

    Why Marks May Be Partially Covered by Glaze

    Sometimes glaze runs or pools over the backstamp during firing, partially obscuring the mark.

    This wasn’t intentional, but happens in ceramic production when glaze migrates.

    You might see only part of the text or notice the mark appears fainter in some areas. Tilting the piece under bright light helps you read partially covered marks.

    Faded or Worn Backstamps

    Decades of washing, stacking, and general use can wear down printed or stamped marks, especially on frequently used pieces.

    Dishwashers and abrasive scrubbing accelerate fading. If a mark seems barely visible, try examining it under strong directional lighting or slightly dampening the area to increase contrast temporarily.

    How to Date Pfaltzgraff Using Marks

    Dating Pfaltzgraff requires matching backstamp characteristics to specific production periods and confirming with pattern details.

    While marks won’t give you an exact production year, they reliably narrow the timeframe when combined with other identifying features.

    Identify Wording and Font Style

    Start by reading exactly what the mark says and noting the font style. Early impressed marks have distinct handcrafted qualities, mid-century printed marks show consistent professional typography, and modern marks often include additional symbols or codes.

    The specific wording—especially “USA” versus country names—immediately places pieces in broad time categories.

    Look for “USA” vs Country Names

    This is your most important dating clue. “Pfaltzgraff USA” indicates pre-1990s domestic production, while “Made in China,” “Made in Mexico,” or other country designations point to 1990s or later.

    The absence of any country designation often suggests earlier production or transitional pieces.

    Cross-Check With Known Pattern Timelines

    Don’t rely solely on marks for dating—confirm with the pattern itself. Certain Pfaltzgraff patterns were only produced during specific decades, and pattern variations evolved.

    Yorktowne, for example, has subtle differences between early and late production runs. Match your mark to the pattern’s known production timeline for accurate dating.

    Identifying Pfaltzgraff Without a Clear Mark

    When backstamps are missing, worn beyond recognition, or partially obscured by glaze, you can still identify Pfaltzgraff through physical characteristics and design elements.

    These secondary identification methods require closer examination, but remain reliable once you know what to look for.

    Pattern Recognition

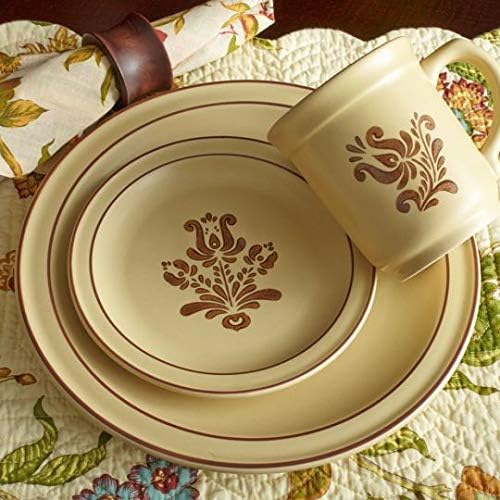
    Pfaltzgraff’s most popular patterns—Yorktowne, Village, Tea Rose, Naturewood—are distinctive and well-documented.

    Even without a clear mark, a recognizable pattern strongly suggests Pfaltzgraff origin. Pattern databases, collector guides, and online resources provide visual references for comparison.

    The pattern artwork remains consistent across pieces, making it a reliable identifier.

    Glaze Color and Texture

    Pfaltzgraff developed characteristic glaze finishes for different patterns.

    Yorktowne’s cream background with brown folk art motifs, Village’s warm ivory tone, and Tea Rose’s pink florals each have specific glaze qualities.

    The texture—smooth or slightly textured—and the glaze’s sheen level help confirm Pfaltzgraff when marks aren’t readable.

    Weight and Stoneware Thickness

    Genuine Pfaltzgraff stoneware has substantial heft and thickness that distinguishes it from lighter ceramics.

    Pick up a piece and feel its weight—Pfaltzgraff plates and bowls are noticeably heavier than comparable items from many competitors.

    The thickness remains consistent throughout the piece, with solid, substantial foot rings on plates and bowls.

    Pfaltzgraff Marks vs Other American Dinnerware Brands

    Several American dinnerware manufacturers produced during Pfaltzgraff’s heyday, and distinguishing between them requires attention to backstamp details and material differences.

    Understanding these distinctions prevents misidentification and helps you accurately attribute unmarked or partially marked pieces.

    Pfaltzgraff vs Corelle

    Corelle, made by Corning, uses a completely different material, laminated tempered glass rather than ceramic stoneware.

    Corelle pieces are exceptionally thin and light compared to Pfaltzgraff’s heavy stoneware.

    Corelle backstamps typically say “Corelle” with pattern names, and the glass composition makes them unmistakable once you handle both types.

    Pfaltzgraff vs Homer Laughlin

    Homer Laughlin, maker of Fiesta and other popular dinnerware, used much more elaborate backstamps that often included specific date codes, plant locations, and detailed company information.

    Their marks tend to be more complex than Pfaltzgraff’s straightforward backstamps.

    Homer Laughlin also produced not too thin stoneware, lighter dinnerware compared to Pfaltzgraff’s chunky stoneware.

    Do Pfaltzgraff Marks Indicate Lead or Safety?

    Backstamps don’t directly tell you whether Pfaltzgraff contains lead, but they help identify which pieces warrant testing.

    Understanding when and where lead appears in vintage dinnerware helps you make safe decisions about using older pieces for food.

    Vintage Glaze Concerns

    Vintage Pfaltzgraff, particularly pieces with brightly colored glazes or decorative elements, may contain lead.

    Ceramic glazes manufactured before strict regulations often included lead compounds to achieve certain colors and finishes.

    The stoneware body itself is typically safe; concerns focus on the glaze surface that contacts food.

    Decorated vs Plain Surfaces

    Plain, undecorated glaze areas on Pfaltzgraff are generally lower risk than heavily decorated sections.

    Pieces with painted or applied decorations, especially in reds, oranges, and yellows, historically carried higher lead content.

    If you’re concerned about specific pieces, focus testing on the decorated surfaces rather than plain backgrounds.

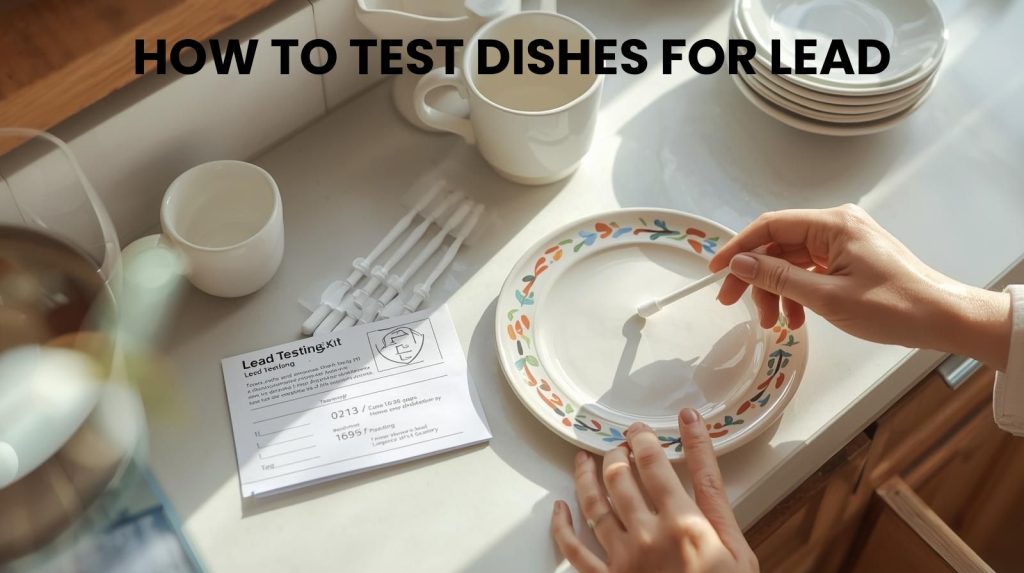
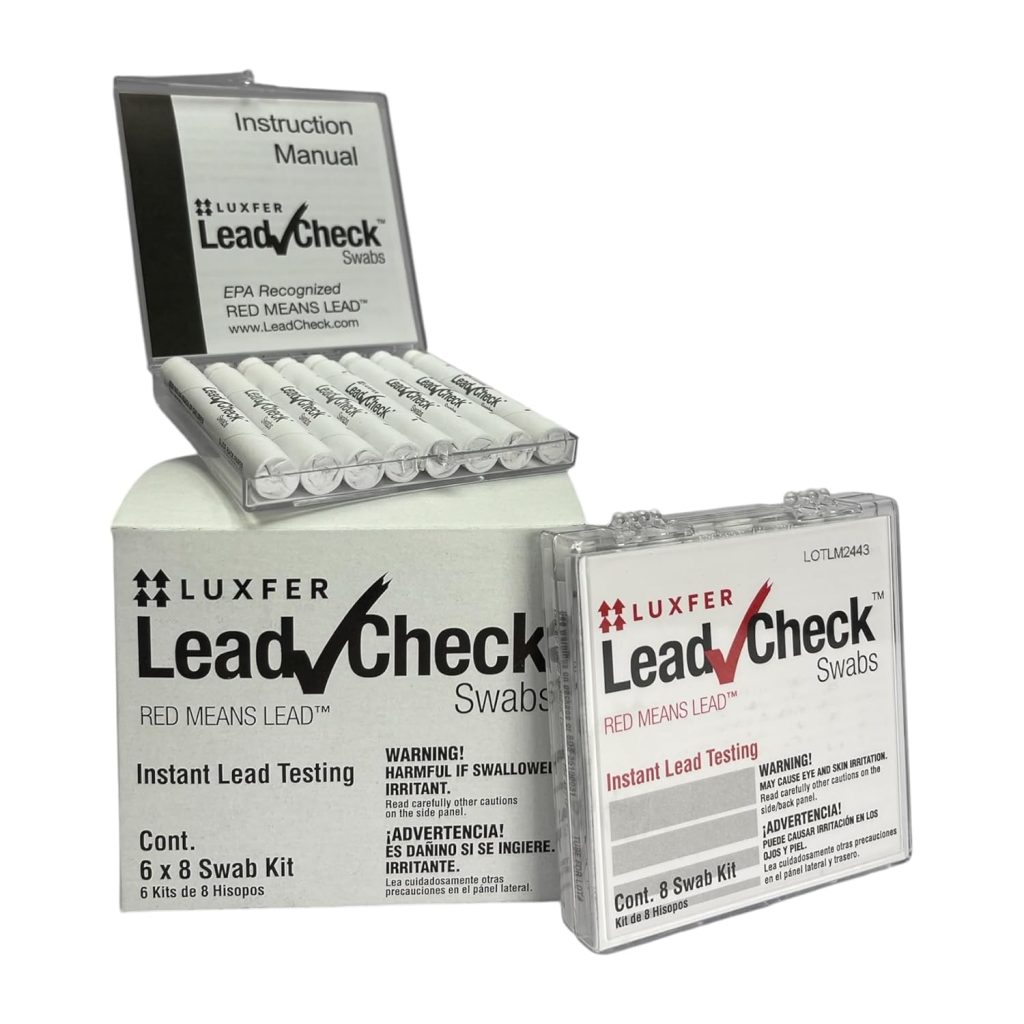
    When Lead Testing Is Recommended

    If you plan to use vintage Pfaltzgraff for food—especially pieces made before 1990—testing is wise.

    USA-made pieces from the 1970s-1980s warrant particular attention, as this period preceded current lead-free standards.

    For comprehensive guidance on checking your dishes, consult our safety testing guide before using vintage pieces regularly.

    If testing reveals lead, consider using those pieces decoratively or researching safer alternatives for everyday dining.

    Using Pfaltzgraff Marks to Determine Value

    Backstamps significantly influence Pfaltzgraff’s collectible value by confirming origin and production era.

    While marks alone don’t determine worth, they’re a critical factor alongside pattern, condition, and completeness when assessing what pieces might sell for.

    USA-Made vs Imported Pieces

    “Pfaltzgraff USA” marked pieces generally command higher prices than imports because collectors value domestic manufacturing and associate it with superior quality.

    The difference might be modest for common patterns but becomes significant for rare or discontinued designs.

    Imported pieces still have value but typically sell at 30-50% less than equivalent USA-made examples.

    Discontinued Patterns

    Marks that confirm discontinued patterns increase value, especially for sought-after designs that aren’t in current production.

    Village, Yorktowne, and Tea Rose remain popular, but rarer patterns that were produced briefly or in limited quantities become more valuable when authentic marks verify them.

    Discontinued USA-made patterns represent the top tier.

    Complete Sets vs Replacements

    Marked complete sets—eight place settings with serving pieces bring significantly more than individual replacement pieces.

    The marks confirm every piece is genuine Pfaltzgraff, which matters when buyers are investing in an entire set.

    Even incomplete sets with clear USA marks typically sell better than mixed or unmarked groupings.

    FAQ — Pfaltzgraff Marks

    Does All Pfaltzgraff Dinnerware Have a Mark?

    Most Pfaltzgraff carries backstamps, but some pieces, particularly from early production or specific promotional lines, may lack clear marks.

    Additionally, marks can wear off heavily used pieces over decades of washing and handling.

    Are Pfaltzgraff USA Pieces More Valuable?

    Yes, “Pfaltzgraff USA” marked pieces typically command higher prices than imported equivalents because collectors prefer domestic production.

    The value difference is most pronounced for discontinued patterns and complete sets in excellent condition.

    Can Pfaltzgraff Marks Fade Over Time?

    Printed or stamped marks can fade from repeated washing, dishwasher use, and abrasive cleaning.

    Impressed marks molded into the clay are more permanent but can fill with residue. Most marks remain partially readable even when worn.

    Do Marks Help Identify the Pattern?

    Sometimes marks include pattern names, which immediately identify the design.

    Even without pattern names, marks help narrow production periods, and patterns were often era-specific, making the mark an indirect identifier of possible patterns.

    Final Verdict — How to Confidently Identify Pfaltzgraff Marks

    Pfaltzgraff backstamps are reliable identifiers when present and legible, providing clear evidence of the manufacturer and often revealing production location and era.

    A visible “Pfaltzgraff USA” mark immediately confirms American manufacturing and helps date pieces to pre-1990s production, while country-specific marks indicate later imported pieces.

    However, marks aren’t the complete story; they work best when combined with pattern recognition, glaze characteristics, and physical qualities like weight and stoneware thickness.

    Don’t dismiss pieces with worn or partially obscured marks; instead, use multiple identification factors together.

    Whether you’re collecting Yorktowne, building a Village set, or simply curious about inherited dishes, understanding Pfaltzgraff’s marking evolution and cross-referencing marks with patterns gives you confidence in authentication.

    The most reliable identification comes from evaluating marks alongside the craftsmanship, design, and materials that made Pfaltzgraff an American dinnerware staple.

  • Are Dishes With Crazing Safe to Use? (Lead, Bacteria & Safety Guide)

    Crazing appears as delicate spiderweb patterns across ceramic dishes, creating a vintage aesthetic that many find charming.

    However, these fine cracks represent serious safety concerns that go beyond cosmetic damage.

    When glaze integrity fails, the protective barrier between food and the porous ceramic breaks down, creating pathways for bacterial contamination and toxic metal leaching.

    Many people unknowingly use crazed dishes daily, unaware that heat, acids, and moisture amplify health risks significantly.

    Vintage dishes pose particular dangers due to outdated manufacturing standards and lead-containing glazes.

    This comprehensive guide examines the science behind crazing, explains why compromised glaze integrity threatens food safety, and provides clear guidance on when dishes should be retired from kitchen use for your family’s protection.

    What Is Crazing on Dishes?

    are dishes with crazing safe to use

    Crazing represents visible glaze failure that compromises the protective surface of ceramic dishware.

    Definition: Tiny cracks in glaze

    Crazing consists of microscopic to visible cracks forming networks across a dish’s glazed surface.

    These cracks penetrate through the glaze layer, exposing the porous ceramic body underneath.

    The fractures create pathways for liquids, bacteria, and food particles to infiltrate the dish structure.

    While individual cracks may measure only micrometers wide, their cumulative effect destroys the glaze’s protective function.

    Caused by tension between the clay body & glaze

    The ceramic body and glaze have different expansion and contraction rates during firing and cooling.

    When these rates don’t match properly, internal stress develops within the glaze layer. Over time or with temperature changes, this stress exceeds the glaze’s tensile strength, causing fractures.

    Manufacturers call this “glaze fit” issues, when expansion coefficients are incompatible, crazing becomes inevitable.

    Looks like spiderweb cracks or fine lines

    Crazing appears as interconnected hairline fractures resembling spider webs, crackled patterns, or random fine lines.

    The cracks may be barely visible initially, but they become more apparent as food stains, oils, and moisture accumulate within them.

    Patterns range from tight, uniform networks to irregular branching cracks. The appearance often worsens with continued use and washing.

    Happens in both vintage and modern dishes

    While more common in older dishes, crazing affects contemporary ceramics too.

    Poor manufacturing quality control, inadequate testing, or cost-cutting measures cause modern dishes to craze prematurely.

    Even premium brands can develop crazing if subjected to thermal shock or extended use. The phenomenon is not exclusive to any era, though vintage pieces show crazing more frequently due to age and manufacturing standards.

    Why Does Crazing Happen?

    Multiple factors contribute to glaze failure, often working together to cause crazing.

    Age and natural wear

    Years of use gradually weaken glaze integrity through repeated thermal cycling and mechanical stress.

    Microscopic damage accumulates invisibly until reaching a threshold where visible cracks appear.

    Even properly manufactured dishes eventually develop crazing after decades of service.

    The aging process is accelerated by frequent temperature changes and harsh cleaning methods.

    Poor glaze fit during manufacturing

    Manufacturing defects occur when the glaze and clay body have incompatible thermal expansion properties.

    If the glaze shrinks more than the clay during cooling, it remains under constant tension. This pre-stressed condition makes the glaze vulnerable to cracking from minimal additional stress.

    Some manufacturers use incompatible glaze formulations to reduce costs or achieve specific aesthetic effects.

    Rapid temperature changes (thermal shock)

    Moving dishes from the refrigerator to the microwave, pouring hot liquids into cold dishes, or placing hot dishes in cold water creates sudden temperature differentials.

    The glaze and clay body expand or contract at different rates during these transitions. This differential movement generates stress that can initiate or propagate cracks.

    Similar to scratched plates, damaged surfaces become increasingly vulnerable to further deterioration.

    Dishwasher damage over time

    Modern dishwashers subject dishes to repeated cycles of high heat, harsh detergents, and rapid temperature changes.

    The aggressive cleaning environment gradually degrades glaze quality. Water jets create mechanical stress, while alkaline detergents may chemically attack certain glaze compositions.

    Over hundreds of wash cycles, these factors combine to induce crazing in susceptible dishes.

    Are Crazed Dishes Safe to Use?

    Short Answer: Often No.

    Crazing compromises dish safety through multiple pathways that increase health risks significantly.

    Crazing allows liquids, acids, and oils to penetrate the glaze

    The protective glaze layer acts as a barrier, preventing food contact with porous ceramic.

    Once cracks form, liquids seep through to the absorbent clay body underneath.

    Acidic foods like tomato sauce, vinegar, or citrus juice penetrate particularly deeply.

    Oils saturate the ceramic, creating permanent stains and rancidity over time. This infiltration cannot be reversed or cleaned effectively.

    It can cause bacterial growth in cracks

    Moisture and food particles trapped in crazing cracks create ideal environments for bacterial colonization.

    The narrow crevices protect bacteria from normal washing and sanitizing. Pathogens like Salmonella, E. coli, and Staphylococcus can establish colonies within the ceramic matrix.

    Each use potentially recontaminates fresh food placed on the dish, creating ongoing health hazards.

    Crazing increases lead and cadmium leaching, especially in vintage dishes

    Intact glaze traps heavy metals within its matrix, preventing food contact.

    Crazed glaze exposes metal-containing layers to acids and heat, dramatically increasing leaching rates.

    Vintage dishes manufactured before lead regulations pose extreme risks when crazed.

    Even dishes that tested safe when new may become dangerous after crazing develops, especially with repeated exposure to acidic or hot foods.

    Heat (microwave, hot food) accelerates leaching

    High temperatures increase the rate of chemical reactions, causing metals to leach more rapidly from compromised glaze.

    Microwaving crazed dishes intensifies this effect through both heat and moisture. Hot foods sitting on crazed surfaces extract metals more efficiently than cold foods.

    The combination of heat, acidity, and time maximizes toxic metal transfer into food.

    Lead & Cadmium Risks in Crazed Dishes

    Heavy metal contamination presents the most serious health threat from using crazed dishware.

    Lead-containing glazes can release more toxins when cracked

    Lead provides desirable properties in ceramic glazes, including vibrant colors, smooth finish, and low firing temperatures.

    When glaze integrity fails, food acids can reach lead-containing layers directly. Research shows crazed dishes leach lead at rates hundreds of times higher than intact glaze.

    Even low-level chronic exposure accumulates in the body, affecting neurological development and organ function.

    Torch, pour tests & why crazing makes results unreliable

    Home lead testing methods, like the swab test, provide screening information for intact glazes.

    However, crazing creates inconsistent results because cracks may not reach the lead-containing glaze layers uniformly.

    A negative test on one area doesn’t guarantee safety across the entire dish. The only reliable approach for crazed dishes involves laboratory testing or complete avoidance.

    Testing crazed dishes for toxic metals requires professional analysis to accurately assess contamination risks.

    Risk is higher in: Vintage dishes (1970s and earlier), Imported ceramics, Handmade pottery

    Pre-1970s dishes were manufactured before lead regulations, making them particularly dangerous when crazed.

    Many imported ceramics come from countries with lax safety standards. Artisan pottery may use traditional glazes containing lead for aesthetic purposes.

    These categories deserve extreme caution—crazing transforms them from potentially safe to definitively hazardous for food contact.

    Bacterial Risks in Crazed Dishes

    Microbial contamination creates immediate and ongoing infection risks separate from heavy metal concerns.

    Moisture trapped in cracks

    The network of cracks in crazed glaze acts as a sponge, absorbing and retaining moisture long after washing.

    This trapped water provides the essential environment that bacteria need to survive and multiply.

    Even after apparent drying, moisture remains deep in the ceramic matrix. Humidity and repeated use maintain this moisture, sustaining bacterial populations indefinitely.

    Food residues that cannot be fully cleaned

    Normal washing removes surface contamination but cannot penetrate narrow, crazing cracks.

    Proteins, sugars, and fats lodge deep in crevices where detergents and mechanical action cannot reach.

    These nutrients feed bacterial colonies continuously. Even aggressive scrubbing fails to extract embedded food particles, making truly sanitary cleaning impossible for crazed dishes.

    Bacteria survive dishwashers because cracks protect them

    While dishwasher temperatures kill surface bacteria, organisms sheltered within crazing cracks remain protected.

    The ceramic material insulates bacteria from lethal temperatures. Water and detergent cannot penetrate sufficiently to sanitize deep crevices.

    Each wash cycle may kill surface contamination while leaving protected colonies intact, ready to recontaminate the next meal served.

    Are Crazed Dishes Safe If They Are Labeled “Food-Safe”?

    Original safety certifications become invalid once glaze integrity fails through crazing.

    “Food-safe” label applies only when the glaze is intact

    Manufacturers test dishes with undamaged glaze to obtain food-safe certifications. These tests measure leaching from intact surfaces under standard conditions.

    The certification makes no claims about safety after glaze failure. Testing protocols don’t account for compromised barriers created by crazing.

    Any food-safe label becomes meaningless once visible glaze damage appears.

    Crazing voids the protective barrier

    The entire premise of ceramic dish safety depends on maintaining an impermeable glaze layer.

    This barrier prevents contact between food and the porous ceramic body containing potentially harmful materials.

    Crazing breaches this barrier fundamentally, eliminating the protective function that enables safe food contact. No amount of careful use can restore the compromised protection.

    Regulatory standards assume no glaze failure

    Food safety regulations for ceramic dishware presume proper manufacturing and intact glaze throughout the product’s lifetime.

    Standards don’t address safety after physical damage because damaged dishes are expected to be discarded.

    Continuing to use crazed dishes places users outside the safety framework that regulations provide, entering uncharted risk territory.

    Are Modern Crazed Dishes Safer Than Vintage Ones?

    Contemporary manufacturing standards reduce but don’t eliminate risks from crazed dishware.

    Modern glazes have stricter lead limits

    Current regulations severely restrict lead and cadmium in ceramic glazes for food contact.

    Dishes manufactured after the 1990s generally contain much lower heavy metal concentrations than vintage pieces.

    These restrictions significantly reduce—but don’t eliminate—toxic metal leaching risks from crazed modern dishes.

    The reduced initial contamination means lower absolute exposure even with crazing.

    But crazing still exposes porous ceramic beneath

    Regardless of the glaze’s lead content, crazing exposes the underlying ceramic body to food contact.

    This porous material absorbs liquids, harbors bacteria, and may contain other problematic substances.

    The ceramic body itself wasn’t formulated for direct food contact because the glaze was meant to provide protection. Modern manufacturing doesn’t change this fundamental vulnerability.

    Safety risk is still present, especially with acidic foods

    Acidic foods aggressively attack exposed ceramic, leaching various compounds regardless of heavy metal content.

    Tomatoes, citrus, vinegar, and wine create particularly aggressive environments.

    Even lead-free modern ceramics contain aluminum, silica, and other compounds that may leach in concerning quantities.

    The health implications of these exposures remain uncertain but justify caution.

    When You Should Stop Using Crazed Dishes

    Specific conditions indicate crazed dishes pose unacceptable safety risks requiring immediate retirement.

    If used for hot food

    Heat dramatically increases leaching rates and bacterial growth in compromised glaze.

    Hot soups, microwaved meals, or freshly cooked foods create the worst-case scenario for contamination.

    The combination of heat, moisture, and potential acidity maximizes both toxic metal extraction and bacterial proliferation.

    Reserve crazed dishes strictly for cold, dry applications or remove them from food service entirely.

    If they are vintage

    Pre-1970s dishes carry a high probability of lead-containing glazes that become extremely dangerous when crazed.

    The risk-benefit calculation never favors using vintage crazed dishes for food. Sentimental value doesn’t justify potential lead poisoning, particularly for children.

    Display vintage crazed pieces decoratively rather than risking family health through continued food contact.

    If liquid seeps into cracks

    Visible moisture absorption proves that the glaze barrier has failed completely. Watch for water beading in crack patterns or color changes when wet, indicating liquid penetration.

    Once liquids visibly infiltrate, bacterial contamination and leaching become certainties rather than possibilities.

    This observation provides definitive evidence requiring immediate retirement from food service.

    If discoloration appears

    Staining within crazing cracks indicates that food compounds, oils, or bacteria have colonized the ceramic matrix.

    Brown, gray, or colored lines following crack patterns prove contamination. This discoloration cannot be cleaned because it exists deep within the ceramic structure.

    Stained crazing demonstrates ongoing contamination that will transfer to future food contact.

    What to Do With Dishes That Are Crazed

    Crazed dishes retain value for non-food purposes despite being unsafe for meals.

    Repurpose for décor plants

    Crazed dishes make attractive planters for small succulents or decorative arrangements.

    The moisture retention that creates bacterial problems for food actually benefits plants.

    Vintage pieces add character to displays. This repurposing preserves sentimental value while eliminating health risks, creating a safe way to continue enjoying beloved pieces.

    Use only for dry, non-food storage

    Store office supplies, jewelry, keys, or craft materials in crazed dishes without health concerns. The items never contact mouths and don’t support bacterial growth.

    Bathroom use for cotton balls or cosmetics poses minimal risk. Ensure everyone in the household understands these dishes are permanently retired from food service to prevent accidental use.

    DO NOT donate (passes risk to others)

    Donating crazed dishes to thrift stores or charities transfers health risks to unsuspecting recipients who may lack knowledge about crazing dangers.

    This practice is particularly irresponsible because vulnerable populations often rely on donated goods.

    The ethical approach requires destroying obviously damaged dishes or clearly marking them “decorative use only—not food safe” if donating.

    How to Prevent Crazing in Future Dishes

    Proper care significantly extends dish life and prevents premature glaze failure.

    Avoid rapid temp changes

    Allow dishes to reach room temperature before exposing them to extreme heat or cold.

    Never transfer dishes directly from the refrigerator to the oven or microwave.

    Don’t pour boiling water into cold dishes or place hot dishes in cold water for washing.

    These gradual temperature transitions reduce thermal stress that initiates crazing.

    Hand-wash instead of dishwasher

    Manual washing with moderate water temperatures and gentle detergents minimizes stress on glaze.

    Avoid abrasive scrubbers that create microscopic damage. While less convenient, hand washing significantly extends dish life by eliminating harsh dishwasher conditions.

    Reserve dishwasher use for explicitly dishwasher-safe rated dishes and use gentle cycles when possible.

    Choose high-quality glaze-fit brands

    Research manufacturers known for proper glaze formulation and quality control. Premium brands invest in testing to ensure glaze and clay body compatibility.

    While more expensive initially, these dishes resist crazing and provide safer, longer service.

    Read reviews specifically mentioning crazing resistance before purchasing new dinnerware sets.

    Avoid cheap ceramic imports

    Budget-priced imported ceramics often cut costs through poor quality control and incompatible materials. Manufacturing shortcuts increase crazing likelihood significantly.

    These dishes may fail within months rather than years. The apparent savings disappear when dishes require premature replacement—invest in quality pieces that resist degradation.

    Safer Alternatives to Crazed Ceramic Dishes

    Multiple options provide safe alternatives when replacing compromised ceramic dishware.

    High-quality porcelain

    Premium porcelain features superior glaze fit and higher firing temperatures that create more durable surfaces.

    True porcelain resists crazing far better than earthenware or stoneware. While more expensive, porcelain dishes justify the investment through longevity and maintained safety.

    Choose reputable manufacturers with transparent quality standards.

    Tempered glass (Corelle)

    Tempered glass dishes eliminate glaze, removing the primary failure mechanism. Brands like Corelle offer lightweight, stackable dishes that resist breaking and never craze.

    The non-porous glass surface remains hygienic indefinitely without absorption issues.

    These dishes provide exceptional value through decades of safe service without degradation.

    Pure ceramic (Xtrema)

    Specialty brands produce ceramic dishes without glaze using pure ceramic formulations throughout.

    These solid-composition dishes can’t develop crazing because there’s no separate glaze layer to crack.

    While premium-priced, they offer maximum safety for those preferring ceramic aesthetics without glazing risks.

    The material is naturally non-toxic and highly durable.

    Stoneware with well-fitted glaze

    Quality stoneware from reputable manufacturers features carefully formulated glazes matched to the clay body.

    The higher firing temperatures create stronger bonds less prone to crazing.

    Select brands with established reputations for durability and safety rather than choosing based on appearance alone.

    Properly manufactured stoneware serves safely for many years.

    Stainless steel for kids

    Unbreakable stainless steel eliminates all concerns about glaze failure, toxic metals leaching, or bacterial harboring.

    Perfect for children’s dishes where drops and rough handling occur frequently.

    The material sanitizes easily, withstands dishwashers, and lasts indefinitely.

    While lacking ceramic aesthetics, stainless steel provides unmatched safety and durability for daily family use.

    FAQ — Crazed Dishes Safety

    Is crazing harmful?

    Yes, crazing creates pathways for bacterial contamination and increases toxic metal leaching from glazes.

    The cracks trap food particles that can’t be cleaned, supporting bacterial growth. Heat and acidic foods accelerate contamination.

    While severity varies by dish age and condition, crazing generally makes dishes unsafe for food contact.

    Can I microwave crazed dishes?

    No, microwaving crazed dishes is particularly dangerous. Heat dramatically increases lead and cadmium leaching rates from compromised glazes.

    The combination of heat and moisture creates ideal conditions for maximum contamination.

    Microwaving also risks thermal shock, causing complete dish failure. Always avoid heating food on or in crazed dishes.

    Are crazed dishes safe if I only serve dry food?

    Dry foods pose less immediate risk than wet or acidic foods, but bacteria can still transfer from contaminated dishes.

    Moisture from humidity or handling can activate trapped contamination. Complete avoidance is safest—repurpose crazed dishes for non-food uses instead.

    No food contact eliminates all potential health risks.

    Why do old dishes craze more easily?

    Vintage dishes used different manufacturing standards with poorer glaze-fit testing.

    Many contain lead-based glazes more prone to degradation.

    Decades of use, thermal cycling, and washing accumulate damage that manifests as crazing.

    Additionally, older dishes had already experienced years of stress before regulations improved manufacturing quality and durability standards.

    Final Answer — Crazing Compromises the Safety of Most Dishes

    Crazed dishes fail the fundamental requirement for safe food contact, maintaining an intact barrier between food and potentially hazardous materials.

    The spiderweb cracks that create vintage charm actually represent serious health risks through bacterial contamination and toxic metal leaching.

    While modern dishes pose somewhat lower risks than vintage pieces, crazing makes any dish questionable for food service.

    Heat, acidity, and moisture amplify dangers significantly, making crazed dishes particularly unsuitable for typical meal service.

    The safest approach treats all visible crazing as disqualifying for food contact, regardless of the dish’s age, brand, or original quality.

    Repurpose sentimental, crazed pieces decoratively and invest in crack-resistant alternatives like tempered glass or quality porcelain to protect your family’s health while maintaining functional, beautiful tableware for daily use.

  • Are Mason Jars Heat Resistant? (Full Guide to Safe Use)

    Mason jars are kitchen staples for canning, storage, and serving, but their heat resistance has limits that many users misunderstand.

    While these iconic glass containers handle certain heat applications safely, they’re not designed for all high-temperature uses.

    Understanding the difference between annealed glass construction and true heat-resistant materials prevents dangerous breakage and potential injuries.

    Many people assume Mason jars can withstand any heat source, leading to cracked jars, ruined food, and safety hazards.

    This comprehensive guide examines Mason jar heat tolerance, safe temperature ranges, and proper usage scenarios.

    Learn when Mason jars are appropriate for heat exposure and when you should choose alternatives for your kitchen needs.

    Are Mason Jars Actually Heat Resistant?

    are mason jars heat resistant

    Mason jars possess limited heat resistance suitable for specific applications, but not universal high-heat use.

    Mason jars are made of annealed glass, not tempered glass

    Annealed glass undergoes a slow cooling process during manufacturing that relieves internal stress.

    This makes Mason jars durable for everyday use, but leaves them vulnerable to sudden temperature changes.

    Tempered glass, by contrast, is heat-treated to withstand thermal shock better.

    The annealing process prioritizes affordability and adequate strength for canning rather than maximum heat resistance.

    What does heat resistance mean for glass?

    Heat resistance refers to glass’s ability to withstand temperature changes without cracking or shattering.

    For Mason jars, this means they tolerate gradual temperature increases within specific ranges.

    wide mouth mason jars

    The glass composition and thickness determine safe temperature limits.

    True heat-resistant glass maintains structural integrity across wide temperature swings, while Mason jars require careful temperature management.

    Why Mason jars are not designed for high dry heat

    Mason jars are engineered for water bath canning, where liquid surrounds the jar, distributing heat evenly.

    Dry oven heat creates uneven temperature distribution across the glass surface, causing stress points.

    The direct radiant heat from oven elements exceeds the jar’s thermal tolerance.

    Manufacturers specifically warn against oven use because the glass lacks the composition needed for dry, concentrated heat exposure.

    Understanding What Mason Jars Are Made Of

    The material composition of Mason jars explains their heat limitations and proper applications.

    Annealed soda-lime glass

    Soda-lime glass comprises approximately 70% silica, 15% sodium oxide, and 10% calcium oxide.

    This formula creates affordable, clear glass suitable for food storage and canning. The annealing process slowly cools molten glass to remove internal stress.

    While this produces stable jars for normal use, soda-lime glass has lower thermal resistance than specialty glass formulations.

    Not the same as borosilicate glass (like vintage Pyrex)

    Borosilicate glass contains boron trioxide, giving it superior thermal shock resistance compared to soda-lime glass.

    Vintage Pyrex used a borosilicate formulation, allowing safe oven-to-freezer transitions. Mason jars lack this composition, making them far more susceptible to temperature-induced stress.

    The coefficient of thermal expansion differs significantly between these glass types, explaining why borosilicate handles heat changes that would shatter Mason jars.

    Glass expansion under heat

    All glass expands when heated and contracts when cooled. Soda-lime glass has a higher expansion coefficient than borosilicate glass.

    When heat is applied unevenly to a Mason jar, different sections expand at different rates.

    This creates internal tension that can exceed the glass’s strength, causing cracks or complete failure.

    Why do Mason jars crack more easily under uneven heating

    Uneven heating creates temperature gradients within the glass structure. The heated section expands while cooler areas remain contracted, generating stress at the boundary.

    Mason jar walls are relatively thin compared to dedicated bakeware, amplifying this vulnerability.

    Understanding thermal shock in glassware helps explain why sudden temperature changes are particularly dangerous for annealed soda-lime glass, such as Mason jars.

    Can You Put Mason Jars in the Oven?

    Oven use presents significant risks that outweigh any perceived convenience of baking in Mason jars.

    Manufacturers say no

    Ball, Kerr, and other major Mason jar manufacturers explicitly state their products are not oven-safe.

    This warning appears in product documentation and safety guidelines. The companies test their jars solely for canning purposes.

    Using jars in ovens voids any warranty and places users at risk of injury from glass failure.

    High risk of cracking or exploding

    Oven temperatures typically range from 300°F to 500°F, far exceeding Mason jar safety limits.

    The dry heat causes rapid, uneven expansion that glass cannot accommodate.

    Jars may appear fine initially, but can fail catastrophically mid-baking.

    Exploding glass poses serious injury risks, including cuts from flying shards and burns from released contents.

    Dry oven heat ≠ , wet canning heat

    Water bath canning surrounds jars with boiling water at 212°F, heating them gradually and evenly.

    Oven heat hits jars directly through radiation and convection without the buffering effect of liquid.

    This fundamental difference makes canning-safe jars oven-dangerous. The moisture in canning also prevents hot spots that develop during dry heating.

    Scenarios where people try using them as baking vessels

    Pinterest-style recipes often feature individual desserts or layered dishes baked in Mason jars.

    While photogenic, these recipes risk glass breakage. Some users attempt bread baking, pot pies, or casseroles in jars.

    The aesthetic appeal doesn’t justify the safety hazard, especially when proper ramekins or baking dishes cost similarly.

    Can Mason Jars Go in the Microwave?

    Microwave heating presents a moderate risk when proper precautions are followed carefully.

    Microwave-safe for heating liquids (with precautions)

    Mason jars can microwave-heat liquids like soup or beverages if you follow safety guidelines.

    Use short heating intervals of 30-60 seconds with stirring between cycles. This distributes heat evenly and prevents superheating.

    Always leave the lid off and remove metal bands completely. Check our heat-resistant kitchenware guide for more microwave-safe container options.

    Risk increases if the jar is cold, chipped, or tightly sealed

    Cold jars from the refrigerator face greater thermal shock when microwaved.

    Chips or cracks create weak points where stress concentrates, increasing failure risk.

    Sealed containers build dangerous pressure as contents heat. Even slightly damaged jars should never be microwaved.

    Allow refrigerated jars to reach room temperature before heating.

    Never microwave with the lid on

    Metal lids cause dangerous sparking and potential fire in microwaves. Even with lids removed, the metal screw bands should not be present.

    Plastic storage lids may warp or melt, releasing chemicals into food. Leave jars uncovered or use microwave-safe covers with venting.

    Pressure buildup from sealed heating can cause explosive jar failure.

    Can You Pour Boiling Water Into a Mason Jar?

    Proper technique allows safe use of boiling water in Mason jars for canning purposes.

    Yes—if the jar is warmed first

    Pre-warming jars before adding boiling liquid prevents thermal shock. Place jars in warm water and gradually increase the temperature.

    This prepares the glass for hot contents without sudden stress. Most canning recipes include jar-warming steps as standard procedure.

    The gradual temperature increase allows uniform glass expansion.

    Rapid temperature shock – breakage risk

    Pouring boiling water directly into a cold jar creates instant thermal stress. The interior surface heats and expands rapidly while the exterior remains cool.

    This temperature differential exceeds the glass’s stress tolerance, causing cracks or complete shattering.

    The sudden failure can splash boiling liquid, causing burns.

    Correct way to pre-warm jars

    Place clean jars in a large pot of warm water over medium heat. Bring water to a simmer (180°F) and maintain the temperature until ready to fill.

    Alternatively, run jars under increasingly hot tap water for several minutes.

    Keep jars in hot water until immediately before filling.

    This process ensures even warming throughout the glass structure.

    Can Mason Jars Handle Freezer-to-Heat or Heat-to-Freezer?

    Extreme temperature transitions create dangerous conditions that Mason jars cannot safely withstand.

    Absolutely not

    Moving Mason jars directly from the freezer to the heat source guarantees thermal shock.

    The massive temperature differential causes immediate stress fractures or explosive failure.

    Similarly, transferring hot jars to cold environments risks shattering. These transitions create thermal stress far beyond the glass’s design limits.

    No gradual warming can adequately prepare frozen glass for sudden heating.

    Frozen jars – cracking when heated

    Frozen glass is contracted to its smallest dimensions. Applying heat causes rapid expansion starting at the heat source.

    The frozen sections remain rigid while heated areas expand, creating unbearable internal tension.

    Cracks typically form within seconds of heat application. Even microwave heating on low power cannot safely warm frozen Mason jars.

    Hot jars – shatter in cold environments

    Hot jars placed in freezers or cold water experience rapid contraction. The exterior cools and contracts faster than the interior, creating reverse thermal stress.

    The resulting tension often causes immediate catastrophic failure. Additionally, liquid contents expanding during freezing can crack jars even when cooled properly.

    Always allow jars to reach room temperature naturally before freezing.

    Why pressure differences matter

    Temperature changes create pressure variations inside sealed containers. Heating increases internal pressure as contents expand and gases volatilize.

    Rapid cooling creates negative pressure or vacuum effects. These pressure changes compound the stress from thermal expansion and contraction.

    The combination often exceeds the jar’s structural capacity, leading to failure.

    Temperature Limits for Mason Jars

    Understanding specific temperature ranges helps users avoid dangerous situations.

    Typical safe range: -20°C to ~100°C (-4°F to 212°F)

    Mason jars safely store frozen foods at 0°F when properly prepared with headspace. They handle boiling water at 212°F during water bath canning.

    This range represents gradual temperature changes with proper preparation.

    Sudden exposure to temperature extremes within this range still poses risks. Always transition slowly between temperatures.

    Not safe for oven temperatures (350°F+)

    Oven baking temperatures start around 325°F and commonly reach 350°F to 450°F. These temperatures far exceed Mason jar capabilities.

    Even lower warming temperatures of 200°F risk failure due to dry heat exposure. The combination of high temperature and uneven heating makes ovens particularly dangerous.

    Pressure canning at 240°F works because water and steam distribute heat evenly.

    Why is dry heat more damaging than wet heat?

    Liquid transfers heat more uniformly than air, reducing temperature gradients across glass surfaces.

    Water bath canning keeps all jar surfaces at approximately the same temperature.

    Dry oven heat creates hot spots where radiant energy strikes directly. Air’s poor thermal conductivity means temperature distributes slowly and unevenly.

    This uneven heating creates the stress concentrations that crack jars.

    Signs Your Mason Jar Should Not Be Heated

    Recognizing damaged jars prevents dangerous failures during heating.

    Chips or cracks

    Any visible damage compromises structural integrity significantly. Chips along the rim create stress concentration points.

    Hairline cracks propagate rapidly under thermal stress. Even tiny chips invisible to casual inspection can cause failure.

    Inspect jars carefully before each use, discarding any with defects.

    Cloudy glass (stress)

    Cloudiness often indicates previous stress or micro-cracking within the glass structure.

    This stress-induced haze shows the material has already been compromised. Previously stressed glass has reduced capacity to handle additional thermal loads.

    Cloudiness from mineral deposits is less concerning than actual glass stress indicators.

    Sudden sound changes when tapped

    Clear glass jars produce a bright ringing tone when tapped gently.

    Cracked or stressed jars create dull, flat sounds indicating structural compromise.

    This acoustic test reveals internal damage before visible signs appear. Compare suspicious jars to known-good jars for reference.

    Any tonal difference suggests the jar should be retired from heating uses.

    Vintage jars with unknown history

    Old jars may have invisible stress from repeated heating cycles or impacts. Manufacturing standards and glass quality varied historically.

    Some vintage jars contain lead or other concerning materials. Without knowing the jar’s exposure history, heating risks increase substantially.

    Many people verify mason jars ‘ non-toxic status before using vintage pieces for food storage or heating.

    Safer Alternatives for High-Heat Use

    Proper heat-resistant containers eliminate risks associated with Mason jars in demanding applications.

    Borosilicate glass (Pyrex-style bakeware)

    Borosilicate glass withstands oven temperatures up to 500°F safely. The material handles thermal shock significantly better than soda-lime glass.

    Premium Borosilicate glass bakeware

    Modern Pyrex uses tempered soda-lime glass, while true borosilicate (labeled as such) offers superior performance.

    These containers are specifically designed and tested for oven use.

    Ceramic ramekins

    Ceramic ramekins handle oven, microwave, and broiler temperatures without issue. The material distributes heat evenly and resists thermal shock.

    heat resistant ceramic oven safe ramekins

    Available in various sizes for individual portions. Many are dishwasher safe and aesthetically pleasing for serving.

    The thicker walls provide better insulation than thin glass jars.

    Stoneware crocks

    Stoneware tolerates extreme temperatures and provides excellent heat retention.

    The material is virtually immune to thermal shock when properly manufactured. Ideal for slow cooking, baking, and serving applications.

    Stoneware oven safe soup crocks for casseroles and stews

    Stoneware’s weight and thickness make it stable and durable. Most stoneware is safe from freezer to oven when used correctly.

    Stainless steel containers

    Stainless steel is completely unbreakable and handles all temperature extremes. Safe for oven, freezer, and stovetop use.

    The material doesn’t retain odors or stains. While not microwave-safe, stainless steel offers unmatched versatility otherwise.

    Particularly excellent for storage and reheating on stovetops.

    Best Uses for Mason Jars (Safe Applications Only)

    Mason jars excel in specific applications where their properties match the requirements.

    Water bath canning

    This is the primary design purpose of Mason jars. Water bath canning preserves high-acid foods like jams, pickles, and tomatoes.

    The process keeps jars submerged in boiling water, ensuring even heating.

    Proper sealing creates shelf-stable preserved foods. Always follow tested canning recipes and procedures for food safety.

    Refrigerator storage

    Mason jars work excellently for refrigerated storage of prepared foods, leftovers, and ingredients.

    The glass doesn’t absorb odors or stains. Clear jars allow easy content identification. Various sizes accommodate different storage needs.

    Ensure jars cool to room temperature before refrigerating hot foods.

    Dry goods storage

    Pantry staples like flour, sugar, rice, beans, and pasta store well in Mason jars. The airtight seal prevents moisture and pest infiltration.

    Glass doesn’t leach chemicals into dry foods. The clear material makes inventory management simple. Jars stack efficiently for organized storage.

    Serving cold beverages

    Mason jars have become popular drinking vessels for water, iced tea, smoothies, and cocktails.

    The wide mouth accommodates ice and straws easily. The nostalgic aesthetic appeals to many users. Jars are sturdy enough for everyday use.

    Choose plastic storage lids for drinking applications instead of metal canning lids.

    Microwave reheating (with caution)

    Gentle microwave reheating works when following proper protocols. Use only for liquids and soft foods that heat evenly.

    Remove all metal components completely. Heat in short intervals with stirring between cycles. Never microwave frozen or cold jars directly.

    Allow contents to cool slightly before handling hot jars.

    FAQs — Are Mason Jars Heat-Resistant?

    Can Mason jars explode from heat?

    Yes, Mason jars can explode when exposed to temperatures exceeding their safe range or rapid temperature changes.

    Oven heat, direct stovetop flames, or extreme thermal shock cause catastrophic failure.

    The explosion sends sharp glass fragments and hot contents outward, creating a serious injury risk.

    Why did my Mason jar crack when I microwaved it?

    Microwaving cold jars creates thermal shock as the interior heats rapidly while the exterior remains cool.

    Uneven heating from thick contents or high power settings causes stress fractures. Chips, cracks, or previous damage reduce the jar’s ability to handle thermal stress, leading to failure during heating.

    Can I bake in a Mason jar?

    No, manufacturers explicitly prohibit oven use for Mason jars. Oven temperatures exceed safe limits for annealed soda-lime glass.

    Dry oven heat distributes unevenly, creating dangerous stress concentrations.

    Use proper bakeware like ceramic ramekins or borosilicate glass instead of risking jar failure and potential injury.

    How to prevent thermal shock?

    Always warm jars gradually before adding hot contents by placing them in warm water first. Never move jars from extreme cold to heat or vice versa.

    Allow frozen jars to thaw completely at room temperature. When microwaving, use short intervals and let contents cool before handling.

    Final Answer — Mason Jars Are Heat-Resistant Only in Certain Conditions

    Mason jars demonstrate adequate heat resistance for their intended purposes—water bath canning, gradual heating, and controlled temperature applications.

    Their annealed soda-lime glass construction handles boiling water temperatures when properly warmed, but fails catastrophically under oven heat, thermal shock, or extreme temperature swings.

    The jars serve excellently for refrigerated storage, dry goods organization, and careful microwave reheating with proper precautions.

    Understanding Mason jars’ material limitations prevents dangerous situations and potential injuries.

    For high-heat cooking, freezer-to-heat transitions, or oven baking, choose purpose-built heat-resistant containers like borosilicate glass or ceramic.

    Respect manufacturer guidelines, inspect jars regularly for damage, and always prioritize gradual temperature changes to ensure safe Mason jar usage in your kitchen.

  • 10 Types of Plates With Names (Uses, Materials & Best Purpose)

    Choosing the right plate goes beyond aesthetics; it affects how you serve food, maintain safety standards, and organize your kitchen.

    From everyday meals to formal gatherings, each plate type serves a distinct purpose.

    Understanding plate sizes, materials, and functions helps you make informed decisions for your dining needs.

    Whether you’re setting up a new kitchen, hosting events, or simply replacing worn dinnerware, knowing the differences between dinner plates, charger plates, and specialty options ensures you select plates that match your lifestyle.

    10 types of plates with names

    This guide covers 10 essential plate types, their materials, dimensions, and best uses to help you build a functional and safe tableware collection.

    1. Dinner Plate

    The dinner plate is the foundation of any tableware set, designed to hold your main course during meals.

    Standard size (10–12 inches)

    Most dinner plates measure between 10 and 12 inches in diameter.

    10.5 inch standard porcelain dinner plates

    This size accommodates proteins, starches, and vegetables without overcrowding.

    The standard dimension ensures compatibility with most dishwasher racks and cabinet storage systems.

    Main course plate

    Dinner plates serve as the primary vessel for entrees during lunch and dinner.

    They provide enough surface area for balanced portions while maintaining visual appeal.

    12 inch ceramic large dinner plate size

    The flat or slightly rimmed design prevents food from spilling.

    Materials: ceramic, porcelain, stoneware

    Common materials include ceramic for everyday durability, porcelain for elegant dining, and stoneware for rustic aesthetics.

    Each material offers varying heat retention, scratch resistance, and weight characteristics. Choose based on your usage frequency and dishwasher needs.

    2. Salad Plate

    This smaller plate is ideal for lighter courses before or alongside your main meal.

    7–9 inches

    Salad plates typically range from 7 to 9 inches in diameter. This compact size prevents salad greens from spreading too thin while maintaining proper portion control.

    7.8 inch salad, dessert and appetizer ceramic plate set

    The dimensions make them easy to stack and store efficiently.

    For salads, appetizers

    Beyond leafy greens, these plates work perfectly for appetizers, side dishes, and small servings.

    They’re ideal for bread accompaniments, cheese platters, or tapas-style dining. Many households use them for breakfast, toast, and fruit.

    Often paired with dinner sets

    Most dinnerware collections include salad plates that match dinner plates in design and material.

    This coordination creates visual harmony during formal table settings. Purchasing complete sets ensures consistent quality across all pieces.

    3. Dessert Plate

    Designed specifically for the final course, dessert plates combine function with decorative appeal.

    Similar to a salad plate but decorative

    Dessert plates measure around 7–8 inches but often feature more ornamental patterns or colors.

    6 inch dessert snacks and side dish plate

    The decorative element enhances the presentation of sweets and treats. Some designs include calloped edges or metallic accents.

    Pastries, cake, desserts

    These plates accommodate cakes, pastries, cookies, and fruit-based desserts perfectly.

    The smaller surface prevents dessert portions from appearing sparse. They’re essential for tea parties, coffee service, and formal dinners with multiple courses.

    4. Bread and Butter Plate (B&B Plate)

    This small plate serves as a personal space for bread items during formal dining.

    5–7 inches

    Bread and butter plates measure 5 to 7 inches in diameter, making them the smallest standard table plate.

    6 inch bread and butter plates

    Their compact size fits easily to the left of the main plate setting. The dimensions prevent table clutter during multi-course meals.

    Used in formal dining

    In traditional table settings, the B&B plate sits above the forks on the left side.

    It maintains separation between bread items and the main course. This practice follows classic etiquette standards for upscale restaurants and events.

    Also for rolls, snacks

    Beyond bread and butter, these plates work well for dinner rolls, crackers, or small snacks.

    Many people use them for condiments, lemon wedges, or garnishes. Their versatility extends to casual gatherings and children’s portions.

    5. Charger Plate (Service Plate)

    Charger plates add elegance to formal table settings without directly contacting food.

    Decorative underplate

    Charger plates remain on the table throughout the meal as a base layer.

    13 inch Charger or Service plate for wedding and table decor

    They frame dinner plates and create visual impact through metallic finishes, ornate designs, or bold colors. Remove them before dessert service.

    11–14 inches

    These large plates measure 11 to 14 inches in diameter, extending beyond the dinner plate edges.

    The extra size creates a border effect that enhances table presentation. Proper sizing ensures the charger remains visible beneath standard plates.

    Never used for direct food contact

    Food should never touch the charger plates directly. They serve purely decorative and protective functions for tablecloths.

    Always place dinner plates, salad plates, or bowls on top of chargers during service.

    Important safety note about materials

    Many chargers use non-food-safe materials like uncoated metals, resin, or decorative finishes.

    Always verify food-safety certifications before purchasing.

    Avoid materials that could leach chemicals if accidentally used for direct food contact.

    6. Appetizer Plate

    These small plates facilitate easy serving and eating of pre-meal bites.

    Mini portions, hors d’oeuvres

    Appetizer plates measure 6–8 inches and handle bite-sized foods perfectly. They’re designed for finger foods, canapés, and tasting portions.

    6 inch Appetizer round corelle plates

    The size encourages sampling multiple items without overwhelming guests.

    Often seen at parties

    Cocktail parties, receptions, and buffets rely heavily on appetizer plates. Guests can circulate while holding small plates easily.

    The plates encourage mingling while preventing food waste from oversized portions.

    Multipurpose

    Beyond parties, these plates work for everyday snacking, desserts, or children’s meals.

    Many households use them for fruit servings, cheese and crackers, or light lunches.

    Their versatility makes them valuable in any kitchen collection.

    7. Soup Plate / Pasta Plate (Rimmed Bowl Plate)

    This hybrid design combines the depth of a bowl with the flatness of a plate.

    Wide rim, shallow bowl

    Soup plates feature a wide, flat rim surrounding a shallow bowl center. The rim provides space for resting spoons and prevents spills.

    wide rimmed and shallow soup bowl

    The shallow depth works better than deep bowls for thick soups and saucy pasta.

    Soup, pasta, saucy dishes

    These plates excel with minestrone, chowders, risotto, and pasta with sauce. The design allows easy twirling of spaghetti against the bowl’s edge.

    6.3 inch and 32 Oz soup cereal bowls

    They also work well for stews, curries, and grain bowls.

    Usually, ceramic or porcelain

    Heat retention makes ceramic and porcelain ideal materials for soup plates.

    These materials keep food warm throughout the meal without burning hands.

    Avoid materials that conduct heat too quickly, like thin metal.

    8. Breakfast Plate

    Specifically sized for morning meals, breakfast plates balance portion control with functionality.

    Slightly smaller than a dinner plate

    Breakfast plates typically measure 8–10 inches, falling between salad and dinner plate sizes.

    Breakfast Porcelain Plate

    This dimension suits typical morning portions without encouraging overeating.

    The size accommodates eggs, toast, and sides comfortably.

    Versatile for toast, eggs, and fruits

    These plates handle pancakes, waffles, omelets, bacon, and fruit servings effectively.

    The moderate size prevents runny eggs from spreading too far.

    Many designs include divided sections for separating syrup from other foods.

    9. Buffet Plate / Luncheon Plate

    Designed for casual dining and event catering, these plates balance size with portability.

    9–10 inches

    Buffet plates measure 9 to 10 inches, smaller than dinner plates but larger than salad plates.

    Buffet and Luncheon Plate

    This middle-ground size prevents overloading while providing adequate space.

    The dimensions work well for self-serve situations where guests carry their plates.

    Lightweight for parties

    Event planners prefer lightweight materials that guests can hold easily while standing. Disposable or durable reusable options reduce breakage concerns.

    The weight consideration matters for outdoor events and casual gatherings.

    Often, durable materials (melamine, plastic—but you can give safer alternatives)

    While melamine and plastic offer durability, safer alternatives include bamboo fiber plates, palm leaf plates, or tempered glass options.

    Bagasse (sugarcane fiber) and wheat straw plates provide compostable solutions.

    For reusable options, choose BPA-free materials or stainless steel for maximum safety.

    10. Compartment Plate (Divided Plate)

    Built-in dividers separate different foods on a single plate.

    Used for kids, picnics

    Compartment plates prevent foods from touching, appealing to children and picky eaters.

    Compartment or Bagasse disposable divided plate

    They’re practical for outdoor dining where multiple plates become cumbersome.

    Schools and cafeterias use them extensively for portion-controlled meals.

    Stainless steel, bamboo, wheat straw

    Stainless steel compartment plates offer unbreakable durability for children and camping.

    Bamboo options provide eco-friendly alternatives with natural antimicrobial properties.

    Wheat straw plates are lightweight, compostable, and free from harmful chemicals.

    Great for portion control

    The divided sections naturally create portion guidelines for balanced meals.

    Meal preppers use them to separate proteins, carbs, and vegetables systematically.

    This visual organization helps with dietary management and calorie tracking.

    Bonus: Specialty Plates You May Encounter

    Beyond standard types, specialty plates serve niche dining purposes and cultural cuisines.

    Cheese plates feature smooth surfaces, sometimes with integrated knife holders or grooves for crackers.

    Sushi plates come in rectangular or oval shapes with sections for soy sauce and wasabi.

    Taco plates include curved holders that keep shells upright and prevent spillage. Chip-and-dip plates combine a large outer ring for chips with a centered bowl for dips.

    Pizza plates are extra-large and flat, designed to support oversized slices without bending.

    These specialty options enhance specific dining experiences when standard plates fall short.

    How Plate Materials Affect Safety & Durability

    Material choice impacts the longevity, safety, and maintenance requirements of your plates.

    Ceramic

    Ceramic plates offer affordability and a wide design variety with moderate durability.

    They resist scratching and staining better than plastic, but can chip if dropped.

    Most ceramic plates are dishwasher and microwave-safe, though always check manufacturer specifications for lead-free certification.

    Porcelain

    Porcelain provides superior strength and elegance compared to standard ceramic. Its dense composition resists chips and maintains its appearance longer.

    Porcelain’s non-porous surface prevents bacterial growth, making it highly hygienic for food contact.

    Tempered glass (e.g., Corelle)

    Tempered glass plates are extremely durable, lightweight, and resistant to breaking.

    Brands like Corelle use thermal treatment that strengthens glass significantly.

    These plates stack compactly, resist scratches, and maintain clarity without yellowing over time.

    Stoneware

    Stoneware delivers rustic aesthetics with excellent heat retention for keeping food warm.

    It’s heavier and more chip-resistant than standard ceramic.

    The material’s natural look complements farmhouse and casual dining styles effectively.

    Bamboo & eco plates

    Bamboo plates offer renewable, biodegradable alternatives with natural antimicrobial properties.

    They’re lightweight and safe for children but require hand washing to prevent warping.

    Choose options without melamine binders for maximum safety.

    Stainless steel (kid-friendly)

    Stainless steel provides unbreakable durability ideal for children, camping, and outdoor use.

    It’s free from toxic chemicals and easy to sanitize. The material doesn’t retain flavors or odors, though it conducts heat quickly.

    Melamine (avoid for hot foods)

    Melamine plates resist breaking but can leach chemicals when exposed to high temperatures.

    Never microwave melamine or use it for hot foods above 160°F. Choose certified food-grade melamine and replace it when scratched or damaged.

    How to Choose the Right Plate for Your Kitchen

    Selecting appropriate plates requires evaluating your lifestyle, safety priorities, and practical needs.

    Everyday vs formal

    Everyday plates should prioritize durability, dishwasher safety, and affordability for frequent use.

    Formal plates emphasize aesthetics and may require hand washing or special care.

    Many households maintain two separate sets to balance practicality with elegance.

    Material safety

    Prioritize lead-free, cadmium-free certifications, especially for daily-use plates.

    Verify that decorative glazes meet food-safety standards. Avoid plates with metallic trims if you use microwaves regularly.

    Weight & durability

    Consider who will handle the plates—lightweight options suit children and elderly users.

    Heavy stoneware plates feel substantial but increase breakage risk if dropped. Balance durability needs with comfortable handling weight for your household.

    Stacking & storage

    Check how plates nest together before purchasing full sets. Poorly designed plates waste cabinet space and increase breakage risk. Consider rim shapes and sizes to ensure efficient stacking.

    FAQ — Types of Plates

    What size is a standard dinner plate?

    Standard dinner plates measure 10 to 12 inches in diameter. This size accommodates balanced portions of protein, vegetables, and starches comfortably.

    Most dishwashers and cabinets are designed around this standard dimension for universal compatibility.

    Can all plates go in the microwave?

    Not all plates are microwave-safe. Avoid plates with metallic trim, melamine construction, or certain glazes that can spark or leach chemicals.

    Check for microwave-safe symbols on the bottom of plates before heating. Ceramic, porcelain, and tempered glass are typically safe options.

    Which plates are safest for kids?

    Stainless steel, bamboo, and wheat straw plates offer the safest options for children.

    These materials are non-toxic, free from harmful chemicals, and durable enough to withstand drops.

    Avoid melamine for hot foods and any plates with small decorative pieces that could detach.

    What plate material lasts the longest?

    Tempered glass plates like Corelle last the longest with proper care, resisting chips and scratches for decades.

    Porcelain and stainless steel also offer exceptional longevity. While stoneware and ceramic are durable, they’re more prone to chipping from impacts compared to tempered glass.

    Conclusion

    Selecting the right plates transforms your dining experience from functional to exceptional.

    Each plate type, from dinner plates to specialty options, serves specific purposes that enhance meal presentation and practicality.

    Material choices affect safety, durability, and maintenance requirements, making it essential to match plates to your household’s needs.

    Whether you prioritize everyday durability with tempered glass, child-safe options like stainless steel, or elegant porcelain for special occasions, understanding these distinctions helps you invest wisely.

    Build your collection thoughtfully, considering size requirements, storage capacity, and safety certifications.

    The right plates don’t just hold food, they elevate every meal while protecting your family’s health and simplifying kitchen management.

  • Can You Put a Plate in the Oven? (Safety Guide for All Plate Materials)

    Putting a plate in the oven seems straightforward until it cracks, shatters, or worse, explodes.

    The answer depends entirely on your plate’s material and heat tolerance.

    While ceramic, stoneware, and certain glass plates are generally oven-safe, plastic, melamine, and some decorative ceramics are not.

    Understanding which plates can withstand heat prevents dangerous accidents, ruined dinnerware, and wasted food.

    This comprehensive guide examines every plate material, identifies safety symbols, explains temperature limits, and provides brand-specific recommendations.

    Whether you’re warming dinner plates or baking directly on ceramic, knowing the rules keeps your kitchen safe and your meals intact.

    General Rule — Only Oven-Safe Plates Can Go Into the Oven

    can you put a plate in the oven

    The fundamental rule is simple: only plates explicitly marked as oven-safe belong in your oven.

    Oven-safe designation means the manufacturer tested the plate at specific temperatures and verified it won’t crack, release chemicals, or shatter under heat exposure.

    This isn’t about guesswork; it’s about engineered heat resistance built into the plate’s construction and materials.

    What “oven-safe” actually means

    Oven-safe plates undergo manufacturing processes that allow them to withstand thermal expansion without structural failure.

    The glaze, clay body, and firing temperature all contribute to heat tolerance. Manufacturers test these plates at maximum temperatures, ensuring the material composition remains stable.

    An oven-safe rating guarantees the plate won’t leach chemicals, crack from thermal stress, or experience glaze degradation when heated properly.

    The designation includes specific temperature thresholds you must respect.

    How to identify oven-safe symbols

    Check your plate’s underside for stamped symbols or text.

    Look for phrases like “oven-safe,” “oven-proof,” or a symbol showing wavy lines above a dish inside an oven outline.

    Some manufacturers include maximum temperature ratings (e.g., “450°F max”).

    European plates may display a rectangular oven icon. If you see only “microwave-safe,” this does NOT mean oven-safe—microwaves heat food differently than direct oven heat.

    When no markings exist, consult the manufacturer’s website using any brand names or model numbers stamped on the plate.

    Why aren’t all kitchen plates heat-resistant?

    Most everyday dinnerware prioritizes aesthetics, affordability, and dishwasher compatibility over heat resistance.

    Decorative plates often use low-fire glazes, metallic paints, or plastic resins that fail under oven temperatures.

    Budget manufacturers skip expensive high-temperature firing processes to reduce costs.

    Even some ceramic plates use clay bodies that aren’t vitrified enough to handle thermal stress.

    The finish matters too—certain glazes crack at temperatures safe for the underlying material, making the plate unusable.

    What Happens When a Plate Isn’t Oven-Safe?

    Using non-oven-safe plates creates serious hazards beyond ruined dinnerware.

    The consequences range from minor cracks to explosions that can cause burns and injuries.

    Understanding these risks explains why following manufacturer guidelines isn’t optional; it’s essential for kitchen safety.

    Thermal shock

    Thermal shock occurs when rapid temperature changes cause uneven expansion in plate materials.

    Different parts of the plate heat at different rates, creating internal stress. The material tries to expand, but cooler sections resist, generating pressure.

    When this stress exceeds the material’s strength, cracks form instantly. Glass and ceramic are particularly vulnerable because they’re brittle and can’t flex like metal.

    Even small temperature differentials, like placing a room-temperature plate in a 350°F oven, can trigger thermal shock in non-oven-safe materials.

    Why plates crack, shatter, or explode

    Plates fail catastrophically when internal stresses overcome material bonds. Ceramic plates crack along weak points in the clay body or where glaze meets clay.

    Glass plates develop microscopic cracks that suddenly propagate across the entire surface.

    The explosion happens because trapped moisture in porous materials converts to steam, building pressure until the plate shatters.

    Poorly fired ceramics have air bubbles that expand violently. When you hear about Corelle dishes exploding, it’s usually because thermal shock exceeded the tempered glass’s tolerance limits.

    Temperature shock scenarios to avoid

    Never place a refrigerated plate directly into a hot oven—this creates maximum thermal shock.

    Avoid putting frozen food on room-temperature plates and then into the oven, as the cold center creates stress.

    Don’t transfer plates from freezer to oven, even if they’re technically oven-safe.

    Moving hot plates onto cold countertops or wet surfaces also causes reverse thermal shock. Even oven-safe plates need gradual temperature transitions.

    The greater the temperature differential, the higher the explosion risk.

    Risk of flying shards and burns

    When plates explode, sharp fragments fly outward at high velocity, capable of causing lacerations.

    Hot ceramic or glass shards stick to skin, causing severe burns. Opening the oven door when a plate has already cracked can trigger the final explosion toward your face.

    Children and pets near the kitchen face particular danger from flying debris.

    The cleanup afterward is hazardous—microscopic glass particles spread throughout your oven and require thorough decontamination.

    Even small cracks in plates can lead to delayed explosions hours after removing them from the heat.

    Material-by-Material Guide — Which Plates Are Oven-Safe?

    Different materials have vastly different heat tolerances. This section breaks down exactly which plate materials work in ovens, their temperature limits, and specific risks to watch for with each type.

    Ceramic Plates

    Most ceramic plates are oven-safe up to 350–450°F, but quality varies significantly.

    High-quality ceramics fired at high temperatures (cone 6-10) handle heat better than low-fire pottery.

    Mora oven safe ceramic dinnerware

    Check for “oven-safe” stamps before using. Risks include glaze cracking when the glaze and clay body have mismatched expansion rates.

    Cheap ceramic from dollar stores often uses inadequate firing temperatures and can crack on first use.

    Handmade pottery without proper testing poses risks. If your ceramic plate survived dishwasher high-heat cycles without crazing (tiny glaze cracks), it’s more likely oven-safe, though this isn’t guaranteed.

    Porcelain Plates

    Porcelain generally handles heat better than standard ceramic, often safe to 450°F or higher because it’s fired at extremely high temperatures.

    The dense, vitrified body resists thermal shock better than porous ceramics.

    However, fine porcelain or bone china designed for formal dining may be too delicate despite the material’s inherent strength.

    These decorative pieces often have metallic trim or delicate glazes unsuitable for ovens.

    Commercial-grade porcelain used in restaurants typically withstands regular oven use.

    Always verify manufacturer specifications—”porcelain” alone doesn’t guarantee oven safety.

    Stoneware Plates

    Stoneware offers excellent high-temperature tolerance, often rated to 450–500°F. The dense, fully vitrified clay body handles thermal stress well.

    Quality stoneware is naturally oven-safe without special coatings. However, you must avoid cold-to-hot transitions—even durable stoneware cracks when shocked.

    oven safe (up to 482°F) stoneware ceramic dinnerware

    Let refrigerated stoneware reach room temperature before heating. Check for chips or cracks before oven use, as damage creates weak points.

    Glazed stoneware is generally safer than unglazed, which can stain or absorb odors when heated with fatty foods.

    Glass Plates (Including Corelle)

    Tempered glass plates like Corelle are oven-safe within specific limits, typically 350°F maximum.

    Corelle’s three-layer laminated glass construction provides strength but not unlimited heat resistance.

    Modern Corelle explicitly states oven-safe temperatures on packaging. Vintage Corelle patterns have a higher risk because manufacturing standards have evolved.

    Never use decorative glass plates with painted designs—the paint may contain metals that fail under heat.

    Standard soda-lime glass plates aren’t oven-safe at all. Borosilicate glass (like Pyrex) handles higher temperatures but is rare in plate form.

    Plastic Plates

    Plastic plates are never oven-safe under any circumstances. Even heat-resistant plastics deform at oven temperatures, typically melting around 212–300°F.

    Placing plastic in ovens creates multiple hazards: melting onto oven surfaces, releasing toxic fumes, including potential carcinogens, and starting fires if plastic contacts heating elements.

    Some plastics release harmful chemicals like BPA and phthalates when heated.

    Even “heat-resistant” plastic utensils fail at oven temperatures. There are no exceptions—plastic and ovens never mix.

    Melamine

    Melamine plates are absolutely NOT oven-safe and extremely dangerous when heated.

    Melamine resin begins breaking down around 160°F, well below minimum oven temperatures.

    Heated melamine releases formaldehyde and other toxic chemicals into your food and air.

    The plates will warp, discolor, and potentially catch fire. Melamine looks like ceramic but feels lighter and slightly softer.

    When comparing melamine plates vs ceramic, ceramic is always the safer choice for any heating application.

    Even brief oven exposure damages melamine permanently and contaminates food.

    How to Tell If a Plate Is Oven-Safe

    When plates lack clear markings, determining oven safety requires investigation. Never assume—guessing wrong creates safety hazards and ruins your dinnerware.

    Label and stamp identification

    Flip your plate over and examine the underside closely. Look for impressed stamps, printed text, or embossed symbols in the center or around the rim.

    Manufacturer markings often include brand names, country of origin, and safety certifications.

    Oven-safe plates typically display explicit text like “oven-safe to 450°F” or “oven-proof.”

    Some show pictogram symbols: an oven outline, wavy heat lines, or temperature numbers.

    European plates might have different certification marks.

    Check if materials like wheat straw dinnerware list their heat tolerance specifications—these plant-based materials have varying oven compatibility.

    Manufacturer website check

    Visit the manufacturer’s website using any brand information from your plate. Search their product specifications, FAQ sections, or downloadable care guides.

    Many brands maintain databases where you can enter pattern names or numbers to access detailed information.

    Contact customer service directly with photos of your plate’s markings if online information is unclear.

    Check whether specific collections within a brand have different heat ratings—some product lines are oven-safe while others aren’t.

    Never test unknown plates by putting them in the oven “to see what happens.” Testing risks, explosions, injuries, and oven damage.

    Some plates crack or explode only after multiple heating cycles, so surviving one test proves nothing.

    Temperature variations within ovens mean your test conditions differ from others’ experiences.

    The risk to your safety and property far exceeds the cost of replacing questionable plates. When uncertain, treat plates as NOT oven-safe.

    Understanding heat tolerance marks

    Temperature markings indicate maximum safe temperatures, not recommended usage temperatures.

    A “450°F” marking means absolute maximum—use lower temperatures for safety margins. Some plates list both maximum temperature and recommended range.

    Time limits may accompany temperature ratings (e.g., “30 minutes maximum at 350°F”).

    Multiple certification marks indicate testing by different safety organizations. Understanding these marks prevents misuse even with oven-safe plates.

    Safe Temperature Limits for Different Plate Materials

    Specific temperature thresholds determine whether your oven-safe plates survive heating. Exceeding these limits damages even properly rated dinnerware.

    350°F – safe threshold for most ceramics

    350°F represents the conservative safety zone for everyday ceramic plates marked oven-safe.

    Most mid-range ceramic dinnerware tolerates this temperature for reheating meals and warming plates before serving.

    This temperature heats food thoroughly without stressing most glazes or clay bodies. When manufacturer specifications are unclear, but an oven-safe symbol exists, 350°F provides a reasonable maximum.

    Use this temperature for broiler-alternative cooking or keeping dishes warm. Staying at or below 350°F minimizes thermal shock risks during placement and removal.

    450°F – high-end stoneware

    Premium stoneware and professional-grade ceramics often handle 450°F reliably.

    This temperature suits actual cooking rather than just reheating—think finishing casseroles or browning toppings.

    High-fire stoneware achieves this tolerance through extended kiln firing that fully vitrifies the clay.

    Restaurant-quality plates typically meet this standard. However, verify your specific plates’ ratings before assuming 450°F safety.

    Even at this temperature, avoid broiler settings that create localized extreme heat. This range works for non-toxic cookware materials specifically engineered for high-heat applications.

    250°F – tempered glass limit

    Tempered glass plates like Corelle perform best at 250°F or lower, despite some models rating higher.

    This conservative temperature prevents the thermal stress that causes Corelle dishes to explode.

    Use this range for gentle warming, not actual cooking. The three-layer lamination technology in Corelle tolerates gradual heating to this point.

    Vintage or damaged glass plates should stay well below even this conservative limit.

    When warming serving plates, 250°F achieves the goal without approaching the glass’s failure threshold.

    0°F – no cold plate directly into the hot oven

    Zero transition—meaning never place cold plates directly into hot ovens—is non-negotiable.

    Let refrigerated or room-temperature plates warm gradually by sitting at room temperature first.

    Preheat plates slowly by placing them in a cold oven, then turning it on. The temperature differential between cold plates and hot ovens creates maximum thermal shock stress.

    Even oven-safe materials crack under rapid temperature changes. This rule applies equally to all materials—ceramic, glass, and stoneware all need gradual transitions regardless of their heat ratings.

    Common Mistakes That Cause Plates to Break in the Oven

    Even oven-safe plates fail when misused. These common errors cause most plate-related oven accidents.

    Placing refrigerated plates in a hot oven

    Taking plates straight from the refrigerator into a preheated oven creates extreme thermal shock.

    The temperature differential often exceeds 400°F instantly, far beyond what even quality ceramics handle.

    The cold exterior contracts while the heating interior expands, creating internal stress fractures.

    This mistake accounts for most unexpected plate failures with otherwise oven-safe dinnerware.

    Always let plates reach room temperature first, which takes 30-60 minutes for thick ceramics.

    Even warming plates in a low oven (150-200°F) before increasing the temperature reduces shock.

    Using cheap dollar-store ceramic

    Budget ceramic plates often skip essential manufacturing steps to reduce costs.

    Low firing temperatures leave clay bodies porous and weak. Inadequate glaze application creates uneven surfaces that crack under heat.

    Quality control issues mean inconsistent heat tolerance between identical-looking plates. Some budget ceramics use clay compositions unsuitable for thermal cycling.

    The “oven-safe” stamps on these plates may be inaccurate or meaningless. Investing in reputable brands for oven use prevents accidents and repeated replacements.

    Hidden cracks that expand under heat

    Pre-existing damage—even hairline cracks invisible to the naked eye—becomes catastrophic under oven heat.

    Thermal expansion forces cracks to propagate rapidly across the entire plate. Cracks from previous thermal shock, dishwasher damage, or impact create weak points.

    Crazing (fine glaze cracks) indicates previous stress and future failure risk.

    Always inspect plates thoroughly before oven use. Run your fingers across surfaces, feeling for irregularities.

    When plates have survived years of use but suddenly fail in the oven, hidden damage is usually responsible.

    Putting plastic or melamine inside the oven

    Mistaking melamine or plastic for ceramic remains surprisingly common. The lightweight feel and different sound when tapped should alert you, but visual similarity fools many people.

    Checking materials before first oven use prevents this dangerous mistake. Remember that microwave-safe plastic still melts in ovens.

    Some people incorrectly assume all dinnerware handles similar temperatures. This error creates toxic fume exposure, fire hazards, and ruined ovens.

    When uncertain about material composition, keep it out of the oven entirely.

    Brand-Specific Guidelines — Can These Plates Go in the Oven?

    Specific brand policies and construction methods determine oven safety. Here’s what you need to know about popular dinnerware brands.

    Corelle

    Corelle plates are oven-safe up to 350°F according to current manufacturer guidelines.

    The triple-layer Vitrelle glass construction provides durability but has temperature limits.

    Never use Corelle under broilers or on stovetops—these create heat beyond its tolerance.

    Older Corelle patterns may have different ratings or may be lead-free but not oven-rated.

    Check individual pattern specifications on the Corelle website. Despite their strength, Corelle can still fail from thermal shock, so avoid cold-to-hot transitions.

    The brand’s “break and chip resistance” doesn’t equal unlimited heat resistance.

    IKEA Plates

    IKEA dinnerware varies widely by collection and material. Their stoneware and porcelain collections, like IKEA 365+, are generally oven-safe to temperatures specified on packaging.

    However, IKEA’s melamine and plastic options like Kalas are never oven-safe despite being durable for kids.

    Always check product tags and online specifications for your specific IKEA pattern. The company clearly labels oven-safe items in product descriptions.

    Budget IKEA ceramic lines may have lower temperature tolerances than premium options. When in doubt, contact IKEA customer service with your specific product information.

    Pottery Barn

    Pottery Barn dinnerware is typically oven-safe across most collections, with stoneware and porcelain lines rated to 400-450°F.

    Their premium positioning means better quality control and higher firing temperatures during manufacturing.

    Collections like Cambria and Gabriella explicitly state oven-safe status. However, decorative or hand-painted patterns may have restrictions due to metallic glazes.

    Always verify your specific pattern’s care instructions—Pottery Barn provides detailed specifications for each collection online.

    Their customer service can clarify oven safety for discontinued patterns.

    Fiestaware

    Fiestaware is exceptionally oven-safe, rated to 350°F for all pieces. The fully vitrified ceramic body handles thermal stress excellently.

    Both vintage and modern Fiestaware share this durability, though vintage pieces require lead-free verification for food safety.

    The thick, durable construction and high-quality American manufacturing ensure consistent heat tolerance.

    Fiestaware works equally well for reheating and actual cooking applications.

    However, respect the 350°F limit and avoid broilers. The brand’s 75+ year reputation includes reliable oven performance across all its colorful glazes.

    Generic unmarked plates

    Unmarked plates without brand identification or safety symbols should never go in ovens.

    Without manufacturer accountability, you have no way to verify materials, firing temperatures, or heat tolerance.

    These plates likely come from budget manufacturers who skip proper testing and certification.

    The absence of markings often indicates lower quality control standards. Even if the plate “looks” ceramic, an unknown composition makes oven use dangerous.

    The risk of explosion, toxic fume release, or fire isn’t worth saving questionable plates. Replace unmarked dinnerware with properly certified oven-safe options.

    How to Safely Heat Food on a Plate in the Oven

    When you’ve confirmed your plates are oven-safe, proper technique prevents accidents and extends plate life.

    Preheat gradually

    Start with a cold oven and place room-temperature plates inside before turning it on.

    Let the plates heat gradually as the oven reaches the target temperature.

    This method eliminates thermal shock by matching plate temperature to oven temperature throughout heating.

    Gradual preheating works especially well for thick ceramic and stoneware that heat slowly.

    Even with oven-safe plates, avoiding temperature shocks extends their usable life. The extra 10-15 minutes for gradual heating prevents years of potential replacement costs.

    Use low-temperature warming (200–250°F)

    For warming pre-cooked food or heating serving plates, 200-250°F provides plenty of heat without stressing materials.

    This range keeps food hot without overcooking or drying it out. Most oven-safe plates easily tolerate these conservative temperatures, even those with marginal ratings.

    Low-temperature warming works perfectly for dinner parties when you need to keep multiple plates warm.

    Set your oven to the “warm” setting if available, typically around 170-200°F. This approach works even with older plates that might not handle higher temperatures.

    Place the plate on the baking sheet for stability

    Setting plates on baking sheets provides stability and easier handling when hot. The sheet catches any spills, protecting your oven.

    Metal sheets distribute heat more evenly underneath plates, reducing hot spots. Baking sheets make removing multiple hot plates safer; carry the entire sheet instead of individual pieces.

    This technique particularly helps with thin or delicate plates that might warp slightly. The sheet acts as a heat buffer, slowing temperature changes during oven removal.

    Avoid the broiler at all costs

    Broilers create intense direct heat that exceeds virtually all plate ratings, even oven-safe ones.

    The extreme localized heat causes rapid thermal expansion in small areas, creating stress fractures.

    Broiler temperatures often exceed 550°F—well above most ceramic glazes’ tolerance. Even metal-trimmed oven-safe plates spark and fail under broilers.

    The radiant heat from above creates uneven heating patterns that ceramic and glass handle poorly.

    Use broilers only with proper broiler pans and metal cookware—never ceramic plates, regardless of their oven-safe rating.

    Safer Alternatives to Plates in the Oven

    When your plates aren’t oven-safe, or you want better heat performance, these alternatives work better for oven use.

    Oven-safe glass baking dishes

    Borosilicate glass baking dishes like Pyrex handle oven heat far better than glass plates.

    These dishes are engineered specifically for oven use, typically rated to 450-500°F. The thicker construction distributes heat more evenly than thin plate glass.

    oven safe glass baking dish

    Glass allows you to monitor food browning while cooking. Use these for casseroles, roasted vegetables, or any cooking application rather than risking plates.

    Glass baking dishes also transition to refrigerator storage better than plates, though you should still avoid extreme temperature changes.

    Stainless steel trays

    Stainless steel is virtually indestructible in ovens, handling temperatures up to 600°F and beyond.

    Metal heats quickly and evenly, ideal for roasting and browning. Stainless steel never cracks, shatters, or releases chemicals regardless of temperature.

    stainless steel oven safe baking and roasting pan

    These trays work under broilers where ceramic fails. They’re lighter than ceramic, making hot handling easier.

    The main drawback is the lack of visual appeal for serving, transferring food to decorative plates afterward. Stainless steel represents the safest, most versatile oven option.

    Stoneware baking plates

    Purpose-built stoneware baking dishes offer both functionality and presentation appeal. These thick ceramic pieces are specifically engineered for high oven temperatures.

    Le Creuset stoneware ovenproof dish

    Brands like Le Creuset and Emile Henry make stoneware rated to 500°F or higher. The excellent heat retention keeps food hot during serving.

    Many stoneware bakers transition from the oven directly to the table, eliminating transfer needs.

    Emile Henry stoneware oven safe casserole dish

    While more expensive than regular plates, dedicated baking stoneware lasts decades with proper care. These pieces handle thermal stress far better than dinner plates.

    Oven-proof ceramic serving dishes

    Dedicated oven-to-table ceramic serving dishes combine cooking capability with presentation quality.

    These pieces use higher-quality glazes and thicker construction than standard dinnerware. Look for terms like “baker,” “gratin dish,” or “oven-to-table” in product descriptions.

    These dishes typically range from 400-450°F and are designed for regular thermal cycling.

    Using purpose-built ovenware rather than adapting dinner plates reduces failure risk.

    Many collections of non-toxic cookware materials include these versatile ceramic pieces that serve both cooking and presentation functions.

    FAQ — Putting Plates in the Oven

    Can you put cold plates in a hot oven?


    No. Placing cold plates in hot ovens causes thermal shock—rapid temperature changes that create internal stress and cracking.

    Always let refrigerated plates reach room temperature first, or place them in a cold oven before turning it on. Even oven-safe plates crack from extreme temperature differentials.

    Can you put a plate in the oven at 350°F?


    Yes, if the plate is marked oven-safe and rated for that temperature.

    Check the underside for “oven-safe” stamps and temperature ratings. Most oven-safe ceramic and stoneware can handle 350°F safely.

    Never use plastic, melamine, or unmarked plates. Glass plates like Corelle typically tolerate 350°F, but verify specifications.

    Is it safe to warm plates before serving?


    Yes, warming oven-safe plates enhances the dining experience by keeping food hot longer.

    Use 200-250°F for 10-15 minutes. Place plates in a cold oven before preheating, or heat them gradually.

    Only warm plates are explicitly marked oven-safe. This practice is common in restaurants using commercial-grade dinnerware designed for regular heating.

    Can you put restaurant plates in the oven?


    Most restaurant plates are commercial-grade and oven-safe, designed to withstand frequent heating for plate warming.

    However, verify before assuming—some restaurants use decorative plates for presentation only.

    Commercial dinnerware typically handles higher temperatures than consumer plates due to better materials and manufacturing.

    Check markings or ask the restaurant for supply information if purchasing used commercial plates.

    Conclusion

    You can safely put plates in the oven, but material type and proper identification are non-negotiable requirements.

    Oven-safe ceramic, stoneware, porcelain, and tempered glass plates work within their specified temperature limits, typically 250-450°F depending on construction quality.

    Never use plastic, melamine, or unmarked plates—these create serious safety hazards, including explosions, toxic fumes, and fires.

    Always check for manufacturer markings, respect temperature limits, and avoid thermal shock by allowing gradual temperature transitions.

    When uncertain about a plate’s oven safety, choose purpose-built baking dishes or ovenware instead.

    Following these guidelines protects your safety, preserves your dinnerware, and ensures successful meal preparation.

    The right plate in the right conditions performs perfectly; the wrong choice creates dangerous, costly disasters.

  • How to Test Dishes for Lead (Step-by-Step Home & Lab Methods)

    Every time you serve dinner on that beautiful vintage plate or sip coffee from your grandmother’s hand-painted mug, you might be unknowingly exposing your family to lead.

    It’s a sobering reality that many dishes—especially older ceramics, colorful glazes, and imported dinnerware can leach this toxic heavy metal directly into your food.

    The good news? Learning how to test dishes for lead is simpler and more affordable than you think.

    Whether you’re concerned about heirloom pieces, thrift store finds, or even modern dinnerware, testing empowers you to make informed decisions that protect your family’s health.

    This comprehensive guide walks you through both home testing methods and professional lab options, helping you identify lead contamination before it becomes a health hazard.

    Why Testing Dishes for Lead Is Important

    Lead contamination in dishware is a serious public health concern that often goes undetected until testing reveals the hidden danger.

    Understanding why testing matters is the first step toward protecting your family from unnecessary exposure to this neurotoxin.

    How Lead Enters Dishware Glazes and Decorations

    Lead has been used in ceramics for centuries because it creates brilliant colors, smooth finishes, and durable glazes.

    Manufacturers historically added lead oxide to ceramic glazes to lower firing temperatures and enhance color vibrancy.

    During the firing process, lead can become trapped in the glaze surface or, worse, remain in a form that can leach into acidic foods and beverages.

    Decorative elements like metallic rims, hand-painted designs, and colorful patterns often contain the highest lead concentrations.

    Even modern dishes aren’t immune; some imported ceramics and artisan pottery may still use lead-based glazes, especially if produced in countries with less stringent safety regulations.

    Health Effects of Lead Exposure

    Lead exposure carries devastating health consequences, particularly for vulnerable populations.

    Children under six years old are most at risk because their developing brains and nervous systems absorb lead more readily than adults.

    Even low levels of lead exposure can cause irreversible cognitive impairment, behavioral problems, reduced IQ, and learning disabilities in children.

    Pregnant women who consume lead pass it to their developing fetuses, potentially causing premature birth, low birth weight, and developmental delays.

    Adults aren’t spared either—chronic lead exposure contributes to high blood pressure, kidney damage, reproductive issues, and neurological problems.

    Because lead accumulates in the body over time, repeated exposure from daily dish use creates a cumulative health burden that’s entirely preventable through proper testing.

    Why Vintage and Imported Dishes Are Higher Risk

    Vintage dishware manufactured before 1970 poses the greatest lead risk because safety regulations were either nonexistent or poorly enforced during those decades.

    Popular patterns from mid-century ceramics often used lead-based glazes liberally, and testing vintage Corelle for lead reveals that even seemingly safe brands can contain lead in decorative elements.

    Imported dishes from countries with relaxed manufacturing standards continue to enter the market with dangerous lead levels, despite FDA regulations.

    Artisan pottery, flea market finds, and hand-painted ceramics deserve particular scrutiny because small-batch producers may not follow proper firing protocols or use lead-free materials.

    The combination of age, manufacturing origin, and decorative complexity makes these dishes prime candidates for lead testing.

    Common Sources of Lead in Dishes

    Identifying which dishes are most likely to contain lead helps you prioritize your testing efforts and understand where contamination typically originates in your kitchen.

    Ceramic Glazes and Colored Finishes

    Ceramic glazes represent the most common source of lead in dishware because lead compounds create desirable properties that manufacturers have relied on for generations.

    Brightly colored glazes—especially reds, oranges, and yellows—historically required lead to achieve their vibrant hues and glossy finish.

    The glaze firing process is critical: properly fired ceramics bind lead tightly within the glass-like surface, while underfired or improperly formulated glazes allow lead to leach freely.

    Matte finishes and textured surfaces can be particularly problematic because they may indicate incomplete firing or amateur production methods.

    Even clear glazes aren’t automatically safe; some transparent coatings contain lead to enhance shine and durability.

    Hand-Painted or Metallic Rim Decorations

    Decorative elements applied to dishware often contain concentrated lead levels that exceed those found in base glazes.

    Hand-painted designs, whether applied over or under the glaze, frequently use lead-based paints for their rich pigmentation and adherence properties.

    Gold, silver, and metallic rim decorations typically contain lead compounds that create the lustrous metallic appearance consumers find attractive.

    These decorative areas experience direct food contact when you eat or drink, making them particularly hazardous.

    Decals and transfers applied to ceramic surfaces may also harbor lead in their inks and adhesives.

    When examining fiestaware lead status, collectors discover that vintage pieces with certain glaze colors and decorative treatments contain measurable lead, while newer reformulated versions meet modern safety standards.

    Older or Imported Dishes with Unregulated Coatings

    Dishes manufactured before stringent regulations took effect remain in circulation through inheritance, antique shops, and secondhand markets, carrying their lead content into modern kitchens.

    Pre-1970s American ceramics and dishes from countries without robust consumer protection laws pose elevated risks.

    Imported items from street markets, souvenir shops, and international retailers may completely bypass safety testing before reaching consumers.

    The absence of proper labeling or certification marks should raise immediate red flags.

    Restaurant supply dishes and institutional tableware from certain eras also warrant testing because commercial ceramics weren’t always held to the same standards as consumer products.

    Unsafe Low-Fire Pottery and Vintage Patterns

    Low-fire pottery—ceramics fired at temperatures below 2200°F—presents unique lead risks because the lower firing temperature may not adequately bind lead into the glaze structure.

    Hobbyist potters and small studios sometimes use low-fire techniques without understanding the leaching risks.

    Vintage patterns from popular dinnerware lines of the 1960s-1980s often combined decorative appeal with lead-laden glazes, creating beautiful but hazardous tableware.

    Specific patterns known for lead content include certain Pyrex designs, decorative Corningware pieces, and numerous ceramic collections from now-defunct manufacturers.

    Collectors and vintage enthusiasts must balance their appreciation for retro aesthetics with the reality of lead contamination in older dishware lines.

    How to Test Dishes for Lead at Home

    How to test dishes for Lead

    Home testing provides an accessible, affordable first line of defense against lead exposure from your dishware, allowing you to screen your collection quickly before deciding whether professional testing is warranted.

    Using Lead Testing Swab Kits

    Lead testing swab kits offer the most practical home testing solution, with brands like 3M LeadCheck and LeadCheck Pro delivering results within minutes.

    These kits contain chemical reagents sealed inside a swab that react specifically with lead, producing a color change when lead is present.

    The swabs work by breaking an internal capsule that releases testing chemicals onto the swab tip, which you then rub against the dish surface.

    Quality test kits are readily affordable(depending on the brand) per swab and are widely available at hardware stores, online retailers, and home improvement centers.

    Each kit includes detailed instructions, but the basic principle remains consistent across brands: apply the activated swab to the test surface and observe any color change.

    How to Properly Clean, Apply, and Interpret Color Changes

    Proper testing technique significantly impacts result accuracy and reliability.

    Begin by thoroughly cleaning the dish with warm, soapy water to remove food residue, oils, and surface contaminants that might interfere with the chemical reaction.

    Rinse completely and dry the surface before testing. Activate the swab according to the manufacturer’s directions—usually by crushing or shaking to break the internal ampule.

    Firmly rub the moistened swab tip against the test area for 30 seconds, applying moderate pressure.

    Watch for color changes: pink or red coloration indicates lead presence, with darker, faster color changes suggesting higher lead concentrations.

    Yellow or no color change typically means no lead was detected.

    Understanding how to test cookware for lead and heavy metals using similar methods helps you apply consistent testing standards across all your kitchen items.

    Surfaces to Test

    Strategic surface selection ensures comprehensive testing coverage while conserving your test swabs.

    Always test the interior food-contact surfaces first, particularly the center of plates, inside of bowls, and interior rim areas where food and beverages rest.

    Examine decorated areas separately, including painted designs, metallic trims, and colored patterns, as these often contain higher lead concentrations than plain glazed areas.

    Check the underside glazing and backstamp area, though these pose less direct food-contact risk.

    If dishes have crazing (fine cracks in the glaze), test those areas specifically because lead can accumulate in cracks and leach more readily.

    For a comprehensive assessment of problematic pieces, test multiple locations—rim, center, and decorated areas to identify localized contamination.

    Limitations of Home Kits

    While home test kits provide valuable preliminary screening, understanding their limitations prevents false confidence in potentially contaminated dishes.

    Swab tests detect only surface-available lead—they cannot measure lead embedded deep within the glaze structure or determine the rate at which lead might leach during actual use conditions.

    These tests provide qualitative results (lead present or absent) rather than quantitative measurements of lead concentration levels.

    Environmental factors like temperature, humidity, and testing technique can affect result accuracy.

    False negatives can occur if lead is present but not accessible to the swab chemicals, while false positives are rare but possible with certain glaze compositions.

    Home kits serve best as screening tools, identifying obviously contaminated dishes and flagging questionable pieces for professional laboratory confirmation.

    Best Lead Test Kits for Dishes

    Choosing the right lead test kit ensures accurate results and reliable screening for your dishware collection.

    Best Lead Test Kits for Dishes

    The 3M LeadCheck Swabs remain the industry standard and most widely recommended option, trusted by professionals and homeowners alike for their consistent performance and clear color-change indicators.

    These EPA-recognized swabs detect lead at levels as low as 1-2 micrograms and provide results within 30 seconds.

    LeadCheck Pro offers similar chemistry with enhanced sensitivity for professional applications.

    D-Lead test kits provide another reliable alternative with comparable accuracy and clear instructions suitable for first-time users.

    Lead test kit for home

    For ceramics specifically, the Lead Inspector Kit includes swabs formulated to work effectively on glazed surfaces and comes with detailed interpretation guides.

    Budget-conscious consumers can find multi-pack options that reduce per-test costs while maintaining quality—look for 8-pack or 12-pack configurations from recognized brands.

    Avoid generic or unbranded test kits lacking EPA recognition or clear manufacturer information, as their accuracy cannot be verified.

    When selecting the best lead test kits for dishes, prioritize established brands with documented testing protocols, clear expiration dating, and positive user reviews from other consumers testing similar ceramic and glass items.

    Professional Lead Testing Options

    When home testing raises concerns or you need definitive answers about valuable or frequently used dishes, professional laboratory testing provides the accuracy and legal documentation that home kits cannot deliver.

    X-Ray Fluorescence (XRF) Testing — Lab-Grade Precision

    XRF testing represents the gold standard for lead detection in dishware, using X-ray technology to identify and quantify lead content without damaging the tested item.

    This non-destructive analytical method bombards the dish surface with X-rays, causing lead atoms to emit characteristic fluorescent X-rays that the analyzer detects and measures.

    XRF analyzers provide precise lead concentration readings in parts per million (ppm) or micrograms per square centimeter, meeting scientific and regulatory standards.

    Professional testing services employ calibrated, certified XRF equipment operated by trained technicians who understand proper testing protocols and result interpretation.

    The technology can detect lead even when it’s embedded within glaze layers, providing a complete picture of contamination levels that surface swab tests might miss.

    Where to Send Dishes for Certified Lab Analysis

    Several reputable organizations offer consumer-accessible lead testing services for dishware and ceramics.

    Lead Safe Mama, founded by Tamara Rubin, provides comprehensive XRF testing services with detailed reports and has tested thousands of household items, building an extensive database of product results.

    University environmental health laboratories often accept samples from the public for lead analysis, offering academic-grade testing at reasonable prices.

    Some state health departments provide testing services or can refer you to certified laboratories.

    Private environmental testing companies specializing in consumer products also accept dishware samples.

    When selecting a testing service, verify they use XRF or equivalent certified methods, provide written reports with specific lead concentration values, and have experience testing food-contact surfaces.

    Turnaround times typically range from one to three weeks.

    Cost, Turnaround Time, and Result Interpretation

    Professional lead testing costs vary based on the testing method, number of items, and service provider, typically ranging from $20 to $100 per item or test location.

    XRF testing services usually charge $40-75 per item, while some providers offer package pricing for multiple pieces.

    Mail-in services require careful packaging to prevent breakage during shipping, adding handling time to the overall turnaround.

    Most laboratories provide results within 10-21 business days, though expedited services may be available for additional fees.

    Results come as detailed reports showing lead concentration levels for each tested area, comparison to regulatory standards, and safety recommendations.

    Understanding these reports requires knowing that FDA limits specify 0.5 ppm for leachable lead in flatware and 0.25 ppm for small hollowware, while California Prop 65 sets even stricter consumer product standards.

    Heirloom dishes carrying sentimental value and imported ceramics with unknown manufacturing histories deserve the certainty that only laboratory testing provides.

    Family heirlooms passed through generations often predate safety regulations, and knowing their exact lead content helps you make informed preservation and use decisions.

    Valuable antique ceramics warrant professional testing before use because their historical significance makes destructive testing methods unacceptable.

    Imported dishes lacking proper certification or purchased from unregulated markets require laboratory confirmation because home tests might miss embedded lead.

    If you use dishes daily for feeding children or preparing family meals, the modest investment in professional testing offers invaluable peace of mind.

    Laboratory documentation also provides legal evidence if you need to report unsafe products or pursue consumer protection remedies.

    How to Interpret Your Test Results

    Understanding what your test results mean—whether from home kits or professional laboratories—empowers you to make appropriate safety decisions about which dishes to keep using and which to remove from food service.

    Understanding Safe vs Unsafe Levels

    Federal and state regulations establish specific lead limits that define safe dishware, though these standards focus on leachable lead rather than total lead content.

    The FDA requires that decorative tableware release no more than 0.5 parts per million (ppm) of lead for flatware like plates and no more than 0.25 ppm for hollowware like cups and bowls when tested using standardized leaching protocols.

    California’s Proposition 65 enforces stricter consumer product standards, requiring warning labels on items that could expose users to lead levels above 0.5 micrograms per day.

    Laboratory XRF results showing total lead content above 90 ppm generally indicate potential leaching concerns.

    However, interpreting safety requires understanding that well-fired glazes can contain lead without releasing it, while poorly manufactured items might leach lead even at moderate concentration levels.

    When in doubt, err on the side of caution with dishes used by children or pregnant women.

    How to Confirm Ambiguous Results with Professional Testing

    Ambiguous home test results, faint color changes, inconsistent results across multiple swabs, or contradictory findings on different dish areas warrant professional laboratory confirmation before making final use decisions.

    If a swab shows slight pinkish coloration that’s difficult to distinguish from the baseline color, professional XRF testing eliminates uncertainty with precise numerical measurements.

    Dishes producing positive swab results on decorative areas but negative results on plain glazed surfaces benefit from comprehensive laboratory analysis to determine whether food-contact zones are actually safe.

    Valuable or frequently used dishes deserve the certainty of laboratory testing even when home tests suggest they might be safe.

    Schedule professional testing for any dish where you have lingering concerns, especially items used daily or by vulnerable family members.

    What to Do If Your Dishes Contain Lead

    Discovering lead in your dishes requires immediate action to eliminate exposure risk while handling affected items appropriately based on their condition, value, and your emotional attachment to them.

    Stop Using Affected Dishes for Food Contact

    Immediately discontinue using lead-containing dishes for any food or beverage service once contamination is confirmed.

    Remove these items from your regular rotation and storage areas where you might accidentally grab them during meal preparation.

    Lead leaches more readily into acidic, hot, or fatty foods, but even brief contact with any food or drink poses unnecessary risk.

    Microwaving lead-containing ceramics can increase lead release into food, so affected dishes should never go in the microwave.

    Dishwashers may also increase lead leaching by exposing glazes to hot water, harsh detergents, and repeated heating cycles.

    Store confirmed lead-positive dishes separately from your safe dinnerware, clearly marked to prevent accidental use by family members or guests who might not know about the contamination.

    Safe Disposal vs Decorative Use

    Lead-containing dishes require thoughtful disposal or repurposing decisions that prevent others from unknowingly using them.

    For complete elimination of risk, dispose of lead-contaminated dishes by wrapping them thoroughly in newspaper or bubble wrap, placing them in a sealed box marked “LEAD – DO NOT USE,” and disposing of them with regular household trash.

    Never donate lead-positive dishes to thrift stores, charities, or second-hand shops where unsuspecting buyers might use them for food.

    Some items can be safely repurposed for non-food decorative display—hanging plates on walls, using bowls as planters with plastic liners, or displaying pieces in curios where they won’t contact food.

    However, decorative use carries risks if pieces might later return to food service or if handling could expose family members to lead dust from deteriorating glazes.

    How to Handle Heirloom or Sentimental Pieces Safely

    Heirloom dishes carrying family history and emotional significance don’t necessarily require disposal, but they do demand special handling protocols.

    Display cherished pieces safely behind glass in china cabinets or on wall-mounted plate racks where they’re visible but not accessible for food use.

    Use high-quality display stands that secure items without causing glaze wear that might release lead dust.

    Photograph heirloom pieces extensively and document their history, allowing you to preserve memories even if you ultimately decide disposal is the safest option.

    Consider professional pottery restoration services that can sometimes encapsulate lead-containing glazes with modern lead-free clear coats, though this doesn’t eliminate lead.

    Clean heirloom display pieces with damp cloths rather than harsh scrubbing that might abrade surfaces, and wash hands thoroughly after handling.

    Replace with Certified Lead-Free Options

    Replacing lead-contaminated dishes with certified safe alternatives completes the transition to a lead-free kitchen.

    Modern manufacturers produce beautiful, durable dinnerware that meets or exceeds current safety standards without sacrificing aesthetic appeal.

    Look for dishes explicitly labeled “lead-free,” “Prop 65 compliant,” or “FDA approved for food contact” when shopping for replacements.

    certified white lead free porcelain dinnerware

    Plain white porcelain, clear tempered glass, and solid-color stoneware from reputable manufacturers generally offer the safest options.

    Many contemporary brands now emphasize their commitment to non-toxic materials in their marketing and product specifications.

    Investing in quality lead-free dinnerware protects your family’s health for years to come and provides peace of mind that every meal is served safely.

    How to Identify Lead-Free Dinnerware Before You Buy

    Preventing lead contamination begins at the point of purchase by learning to recognize truly safe dishware and avoid potentially hazardous products before they enter your kitchen.

    Check for “Lead-Free,” “Prop 65 Compliant,” or “FDA Approved” Labels

    Product labeling provides your first clue about dish safety, though understanding what labels actually guarantee requires knowledge of regulatory frameworks.

    Look for explicit “lead-free” or “cadmium-free” statements on packaging, product tags, or manufacturer websites before purchasing any dinnerware.

    “Prop 65 compliant” indicates the product meets California’s strict standards and won’t expose users to harmful lead levels.

    “FDA approved” or “FDA compliant for food contact” signals the manufacturer has verified their products meet federal leaching limits.

    Be cautious of vague safety claims like “safe” or “non-toxic” without specific certifications or testing documentation.

    Contact manufacturers directly if safety information isn’t readily available, and consider their response time and thoroughness as indicators of their commitment to consumer safety.

    Choose Plain White, Undecorated, or Transparent Glass Dishes

    Simple, minimalist dinnerware designs inherently carry lower lead risks because they eliminate the decorative elements where lead most commonly hides.

    Plain white porcelain without colored glazes, patterns, or decorations represents one of the safest dishware choices available.

    Clear glass dinnerware from quality manufacturers like Duralex or Anchor Hocking contains no glazes or surface coatings that could harbor lead.

    Solid-color stoneware in single, consistent hues throughout the piece (not just surface decoration) typically uses safer modern colorants.

    Avoid dishes with metallic trims, hand-painted designs, bright multi-color patterns, or applied decals unless the manufacturer explicitly certifies them as lead-free.

    Transparent glass allows you to inspect the material throughout rather than relying on surface treatments.

    If you love colorful table settings, choose lead-free textile placemats, napkins, and table runners rather than colored dishes.

    Several established manufacturers have earned reputations for consistently producing lead-free dinnerware backed by proper testing and certification.

    Corelle, manufactured by Corning but now InstantBrands, produces tempered glass dinnerware that’s lead-free in current production, though vintage patterns should still be tested.

    Anchor Hocking specializes in glass tableware and bakeware using lead-free formulations.

    Xtrema crafts 100% ceramic cookware and dinnerware from pure clay without glazes, heavy metals, or toxic additives.

    Duralex makes tempered glass dishes in France using traditional lead-free glass formulations.

    Heath Ceramics, Fiesta (post-1986), and HF Coors all manufacture lead-free certified dinnerware lines.

    When exploring safe cookware materials, apply the same scrutiny to pots and pans that you use for dishware selection, choosing brands committed to transparency about their materials and testing protocols.

    FAQs About Testing Dishes for Lead

    Common questions about lead testing reveal concerns many people share when evaluating their dinnerware safety and trying to protect their families from unnecessary exposure.

    Can I use vinegar or lemon juice to test for lead?


    No, vinegar and lemon juice cannot detect lead presence in dishes.

    While acidic solutions like vinegar can leach lead from contaminated glazes over time during normal use, they don’t produce any visible indication that lead is present or being released.

    The only reliable home testing method involves chemical test swabs specifically designed to react with lead and produce color changes.

    Vinegar and lemon juice can, however, be used in a different way: if you suspect a dish contains lead, soaking it in vinegar and then testing the vinegar solution with a lead test kit can reveal whether the dish leaches lead under acidic conditions.

    This approach still requires actual lead test kits for detection.

    Are all vintage dishes unsafe?


    Not all vintage dishes contain hazardous lead levels, but older dishware carries an elevated risk that warrants testing before use.

    Plain white commercial ceramics from the 1960s-1980s from reputable American manufacturers often meet modern safety standards.

    Glass dishes, including vintage Pyrex clear glass items, typically don’t contain lead in the glass itself, though decorative elements might.

    The greatest vintage risks come from brightly colored glazes, metallic decorations, hand-painted designs, and imported ceramics from eras with lax regulations.

    Each vintage piece deserves individual evaluation because manufacturing practices varied widely between companies, production years, and specific pattern lines.

    Can I use lead test kits on glazed mugs or bowls?


    Yes, lead test swabs work on glazed mugs, bowls, and any ceramic surface where you can apply the swab and observe color changes.

    Test the interior surfaces where beverages and foods make direct contact, paying special attention to decorative elements like painted designs or metallic rim treatments.

    Curved surfaces in bowls and mugs can make swab application slightly more challenging than flat plates, but the testing process remains the same.

    Make sure you apply adequate pressure and maintain contact for the full recommended testing duration to ensure accurate results.

    How reliable are cheap lead test kits?


    Inexpensive lead test kits from reputable manufacturers like 3M LeadCheck provide reasonably reliable screening results when used correctly, though they have inherent limitations.

    These kits effectively detect surface-available lead and rarely produce false positives, making positive results quite trustworthy.

    However, they cannot measure lead concentrations, detect deeply embedded lead, or predict leaching rates under actual use conditions.

    “Cheap” kits from unknown brands without established reputations may use inferior chemistry or poor quality control.

    For home screening purposes, nationally recognized brands in the affordable range per swab range offer good value, while extremely cheap no-name kits warrant skepticism.

    Professional laboratory testing remains the gold standard when you need definitive, legally defensible results.

    Conclusion — Protect Your Family with Regular Testing

    Taking control of your dish safety through regular lead testing represents one of the simplest yet most impactful steps you can take to protect your family from toxic exposure.

    Home testing kits offer affordable, accessible screening that identifies obvious hazards quickly, while professional laboratory analysis provides definitive answers for questionable pieces and valuable heirlooms.

    The few minutes and modest investment required for testing pale in comparison to the lifetime health consequences of lead exposure, especially for children whose developing bodies are most vulnerable.

    By combining careful testing with informed purchasing decisions, choosing certified lead-free replacements, and avoiding high-risk vintage or imported items, you create a truly safe kitchen environment.

    Don’t wait until symptoms appear or contamination seems likely; proactive testing turns uncertainty into confidence, ensuring that every meal served at your table nourishes your family without hidden dangers.