Tag: pottery tableware

  • Does Pfaltzgraff Contain Lead

    You’ve just unpacked your grandmother’s vintage Pfaltzgraff dishes, admiring their timeless patterns and sturdy design.

    As you prepare to serve your family dinner, a thought suddenly crosses your mind: could these beautiful dishes contain lead?

    It’s a fair question that many Pfaltzgraff lovers ask, especially when using older pieces or introducing new collections to their homes.

    Lead in dinnerware has become a significant concern for health-conscious consumers, and rightfully so.

    Pfaltzgraff is a beloved brand with a history spanning over 200 years, so understanding what goes into these dishes matters.

    Are your favourite heritage patterns safe? What about those new Winterberry plates you’ve been eyeing? Let’s uncover the truth about lead in Pfaltzgraff dinnerware.

    THE HISTORY OF PFALTZGRAFF AND LEAD CONCERNS

    Pfaltzgraff has been a household name in dinnerware since 1811, making it one of America’s oldest pottery companies.

    But what about today? Continue reading to discover if Pfaltzgraff is still made in the USA.

    The brand began in York, Pennsylvania, where German immigrants Johann George and Henry Pfaltzgraff established their first pottery shop.

    Pfaltzgraff Josephine 24Pcs Dinnerware Set

    Throughout its long history, manufacturing practices and safety standards have evolved considerably.

    Before the 1970s, lead was commonly used in ceramic glazes across the industry to create vibrant colours and enhance durability.

    This wasn’t unique to Pfaltzgraff – it was standard practice for most ceramic manufacturers worldwide.

    The turning point came in 1971 when the FDA established regulations limiting the amount of leachable lead allowed in ceramic tableware.

    New Pfaltzgraff Gabriela Blue Dinnerware Pattern

    These regulations have been updated several times since, becoming increasingly stringent.

    By the 1990s, most major manufacturers, including Pfaltzgraff, had significantly reduced or eliminated lead from their glazes.

    Fiestaware dating backstamps pdf guide

    CURRENT LEAD STANDARDS FOR DINNERWARE

    Today, strict regulations govern how much lead can be present in dinnerware:

    Regulatory BodyLeachable Lead LimitApplies To
    FDA (USA)Varies by category:
    3 ppm (flatware),
    2 ppm (small hollowware),
    1 ppm (large hollowware),
    0.5 ppm (cups/mugs)
    Dinnerware
    California Prop 65Stricter limits:
    0.10 ppm (hollowware/cups/mugs),
    0.226 ppm (plates)
    All ceramic ware sold in California
    EU StandardsVaries by category:
    0.8 mg/dm²
    4 mg/L
    Ceramic food contact materials  

    Note: PPM stands for parts per million, which is a measurement of lead concentration.

    DOES MODERN PFALTZGRAFF CONTAIN LEAD?

    Does Pfaltzgraff Contain Lead

    Modern Pfaltzgraff products are indeed designed to meet regulatory standards, specifically those set by the U.S. Food and Drug Administration (FDA) regarding lead content.

    The company has stated that its current products comply with all applicable FDA regulations concerning lead levels in dinnerware and other food-related items.

    The FDA does not permit lead to be used as a color or food additive in foodware, and it actively works to limit lead exposure from products intended for food use.

    Manufacturers are legally required to ensure their products do not contain unsafe levels of lead, and the FDA can take regulatory action against those that do.

    Pfaltzgraff asserts that all its products are tested by accredited, independent laboratories to ensure compliance with federal standards related to lead and other contaminants.

    This claim aligns with the FDA’s guidelines, which emphasize that there are no safe levels of lead exposure for humans, particularly vulnerable populations such as children.

    For example, it’s worth noting that “lead-free” in the ceramic industry often means the product contains no intentionally added lead, rather than being 100% free of any lead traces.

    This distinction is important because minute traces of lead can sometimes be found in raw materials used in ceramics manufacturing.

    Furthermore, Pfaltzgraff has faced scrutiny in the past. For instance, in 2008, some of its dinnerware was recalled due to concerns about high lead or cadmium levels. Despite this history, the company has made efforts to ensure that its current offerings meet safety standards.

    In summary, while Pfaltzgraff claims compliance with FDA regulations regarding lead content in its products, consumers should remain informed about potential risks associated with older or vintage items and verify the safety of specific products when necessary.

    DOES PFALTZGRAFF WINTERBERRY CONTAIN LEAD?

    Pfaltzgraff’s Winterberry collection is one of their most popular patterns, especially during the holiday season.

    Does Pfaltzgraff Winterberry Contain Lead

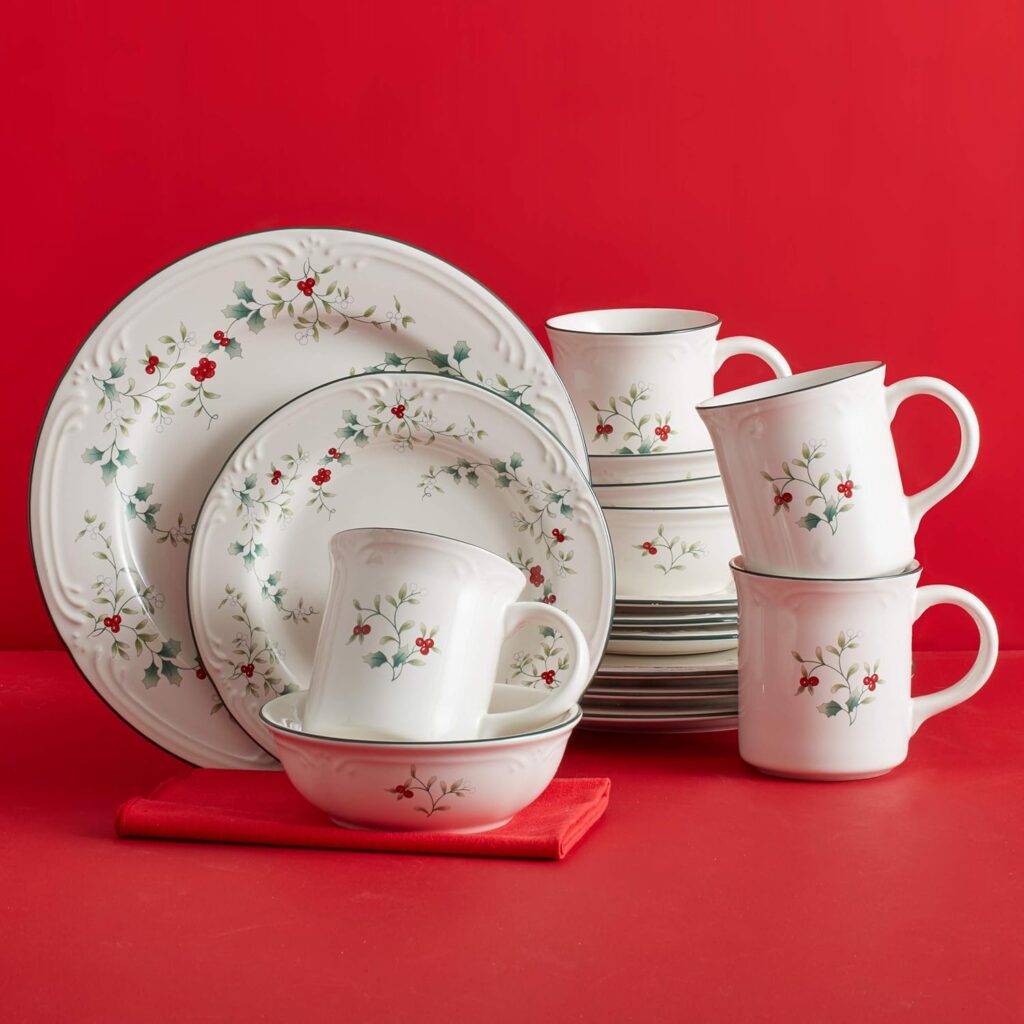
    The Winterberry collection, like other modern Pfaltzgraff lines, is manufactured to meet current FDA standards.

    This means that any lead content would be within regulated safe limits. The bright red berries that characterize this pattern use modern ceramic pigments that don’t rely on lead for their vibrant colour, unlike some older red glazes from decades past.

    For those particularly concerned about the Winterberry pattern, it’s worth noting that this collection was introduced in 1991 and has been updated over time to comply with evolving safety standards.

    Current production of Winterberry items uses modern manufacturing techniques and glazes that are designed to be safe for food contact.

    DOES VINTAGE PFALTZGRAFF HAVE LEAD?

    Older Pfaltzgraff pieces, especially those manufactured before the 1990s, have been found to contain higher levels of lead in their glazes or decorative elements compared to modern safety standards.

    This is consistent with findings from XRF testing, which has detected lead levels exceeding safe thresholds in vintage Pfaltzgraff items from the 1980s and 1990s.

    Vintage Pfaltzgraff 1970 village Pattern

    Such lead content was common in ceramic dinnerware from that era, not unique to Pfaltzgraff.

    Vintage Pfaltzgraff patterns from the 1960s, 70s, and early 80s were likely produced using glazes containing lead, as this was standard practice before stricter regulations were implemented.

    The lead content in these vintage pieces might exceed current safety standards, particularly if the glaze shows signs of wear, cracking, or crazing.

    Some indicators that your vintage Pfaltzgraff might contain high levels of lead include:

    • Manufacturing date before the mid-1980s
    • Bright red, orange, or yellow decorations (these colours often require lead-based pigments)
    • Visible crazing or cracking in the glaze
    • High gloss or exceptionally bright colours

    While many collectors cherish vintage Pfaltzgraff for decorative purposes, it’s advisable to use caution when using very old pieces for food service, especially for acidic foods that might accelerate lead leaching.

    WHICH PFALTZGRAFF PATTERNS CONTAIN LEAD?

    If you’re wondering which Pfaltzgraff patterns contain lead, here’s a general guide based on manufacturing eras:

    Patterns More Likely to Contain Lead:

    Patterns produced before the 1990s may contain higher lead levels than modern standards permit. Some notable older collections include:

    • Yorktowne (pre-1990s versions)
    • Village
    • Folk Art
    • Heritage
    • Early versions of Remembrance

    Patterns Less Likely to Contain Lead:

    Patterns produced after the late 1990s typically comply with modern lead safety standards:

    It’s important to note that Pfaltzgraff has produced hundreds of patterns over decades, and many patterns have been produced across different eras with different manufacturing standards.

    The actual lead content would depend on when a specific piece was manufactured rather than just the pattern name.

    If you own Pfaltzgraff onion soup bowls from vintage collections, these would follow the same guidelines as other items from their respective eras.

    Modern versions should comply with current safety standards.

    HOW TO TEST PFALTZGRAFF DISHES FOR LEAD

    If you’re concerned about potential lead content in your Pfaltzgraff dinnerware, several options exist for testing:

    Home Lead Test Kits

    Swab tests like those made by 3M or Lead Check can provide a preliminary indication of lead presence.

    These tests change colour when they detect lead on surfaces and are relatively inexpensive and easy to use. However, they have limitations:

    • They typically only detect high levels of lead
    • They test surface lead that might rub off, not necessarily lead that could leach into food
    • False negatives are possible, especially with lower lead concentrations

    Professional Laboratory Testing

    For more accurate results, professional laboratory testing is recommended. Labs can perform X-ray fluorescence (XRF) testing or leach testing that simulates food acids to determine how much lead might transfer to food.

    XRF Testing Services

    Some communities offer XRF testing services through health departments or lead safety programs.

    Some companies specialize in household testing and can come to your home and test your dinnerware.

    Remember that testing should be done periodically on older items, as wear and tear can affect lead leaching over time.

    IS PFALTZGRAFF STONEWARE MICROWAVE SAFE?

    Yes, most Pfaltzgraff stoneware is microwave safe.

    Key Points:

    • Modern Pfaltzgraff stoneware (1970s-present) is generally designed to be microwave safe
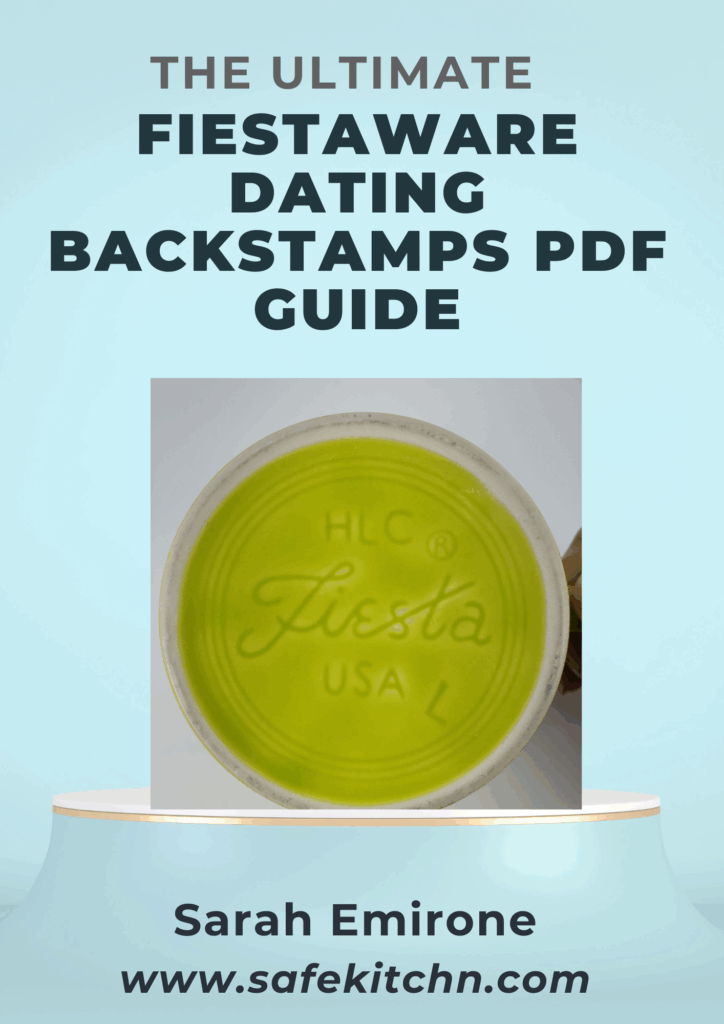
    • The backstamp on the bottom of each piece will indicate “MICROWAVE SAFE” if approved
    • Popular patterns like Yorktowne, Tea Rose, Naturewood, and Winterberry are all microwave safe

    Important Precautions:

    Always check the backstamp – look for the microwave-safe symbol or text
    Avoid pieces with metallic trim – gold or silver decorations are NOT microwave safe
    Vintage pieces from pre-1960s may not be microwave safe – use caution
    Don’t overheat – prolonged microwaving can cause any stoneware to become extremely hot
    Check for damage – cracked or chipped pieces should not be microwaved

    Best Practices:

    • Use moderate heating times
    • Use pot holders when removing (stoneware retains heat well)
    • Allow hot pieces to cool before washing with cold water (prevents thermal shock).

    HOW TO SAFELY USE OLDER PFALTZGRAFF COLLECTIONS

    If you own and love older Pfaltzgraff patterns but are concerned about potential lead content, here are some practical guidelines for safer use:

    1. Avoid using vintage pieces for serving or storing acidic foods (tomatoes, citrus, vinegar-based dressings)
    2. Don’t use older dishes in the microwave, as heat can accelerate lead leaching
    3. Consider using vintage pieces for decoration rather than everyday eating
    4. Wash older dishes by hand rather than in the dishwasher to prevent glaze deterioration
    5. Inspect pieces regularly for signs of wear, crazing, or scratches in the glaze
    6. Be especially cautious with pieces that have bright red, orange, or yellow decorations
    7. Don’t store food in vintage ceramic pieces for extended periods

    These precautions are particularly important for households with children, pregnant women, or those with certain health conditions that might make them more vulnerable to the effects of lead exposure.

    DOES PFALTZGRAFF CHIP EASILY?

    The durability of Pfaltzgraff dinnerware can vary depending on the specific collection and era of manufacture.

    Generally, Pfaltzgraff stoneware is known for its durability and resistance to chipping compared to more delicate ceramics like porcelain.

    The brand built its reputation partly on creating sturdy, everyday dishes that could withstand regular use.

    However, no ceramic product is entirely chip-proof. Factors affecting chip resistance include:

    • Material composition: Different Pfaltzgraff lines use varying materials, from earthenware to stoneware, each with different durability profiles
    • Glaze type: Some glazes provide better protection than others
    • Manufacturing era: Production techniques have evolved, potentially affecting durability
    • Usage patterns: Even durable dinnerware can chip if subjected to impacts or improper handling

    Modern Pfaltzgraff collections typically feature improved durability compared to vintage pieces, partly due to advances in manufacturing technology.

    Many current lines, like the Pfaltzgraff Silverware are specifically designed to withstand the rigours of everyday use, including dishwasher cleaning.

    DOES PFALTZGRAFF SCRATCH?

    Another common concern is Does Pfaltzgraff scratch? Like chipping, scratch resistance varies across different Pfaltzgraff collections and manufacturing eras.

    Pfaltzgraff stoneware generally offers good scratch resistance due to its hard glaze finish. However, it’s not impervious to scratching, especially when:

    • Metal utensils are used aggressively on the surface
    • Pieces are stacked without protective materials between them
    • Abrasive cleaning tools or harsh scouring pads are used
    • Pieces are subjected to cutting directly on the surface

    To minimize scratching on your Pfaltzgraff dinnerware:

    • Use wooden, silicone, or plastic utensils when possible
    • Avoid cutting directly on plates
    • Use non-abrasive cleaning materials
    • Place protective materials between stacked dishes during storage
    • Hand washing, particularly cherished or delicate pieces

    Modern Pfaltzgraff pieces typically feature improved scratch resistance compared to vintage items.

    CARE AND MAINTENANCE OF PFALTZGRAFF DINNERWARE

    Proper care can extend the life of your Pfaltzgraff collection and reduce potential concerns about lead or other issues:

    Dishwasher Safety

    Many modern Pfaltzgraff collections are dishwasher-safe. However, you may be wondering if Pfaltzgraff dishes are oven-safe. We have answered in another guide.

    Hand Washing Recommendations

    For vintage pieces or especially cherished items:

    • Use mild dish soap
    • Avoid abrasive scouring pads
    • Dry thoroughly before storing
    • Don’t soak for extended periods

    Storage Suggestions

    • Place protective materials between stacked dishes
    • Store in a stable environment away from extreme temperature changes
    • Display pieces vertically, when possible, to reduce stress on edges

    Signs It’s Time to Retire Pieces from Food Use

    Consider using pieces for decoration only if you notice:

    • Crazing (fine cracks in the glaze)
    • Chips that expose the clay body
    • Worn decoration, especially on eating surfaces
    • Very old pieces (pre-1980s) with bright colours.

    ALTERNATIVES FOR THOSE CONCERNED ABOUT LEAD

    If you’re particularly concerned about potential lead exposure, several alternatives exist:

    Lead-Free Dinnerware Options

    • Clear glass (like Pyrex, Anchor Hocking)
    • Plain white ceramics from brands that certify lead-free status
    • Stainless steel
    • Bamboo or other natural materials
    • Certified lead-free ceramic brands like the Mora Ceramic Brand (many now prominently advertise this status)

    When to Consider Replacing Older Pieces

    While it can be emotionally difficult to part with inherited or collected pieces, consider replacing items for daily use if:

    • They show signs of wear, especially in food contact surfaces
    • They were manufactured before the more stringent lead regulations
    • You’re serving vulnerable populations like children or pregnant women
    • You’ve had them tested, and they show concerning lead levels.

    CONCLUSION

    When it comes to the question “Does Pfaltzgraff contain lead?” the answer largely depends on when your pieces were manufactured.

    Modern Pfaltzgraff dinnerware is designed to meet current safety standards, while vintage pieces may contain higher levels of lead typical of their era.

    By understanding potential risks, testing options, and proper usage guidelines, you can make informed decisions about your beloved Pfaltzgraff collection.

    Whether you’re admiring the timeless beauty of Winterberry or cherishing heritage patterns passed down through generations, balancing appreciation for these ceramics with appropriate safety measures ensures you can enjoy your Pfaltzgraff dishes for years to come.

    For specific concerns about your collection, consider professional testing and always prioritize safety when it comes to items used for food service.


    Citations:

    1. FDA Regulations on Leachable Lead Limit in Flatware
    2. California 65 lead regulation
    3. EU Regulations on Ceramic Dinnerware.
  • Home Clay Firing: Complete Guide to Firing Pottery at Home

    You’ve shaped something with your own hands, something real, something yours. But there it sits on the table, fragile, raw, and nowhere near finished.

    You know it needs to be fired, but the idea of a professional studio kiln feels out of reach. What if you could do this at home?

    Home clay firing is more accessible than most beginners think, and people are doing it every day — in their backyards, garages, and even kitchen ovens.

    There are multiple methods: kiln firing, pit firing, and oven firing. Each one has its own rules, its own magic, and its own results.

    But which method is right for you, and how do you do it without ruining your work? Join me, let’s find out.

    What Is Clay Firing?

    clay firing earthenware

    Firing is the process of applying heat to clay to permanently harden it. Without it, your clay piece remains soft, fragile, and water-soluble, essentially useless for any practical purpose.

    Fire is what transforms a delicate clay shape into durable pottery.

    The Science Behind Firing Clay

    When clay is heated, several chemical changes happen that can’t be undone.

    First, all the physical water trapped between clay particles evaporates. Then, as temperatures rise further, chemically bonded water inside the clay molecules is driven out too.

    At even higher temperatures, typically above 1,000°C, a process called vitrification begins, where the clay particles fuse together, and the structure becomes glass-like and dense.

    This is what gives fired pottery its hardness and strength.

    Why Clay Must Be Fired

    Unfired clay will simply dissolve or crumble the moment it contacts water.

    Firing locks in the shape permanently, dramatically increases durability, and makes the piece suitable for everyday use, like holding water, food, or serving as a decorative object that will last decades.

    Can You Fire Clay at Home?

    home clay firing

    Yes, absolutely, but with some important caveats. Your options and success depend heavily on the type of clay you’re using and the firing method available to you.

    Some clays are purpose-built for home firing; others simply aren’t.

    Types of Clay Suitable for Home Firing

    Earthenware clay is the most beginner-friendly option. It fires at relatively low temperatures (around 1,000–1,150°C), which makes it achievable with a small home kiln or even a pit fire.

    Air-dry clay doesn’t require any firing at all; it hardens on its own, though it’s not waterproof or food-safe.

    Low-fire clay is another solid choice, designed specifically for lower temperature ranges that home setups can handle.

    Clay That Cannot Be Fired at Home Easily

    High-fire stoneware and porcelain clay both require temperatures well above 1,200°C — sometimes reaching 1,400°C.

    These temperatures are beyond the reach of most small home kilns, ovens, and pit fires.

    Attempting to fire them without proper equipment usually results in undercooked, brittle pottery. Stick to low-fire clays when you’re setting up at home.

    Methods for Firing Clay at Home

    There’s more than one way to fire clay at home, and each method produces different results. The right one depends on your budget, space, and the kind of finish you’re going for.

    Home Clay Firing for Beginners

    home clay firing for beginners

    If you’re just starting, the learning curve doesn’t have to be steep.

    The most important things to get right from the beginning are: choosing the correct clay, drying your piece completely before firing, and understanding your temperature limits.

    Most beginners do best starting with small, simple pieces using low-fire earthenware clay.

    Mistakes are easier to recover from at smaller scales, and the materials are affordable.

    Using a Kiln at Home

    A dedicated kiln is the most reliable way to fire clay at home. Electric kilns are the most popular choice for home potters. They’re clean, controllable, and relatively safe when used properly.

    Small tabletop kilns are also available for those with limited space. They’re ideal for small jewellery, tiles, or test pieces.

    The key advantage of any kiln is temperature control; you can program precise firing schedules and hold temperatures at exact stages.

    If you’re serious about home pottery, visiting a resource like home pottery wheel and kiln can help you understand what equipment setup works best for your space and budget.

    Home Clay Firing Process

    Whether you’re using a kiln, pit, or oven, the process follows a similar structure.

    Natural stoneware high fire white clay

    You start with completely dry clay (bone dry, not just surface dry), move through a slow initial heat phase to remove any remaining moisture, then bring the temperature up to the target firing range.

    Cooling must also be done gradually, as cracking pottery is often the result of cooling too fast, not just firing issues.

    Home Clay Firing Techniques

    Beyond the basic kiln method, there are several alternative techniques worth knowing.

    Pit firing uses an open ground pit filled with combustible materials.

    Raku firing involves pulling pottery from a hot kiln and placing it into a container of combustible material for a dramatic reduction effect.

    Saggar firing uses a protective container inside a larger firing chamber to create localised atmospheric effects.

    Each technique produces a unique surface aesthetic.

    How to Fire Clay in an Oven

    A regular kitchen or craft oven can fire certain types of clay, specifically polymer clay and some specially formulated air-dry clays that require low baking temperatures (around 110–130°C).

    However, a standard oven cannot reach the temperatures needed for earthenware or stoneware.

    low fire pottery white clay USA Made

    If you’re using polymer clay, follow the manufacturer’s instructions closely.

    Place pieces on a parchment-lined tray, bake at the correct temperature, and avoid opening the oven door mid-bake.

    It’s a practical starting point, but know its limits.

    How to Fire Pottery Without a Kiln at Home

    No kiln? No problem — there are real alternatives. Pit firing, barrel firing, and raku-style setups can all be done without a professional kiln.

    You can also look into community studio access or mobile kiln rental if you want occasional kiln-fired results without owning one.

    For those in Australia, checking out available Pottery kilns Australia resources can point you toward local options and suppliers that cater to home potters.

    Pit Firing Pottery at Home

    Pit firing is one of the oldest firing methods in human history, and it’s surprisingly achievable in a backyard.

    Dig a pit roughly 60–90cm deep, line the bottom with combustible material (wood, sawdust, newspaper), place your bone-dry pieces inside, layer more combustibles on top, and light it.

    The fire burns for several hours and reaches temperatures of around 600–900°C.

    Pit-fired pieces are not waterproof, but the surface patterns produced by the smoke and flames are genuinely beautiful.

    Pit Firing Clay

    For successful pit firing, the clay prep matters as much as the fire itself.

    Use low-fire or earthenware clay with an open, grogged body (clay mixed with fired clay particles) this helps withstand the uneven heat of an open fire.

    Burnishing the surface before firing gives a smoother, shinier result.

    Adding materials like salt, banana peel, or copper carbonate into the pit creates colour variations and unique surface effects that no kiln can replicate.

    How to Build a Brick Kiln for Pottery

    Building a simple brick kiln at home is entirely possible with basic materials.

    You’ll need fire bricks (not regular bricks — they crack under high heat), a metal grate for air circulation, and a heat source such as a wood fire or propane burner.

    Stack the bricks in a rectangular structure with gaps for airflow, create a shelf area for your pottery, and cap it loosely with a brick lid that allows some heat escape.

    A basic thermometer or pyrometer is essential so you know what temperature you’re reaching inside.

    How to Build a Kiln for Wood

    A wood-fired kiln is a step up from a simple pit but still manageable as a DIY project.

    The structure needs to be built from firebricks with a dedicated firebox at one end where wood burns, and a chamber where pottery sits.

    Ash from the wood settles on the pottery during firing and melts at high temperatures to form a natural glaze, a characteristic that many potters love.

    Wood kilns require sustained stoking over many hours and some practice to reach even firing temperatures throughout the chamber.

    How to Make Ceramics at Home Without a Kiln

    If you don’t have access to a kiln at all, your best options are air-dry clay or polymer clay.

    Air-dry clay is available at most craft stores, hardens at room temperature over 24–48 hours, and can be painted or sealed afterwards.

    Polymer clay can be cured in a regular oven. Neither produces waterproof, food-safe pottery, but both are perfectly suited for decorative pieces, practice work, and sculptural projects.

    They’re also excellent for building skills before investing in firing equipment.

    Equipment Needed for Home Clay Firing

    Essential Tools

    At minimum, you need a firing vessel (kiln, pit, or barrel), a pyrometer or thermometer to monitor temperature, and heat-resistant gloves.

    You should also have a timer or firing schedule written out before you start.

    Optional Equipment

    Kiln shelves allow you to stack multiple pieces efficiently. Stilts prevent glazed pottery from sticking to the shelf surface during glaze firing.

    Protective eyewear, a fire extinguisher nearby, and a kiln vent or exhaust fan are all worth having for safety and consistency.

    Step-by-Step Process for Firing Clay at Home

    Step 1 – Drying the Clay Completely

    This is non-negotiable. Any moisture trapped inside clay will turn to steam during firing, and steam expands rapidly — causing pieces to crack or literally explode.

    Leave your pieces to dry for at least 24–72 hours in a well-ventilated space. For thicker pieces, drying time can extend to a week or more.

    The clay should feel room temperature (not cool) to the touch when completely dry.

    Step 2 – Bisque Firing

    Bisque firing is the first firing stage. The goal is to fire the clay high enough to permanently harden it and drive out any remaining chemically bonded moisture, but not so high that it vitrifies before you’ve had a chance to apply glaze.

    Earthenware bisque firing typically happens around 1,000°C. The result is a porous, chalky surface that’s perfect for accepting glaze.

    Step 3 – Glaze Firing

    Once bisqued and glazed, the piece goes into a second firing — the glaze firing — at a higher temperature.

    The glaze melts and fuses to the clay surface, creating a smooth, glass-like coating.

    The exact temperature depends on the glaze type and clay body.

    Always fire pieces on stilts or leave the base unglazed to prevent them from fusing permanently to kiln shelves.

    Temperature Guide for Home Clay Firing

    Low-Fire Temperature Ranges

    Earthenware fires between 1,000°C and 1,150°C (cone 06–1). This is the most accessible range for home firing setups. Most small electric kilns comfortably reach these temperatures.

    Polymer clay and air-dry clay operate at much lower temperatures — 110–175°C — within reach of a standard oven.

    Signs the Clay Is Properly Fired

    A properly fired piece will have changed colour (earthenware typically turns from grey/tan to a warm terracotta red or buff).

    Tapping a fired piece produces a clear, resonant ring — unfired or underfired clay sounds dull and thuddy.

    The piece will also feel notably harder and denser than the unfired version.

    Safety Tips for Firing Clay at Home

    Fire and Heat Safety

    Ventilation is critical. Firing clay releases gases and particulates — especially during glaze firing.

    Always work outdoors or in a well-ventilated space with an exhaust fan. Never leave an active pit fire or kiln unattended.

    Use heat-resistant gloves when handling anything near the fire, and keep a fire extinguisher nearby.

    Let all pieces cool completely inside the kiln or pit before attempting to remove them.

    Common Firing Mistakes to Avoid

    The most common mistake is firing clay that isn’t fully dry — this leads to cracking or explosions.

    Overheating is another frequent issue, particularly in pit fires where temperature is difficult to control precisely.

    Poor airflow in a kiln or pit results in uneven firing and cold spots. Always go slow, especially during the initial heating phase, and don’t rush the cool-down.

    Common Problems in Home Clay Firing

    Cracking Pottery

    Cracking usually happens for one of two reasons: the clay wasn’t dry before firing, or the temperature changed too quickly.

    Heat the kiln or pit slowly at the start to allow even temperature distribution throughout the piece.

    Exploding Clay Pieces

    Explosions happen when trapped moisture or air pockets inside the clay expand rapidly under heat.

    Ensure your clay is completely bone dry and that you’ve wedged it thoroughly to remove air bubbles before shaping.

    Uneven Firing Results

    In open fires and pit firings, uneven heat distribution is common.

    Rotating pieces when possible, ensuring good airflow throughout the firing chamber, and not overcrowding pieces help achieve more consistent results.

    Tips for Beginners Firing Clay at Home

    Start with Small Projects

    Small pieces dry faster, heat more evenly, and are much easier to manage when you’re learning.

    Coasters, small bowls, pinch pots, and tiles are all excellent starting projects. Keep wall thickness consistent — uneven thickness causes uneven drying and firing.

    Use Low-Fire Clay

    Low-fire earthenware clay is your best friend as a beginner. It’s forgiving, widely available, and compatible with the temperature ranges achievable by most home setups.

    Once you’ve mastered the basics, you can experiment with mid-fire and high-fire clays using better equipment.

    Practice Temperature Control

    Temperature control is the skill that separates consistent results from frustrating ones.

    Invest in a basic pyrometer, keep a firing log, and take notes on what worked and what didn’t after every session.

    Over time, you’ll develop an intuition for your specific setup.

    Conclusion

    Home clay firing is a genuinely achievable craft, one that rewards patience, preparation, and curiosity.

    Whether you’re using a small electric kiln, digging a backyard pit, or working with air-dry clay in your living room, the fundamentals remain the same: dry your clay completely, respect your temperature ranges, and keep safety front of your mind.

    Beginners should start small, use low-fire clay, and build confidence before scaling up.

    The process isn’t always perfect; cracking and uneven results are part of learning, but every firing teaches you something. Pick your method, prepare well, and start creating.

  • Home Pottery Wheel and Kiln: Complete Guide to Setting Up a Home Pottery Studio

    You have a creative itch that just won’t quit. You’ve watched potters shape clay into beautiful bowls and mugs on a spinning wheel, and something in you thinks: I could do that.

    But then reality sets in: studio memberships are expensive, class schedules are rigid, and you want to create on your own terms.

    That’s exactly why setting up a home pottery wheel and kiln is becoming the choice for so many artists.

    The idea of throwing clay and firing pottery right in your own space sounds ideal, but is it really possible?

    What does it actually take to pull this off without wasting money on the wrong equipment? The answer depends on a few things you might not have considered yet.

    What Is a Pottery Wheel?

    A pottery wheel is a rotating platform that allows a potter to shape clay using centrifugal force and hand pressure. I

    t’s the cornerstone tool of wheel-thrown pottery and the reason those smooth, symmetrical shapes are achievable at all.

    Without a wheel, producing consistently round, centred forms by hand is incredibly difficult.

    How a Pottery Wheel Works

    The wheel spins horizontally, driven either by a foot pedal or an electric motor.

    The potter places a lump of clay at the centre of the spinning wheel head, then uses both hands to centre it, pressing inward and downward simultaneously.

    home pottery studion with electric kiln

    Once centred, the clay is opened, pulled up, and shaped through a series of deliberate hand movements. The rotation does the heavy lifting; the hands guide the form.

    Types of Pottery Wheels for Home Use

    Electric pottery wheels are the most practical for home use; they’re consistent, adjustable, and require less physical effort.

    Kick wheels are traditional, foot-powered, and beloved for their quiet operation and tactile rhythm, though they take up more space.

    Tabletop pottery wheels are compact and affordable, ideal for small spaces or beginners who want to test the craft before committing to a full-sized wheel.

    What Is a Pottery Kiln?

    A pottery kiln is a high-temperature oven specifically designed to fire clay into permanent ceramic.

    It’s what transforms your raw wheel-thrown piece, still fragile and water-soluble, into durable, hardened pottery. Without a kiln, the process is incomplete.

    Pottery Kiln

    Kilns work by heating clay to temperatures that trigger permanent chemical changes.

    The clay’s structure vitrifies, moisture is eliminated, and the material fuses into something fundamentally different from what it started as.

    Most pottery requires two separate firings: a bisque firing to harden the clay, followed by a glaze firing to seal and finish the surface.

    Understanding how to manage these firing cycles is one of the most important skills a home potter can develop.

    For a deeper look at the full firing process, the guide on home clay firing covers everything from pit firing to oven methods in detail.

    Types of Kilns for Home Pottery

    Electric kilns are the standard for home potters — they’re clean, controllable, and compatible with standard studio setups.

    Gas kilns produce distinctive atmospheric effects through flame and reduction but require outdoor space and careful setup.

    Small tabletop kilns are entry-level options great for testing glazes, firing small pieces, or working with low-fire clay.

    Each type has its place depending on your goals, available space, and budget.

    Why You Need Both a Pottery Wheel and a Kiln

    The wheel shapes; the kiln finishes. These two tools exist in a dependent relationship; neither is fully useful without the other if your goal is durable, functional pottery.

    home pottery wheel and kiln

    You can throw beautiful forms on the wheel, but without firing them, they’ll never be more than fragile clay.

    The Pottery-Making Process

    The workflow follows a clear sequence. Clay is thrown on the wheel and shaped into the desired form. Once shaped, it’s left to dry to a leather-hard state, then trimmed and refined.

    After that, it dries completely to bone-dry before its first firing (bisque). Once the bisque is fired, glaze is applied, and the piece goes back into the kiln for the glaze firing.

    That’s the complete cycle from raw clay to finished ceramic.

    Can You Do Pottery Without a Kiln?

    Yes, with some trade-offs. Air-dry clay is a genuine alternative for decorative pieces — it hardens at room temperature without any firing at all, though it’s not waterproof or food-safe.

    Community kiln options are another route: many local art centres, ceramic studios, and makerspaces offer kiln access by the hour or shelf space.

    For those in Australia, exploring Pottery ceramic kilns Australia resources can help locate suppliers, community kilns, and studio-grade equipment within reach.

    Choosing the Right Home Pottery Wheel

    Not all pottery wheels are built the same, and the right choice depends heavily on your skill level, available space, and how seriously you plan to pursue the craft.

    Making the wrong call here is an expensive lesson, so it’s worth taking the time to understand what actually matters.

    What Is the Best Pottery Wheel for Beginners?

    For beginners, the priority is simplicity, reliability, and reasonable cost. Entry-level electric wheels in the 1/3 to 1/2 horsepower range are more than sufficient for learning.

    spinning pottery wheel in a home studio

    Portable and tabletop models work well if space is tight. Budget options from reputable brands typically cost between $400–$700 and handle the basics well.

    Avoid the cheapest no-brand options — inconsistent motor performance makes learning centring even harder than it already is.

    Pottery Wheel for Adults

    Adult learners often benefit from a full-sized, floor-standing electric wheel with a sturdy wheel head (around 11–12 inches) and variable speed control.

    Adults tend to apply more pressure when learning to centre, so motor torque matters more than raw speed. A wheel with a reversible direction feature is also a nice advantage.

    Seating height and ergonomics are worth considering, too — an uncomfortable setup makes long throwing sessions genuinely difficult.

    Brent Pottery Wheel

    Brent is one of the most trusted names in pottery wheels and has been for decades.

    Their wheels are known for exceptional build quality, powerful and consistent motors, and longevity — a well-maintained Brent wheel can last 20–30 years.

    The Brent CXC and Brent IE models are popular mid-range and professional choices, respectively.

    They’re not the cheapest option on the market, but for serious home potters, the investment pays off over time.

    Shimpo Pottery Wheel

    Shimpo is another widely respected brand, particularly popular for its quiet motors and smooth speed control.

    The Shimpo RK-Whisper lives up to its name — it runs remarkably quietly compared to other electric wheels, which matters a great deal in a home setting where noise is a concern.

    Shimpo wheels also tend to be more compact than comparable Brent models, making them a good fit for smaller home studios.

    Professional Pottery Wheel

    A professional-grade pottery wheel typically offers a motor of 1 horsepower or more, a large wheel head (12–14 inches), heavy-duty construction, and precise variable speed from near-zero to full speed.

    Professional wheels are built for sustained daily use and can handle large clay loads — 25 pounds or more.

    If you’re planning to sell work or throw production pottery at home, investing in a professional wheel from the start saves money in the long run.

    Choosing the Right Kiln for Home Use

    Choosing a kiln is arguably a bigger decision than choosing a wheel. Kilns require more space, more electrical planning, and more safety considerations.

    Getting this right from the start matters.

    Home Pottery Kiln

    A home pottery kiln needs to balance capacity, temperature range, and practical installation requirements.

    Most home potters start with a small front-loading or top-loading electric kiln in the 2–7 cubic foot range.

    These are manageable in size, don’t require an industrial electrical supply, and can handle low to mid-fire work comfortably.

    A dedicated kiln space with good ventilation is essential, even electric kilns release fumes during firing that shouldn’t be inhaled.

    Mini Kiln for Pottery at Home

    Mini kilns (also called test kilns or tabletop kilns) are compact units designed for small-scale firing.

    They’re perfect for glaze testing, small jewellery pieces, tiles, or polymer clay. Most mini kilns reach temperatures of up to 1,100–1,300°C and run on standard household power.

    They’re an excellent low-commitment entry point — affordable, space-efficient, and surprisingly capable for the right type of work.

    Best Home Kiln for Pottery

    The best home kiln depends on what you’re making. For low-fire earthenware and glaze work, a small electric top-loader with digital controls is ideal.

    Brands like Skutt, Paragon, and L&L are consistently well-regarded. For mid-fire stoneware, you’ll want a kiln rated to at least Cone 6 (around 1,220°C).

    Digital controllers with programmable firing schedules make the process far more consistent and beginner-friendly than manual kilns.

    Kiln Size and Capacity

    Test kilns (under 1 cubic foot) suit glaze testing and small decorative pieces.

    Small studio kilns (2–5 cubic feet) are the sweet spot for most serious home potters — large enough to fire a meaningful batch, small enough to manage at home.

    Production kilns (7+ cubic feet) are for potters running a home business and require significant electrical and space planning before installation.

    Temperature and Firing Range

    Low-fire kilns reach up to around 1,100°C (Cone 06–1) and are suitable for earthenware and bright commercial glazes.

    Mid-range kilns fire to approximately 1,200°C (Cone 6) and work well for stoneware and most studio glazes.

    High-fire kilns reach 1,300°C and above (Cone 10+) for porcelain and traditional stoneware.

    For home use, Cone 6 is the practical sweet spot, broad enough in clay and glaze compatibility, achievable without an industrial-grade electrical supply.

    Setting Up a Home Pottery Studio

    A home pottery studio doesn’t require a lot of space, but it does require thoughtful planning. Getting the setup right from the start prevents headaches later.

    Can I Use a Pottery Wheel in My House?

    Yes — a pottery wheel can absolutely be used indoors.

    Electric wheels are quiet enough for home use, especially models like the Shimpo Whisper. The main considerations are flooring (clay and water will get everywhere — tile or concrete is ideal), drainage access nearby, and ceiling clearance.

    A dedicated room or garage corner works well. Some potters even work in apartments, using portable wheels and managing mess with rubber mats and covered storage.

    Electrical Requirements for Kilns

    This is where home kiln installation gets serious. Most small home kilns require a dedicated 240V circuit — the same type used for electric ovens or dryers.

    Larger kilns may require 50–60 amp service. Always have a licensed electrician install the circuit and check your home’s panel capacity before purchasing a kiln.

    Running a kiln on an inadequate circuit is a fire hazard and will damage the kiln’s controller over time.

    Organizing Your Workspace

    Place the wheel near a water source and with enough room to walk around it comfortably, about 3 feet of clearance on each side.

    Store clay in sealed bins to prevent drying. Keep tools within arm’s reach of the wheel: a simple pegboard or wall-mounted tool rack works perfectly.

    Position the kiln away from flammable materials, with at least 12 inches of clearance on all sides, and in a space with ventilation or an exhaust fan.

    Safety Tips for Using a Pottery Wheel and Kiln at Home

    Kiln Safety

    Always install a kiln vent or work in a space with strong ventilation. Kilns release carbon monoxide, sulfur compounds, and other fumes during firing, especially during glaze firing.

    Never leave an active kiln unattended for extended periods. Use heat-resistant gloves when handling elements or loading a warm kiln.

    Keep a fire extinguisher in the studio and ensure the kiln has an automatic shutoff or a kiln sitter to prevent overfiring.

    Studio Safety

    Dry clay dust is a genuine health hazard. Silica particles from clay can cause long-term respiratory damage if inhaled regularly.

    Wet mop or wet wipe all surfaces rather than sweeping dry dust. Wear an N95 respirator when mixing dry glazes or reclaiming clay.

    Wash your hands thoroughly before eating or touching your face. These habits feel minor, but they matter a lot over the course of years in the studio.

    Cost of Setting Up a Home Pottery Wheel and Kiln

    Average Price of Pottery Wheels

    Entry-level electric wheels: $400–$700. Mid-range models (Shimpo, Brent entry): $800–$1,200.

    Professional-grade wheels (Brent CXC, Shimpo RK-Whisper): $1,400–$2,000+. Kick wheels: $600–$1,500 depending on construction and brand.

    Tabletop or portable mini wheels: $200–$450.

    Average Price of Kilns

    Mini/test kilns: $300–$600. Small home studio kilns (2–4 cubic feet): $700–$1,500. Mid-size kilns (5–7 cubic feet): $1,500–$3,000.

    Larger production kilns: $3,000–$6,000+. Factor in $150–$400 for professional electrical installation on top of the kiln purchase price.

    Additional Equipment Costs

    Basic tool sets run $30–$80 and include wire tools, ribs, sponges, and trimming tools. Clay costs roughly $20–40 per 25 lb bag, depending on type.

    Glazes range from $10–25 per pint for commercially prepared options. A kiln vent system adds $150–$300. Kiln shelves and posts are another $50–$200.

    Budget around $300–$500 for consumables and accessories when setting up.

    Beginner Tips for Home Pottery

    Start with Small Projects

    Small projects let you build skills faster without the frustration of failing on something ambitious. Pinch bowls, small mugs, simple plates, and coasters are all excellent starting points.

    beginner home electric pottery studio wheel

    They dry faster, centre more easily, and fit multiple pieces in a single kiln firing.

    Once centring and pulling walls feel natural, you’ll have the foundation to tackle larger, more complex forms.

    Practice Centering Clay

    Centring is the single most important skill on the wheel, and it’s the one beginners struggle with most.

    It requires simultaneous inward and downward pressure with both hands while the wheel spins. Don’t rush it.

    A wobbly, uncentred lump will cause problems through every stage that follows. Spend the first several sessions doing nothing but centring and opening.

    It’s not glamorous, but it’s the foundation everything else is built on.

    Learn Basic Firing Techniques

    Start with low-fire earthenware and simple commercial glazes.

    Learn to read your kiln’s behaviour, how it heats, where the hot spots are, and how long it takes to cool.

    Keep a firing log from day one. Note the clay type, glaze, firing temperature, and results after every session.

    Over time, that log becomes one of your most valuable studio resources, saving you from repeating mistakes and helping you replicate successes.

    Conclusion

    A home pottery wheel and kiln setup is more achievable than most people think — but it works best when you go in with clear expectations.

    The wheel and the kiln are partners in the same process: one shapes, one finishes.

    Start with compact, reliable equipment suited to your space and budget, take ventilation and electrical requirements seriously, and give yourself time to build skills gradually.

    Pottery rewards patience over perfection. Begin with small projects, use low-fire clay, and let each firing teach you something.

    With the right setup and a little consistency, a productive home pottery studio is absolutely within reach.

  • Pottery Kilns Australia: Complete Guide to Buying and Using Kilns in Australia

    You’ve put weeks into your craft. The clay is shaped, dried, and sitting there waiting for the one thing that turns it from fragile raw work into something permanent and real: a firing.

    But finding the right kiln in Australia feels overwhelming. Which type do you actually need? What will it cost? Can you even run one at home safely?

    These are the exact questions that stop people from moving forward. Pottery kilns Australia-wide options are broader than most beginners realise, and the right choice depends on a few key factors that are easy to get wrong without the right guidance.

    This guide covers all of it, but where you should start might not be where you expect.

    What Is a Pottery Kiln?

    A pottery kiln is a high-temperature chamber designed to fire clay at controlled temperatures, transforming it from a soft, fragile material into a hard, permanent ceramic.

    It is the single most essential piece of equipment in any pottery studio; without it, the entire process is incomplete.

    How a Pottery Kiln Works

    Kilns work by gradually heating the clay through a carefully managed firing cycle.

    The temperature rises slowly in stages at first to allow residual moisture to escape without causing cracks or explosions, then steadily climbs to the target temperature, where the clay body and glazes undergo permanent chemical transformation.

    Once peak temperature is reached, the kiln holds that temperature for a set period before cooling down slowly. Rushing any stage of this cycle is where most firing problems begin.

    Why Kilns Are Essential for Pottery

    Unfired clay remains water-soluble and structurally weak; it will soften and break down the moment it contacts moisture.

    Firing permanent changes. The heat drives out all moisture, hardens the clay body, and during glaze firing, melts the glaze into a glass-like seal across the surface.

    The result is a durable, food-safe ceramic piece that can last for decades. There is simply no alternative to firing when it comes to producing functional, long-lasting pottery.

    Types of Pottery Kilns Available in Australia

    Pottery Kilns Australia

    Australia’s ceramics market has grown considerably in recent years, and with that growth has come a wider range of kiln types and price points than ever before.

    Understanding what each type offers helps you make the right call from the start.

    Electric Pottery Kilns

    Electric kilns are by far the most common choice for home studios and small ceramic businesses across Australia.

    They’re clean, quiet, and easy to control. Most modern electric kilns include digital controllers that let you program precise firing schedules without needing to monitor the kiln constantly.

    electric pottery kiln slightly open

    They run on standard 240V Australian power (with a dedicated circuit) and are available in a wide range of sizes.

    For beginners, especially, an electric kiln is almost always the right starting point.

    Ceramic Kilns in Australia

    The Australian ceramics community has seen strong growth in both hobbyist and professional kiln use over the past decade.

    Ceramic kilns in Australia range from compact tabletop test units used by jewellers and glaze experimenters, through to large front-loading studio kilns used by working ceramicists producing production runs.

    stone air dry modeling clay

    Gas kilns are used by experienced potters who want the atmospheric effects of reduction firing — the flame interacts with the clay and glaze in ways an electric kiln cannot replicate.

    They require outdoor installation, gas line access, and more technical knowledge to operate safely.

    Small Pottery Kiln Australia

    Small tabletop kilns have become increasingly popular across Australia for hobbyists, jewellers, and potters who work with small-scale pieces.

    These compact units typically hold a firing chamber of under one cubic foot, reach temperatures suitable for low to mid-fire work, and run on standard household power without requiring a dedicated circuit.

    They’re an excellent entry point — affordable, space-efficient, and genuinely capable for the right type of work.

    If your focus is glaze testing, tiles, small decorative pieces, or polymer clay, a small kiln is a smart first purchase.

    Choosing the Right Pottery Kiln in Australia

    Choosing a kiln isn’t just about picking a size or brand. It’s about matching the kiln to how you actually work your clay types, your firing goals, your available space, and your budget.

    Get this right, and the kiln will serve you for decades. Get it wrong, and it becomes an expensive, underused piece of equipment.

    Kiln Size and Capacity

    Small hobby kilns (under 2 cubic feet) suit beginners, glaze testers, and those making small decorative pieces.

    Medium studio kilns (2–6 cubic feet) are the sweet spot for most serious home potters — large enough for a meaningful batch of work, manageable in a home studio environment.

    Large production kilns (7+ cubic feet) are for potters running a business or producing high volumes and require significant space, electrical planning, and installation work before they can be used.

    Temperature Range and Firing Types

    Low-fire kilns reach up to around 1,100°C (Cone 06–1) and are well-suited for earthenware and bright commercial glazes.

    Mid-range kilns fire to approximately 1,220°C (Cone 6), the most versatile range for Australian home studio potters, compatible with a wide range of stoneware clays and studio glazes.

    High-fire kilns exceed 1,280°C (Cone 10+) and are used for porcelain and traditional stoneware; they require a more robust electrical supply and are less common in home studio setups.

    Power Requirements in Australia

    Australian homes run on 240V single-phase power, which is sufficient for most small to medium home studio kilns.

    However, most kilns above tabletop size require a dedicated 15–32 amp circuit separate from your household wiring.

    Larger kilns may need three-phase power, which is not standard in residential properties.

    Always engage a licensed electrician to assess your switchboard capacity and install the dedicated circuit before purchasing a kiln.

    Attempting to run a kiln on an inadequate circuit is a genuine fire risk.

    Pottery Kiln Prices in Australia

    Kiln pricing in Australia varies considerably depending on size, brand, and features.

    Understanding the price ranges across categories helps set realistic expectations and prevents underspending on a unit that won’t meet your needs or overspending on features you don’t yet require.

    Entry-Level Kilns

    Small tabletop kilns suitable for beginners and hobbyists typically range from AUD $400 to $900.

    These units handle low to mid-fire work, fit on a bench or shelf, and run on standard household power.

    They’re ideal for testing glazes, firing small jewellery pieces, or learning the basics of kiln operation before committing to a larger unit.

    At this price point, brands like Paragon and locally distributed compact models offer reasonable reliability for the investment.

    Mid-Range Studio Kilns

    Mid-range studio kilns capable of handling a proper batch of pottery — typically 3–6 cubic feet — run from AUD $1,800 to $4,500 in the Australian market.

    These are the most popular categories for serious home potters and small ceramic studios.

    Digital controllers, programmable firing schedules, and reliable elements are standard features at this level.

    This is also the price range where brands like Skutt, Woodrow, and locally sourced options become available with Australian distributor support.

    Skutt Kilns Australia

    Skutt is one of the most respected kiln brands internationally and has a growing presence in Australia through specialist ceramic suppliers.

    Skutt kilns are known for their precision digital controllers (the KilnMaster system), even heat distribution, and long-term reliability.

    The Skutt KM-818 and KM-1027 are popular mid-range models that suit Australian home studio setups well.

    Pricing for Skutt kilns in Australia typically sits in the AUD $3,000–$6,500 range, depending on model and size, with warranty support available through authorised Australian distributors.

    Professional and Large Kilns

    Professional production kilns — those used by working ceramicists selling work or running studio businesses — range from AUD $5,000 to over $15,000 depending on size and specification.

    At this level, three-phase power is often required, and installation costs (electrician, kiln furniture, ventilation system) can add another $1,000–$3,000 on top of the purchase price.

    These are long-term investments built to handle daily use across many years.

    Where to Buy Pottery Kilns in Australia

    Knowing where to buy matters as much as knowing what to buy. The right supplier provides not just the kiln but also ongoing support, spare parts, and technical advice when things go wrong.

    Australian Kiln Suppliers

    Several specialist ceramic supply companies operate across Australia, stocking kilns from both international brands and locally manufactured units.

    Companies like Walker Ceramics, Ceramic Supply (Sydney and Melbourne), and various state-based pottery suppliers carry a range of electric kilns and accessories.

    Buying through a local distributor gives you access to warranty support, Australian-compliant electrical specifications, and the ability to inspect the unit before purchase, advantages worth paying a modest premium for.

    Buying Kilns Online

    Online purchasing is increasingly common for kilns in Australia, particularly for smaller tabletop units.

    The key considerations are shipping costs (kilns are heavy and fragile — freight from interstate or overseas adds significantly to the final price), warranty terms in Australia, and whether the unit is wired to Australian electrical standards.

    Always confirm that an online purchase comes with local warranty support and that the seller can provide documentation for the electrical specifications before buying.

    Second Hand Kiln for Sale Australia

    The second-hand kiln market in Australia is active — platforms like Gumtree, Facebook Marketplace, and ceramics community groups regularly feature used kilns at 30–60% below new pricing.

    The savings can be significant, but second-hand kilns carry real risks.

    Always inspect the elements (they wear out and are expensive to replace), check the brickwork for cracks or damage, test the controller if possible, and verify the electrical wiring meets current Australian standards.

    If you’re not confident assessing a kiln, bring someone experienced with you before committing.

    Setting Up a Pottery Kiln in Australia

    Buying the kiln is only part of the process. Setting it up properly with the right space, electrical supply, and ventilation is what determines whether it operates safely and consistently for years.

    Space and Studio Requirements

    Kilns need clear space around them on all sides, a minimum of 30 cm clearance from walls and other surfaces, and ideally more.

    They should not be placed near flammable materials, in enclosed spaces without ventilation, or directly on timber flooring without a heat-resistant base.

    A garage, purpose-built studio, or outdoor covered area with a weatherproof cover is the most practical location for Australian home studio kilns.

    Indoor placement is possible with proper ventilation but requires more careful planning.

    Electrical Installation

    This step is non-negotiable in Australia: kiln electrical installation must be carried out by a licensed electrician.

    Most Australian states require a dedicated circuit breaker and appropriately rated cabling for any kiln above tabletop size.

    Attempting a DIY electrical connection for a kiln is illegal in most states and a genuine safety risk.

    Budget AUD $200–$600 for professional electrical installation, depending on your existing switchboard capacity and the distance from the board to the kiln location.

    Ventilation and Heat Management

    Kilns release carbon monoxide, sulfur compounds, and other fumes during firing, particularly during glaze firing.

    An inline kiln vent system (such as the Skutt Envirovent or equivalent) draws fumes down and out of the studio, preventing buildup.

    At a minimum, ensure strong passive ventilation through open windows or vents during every firing.

    Never fire a kiln in a completely enclosed space. In hot Australian summers, heat management also matters.

    Kilns generate significant ambient heat and should not be operated in spaces that exceed safe temperatures for the controller electronics.

    Safety Guidelines for Using Pottery Kilns

    Fire and Heat Safety

    Keep the area around an operating kiln completely clear of flammable materials, such as paper, fabric, chemicals, and timber, which should all be stored well away from the kiln during firing.

    Use heat-resistant gloves when loading a warm kiln or inspecting elements. Never look directly into a peephole without eye protection rated for high-temperature observation.

    Install a kiln sitter or rely on your digital controller’s automatic shutoff function rather than manually timing firings.

    A fire extinguisher should always be accessible in the studio.

    Managing Kiln Fumes

    The fumes produced during glaze firing are a real health concern and should never be dismissed.

    Metallic oxide glazes, particularly those containing lead, barium, lithium, or manganese, produce toxic vapours at firing temperatures.

    Even standard commercial glazes release gases that should not be inhaled over time.

    Run a kiln vent during every firing, keep the studio door or window open, and avoid spending extended time in the firing space while the kiln is running.

    This is not overcaution; it is standard studio practice.

    Tips for Beginners Using Pottery Kilns in Australia

    Pottery Kiln for Beginners

    If you’re just starting, the most important decision you can make is choosing a kiln that matches your actual current needs rather than your future aspirations.

    A compact electric kiln with a digital controller, rated to at least Cone 6, and in the 2–3 cubic foot range is the ideal beginner setup for most Australian home potters. It’s manageable, versatile, and forgiving enough to learn on without overwhelming you with complexity.

    For more on the full process of getting started with clay at home, the guide on firing clay at home is a useful companion read that covers the complete firing process from raw clay through to finished ceramic.

    Learn Basic Firing Schedules

    A firing schedule is simply a programmed set of temperature ramp rates and hold times that guides the kiln through its firing cycle.

    Most digital kilns come with pre-loaded schedules, but learning to read and adjust them yourself is one of the most valuable skills a home potter can develop.

    Start with the manufacturer’s recommended schedule for your clay type, keep a firing log from day one, and adjust gradually based on your results.

    Understanding your kiln’s behaviour, its hot spots, and its actual vs. displayed temperature takes time but pays off in consistent results.

    Practice with Low-Fire Clay

    Low-fire earthenware clay is the most forgiving material for beginners and the easiest to fire successfully in a home studio kiln.

    It reaches maturity at lower temperatures, costs less per kilogram than stoneware or porcelain, and is compatible with a wide range of bright commercial glazes.

    Start here, get comfortable with the firing process, and move to mid-fire stoneware once you understand how your kiln behaves.

    For a broader overview of how a wheel and kiln work together in a home setup, pottery wheel and kiln use at home covers the full studio workflow from throwing to final firing.

    Conclusion

    Choosing the right kiln in Australia comes down to matching the equipment to how you actually work.

    finished Australian studio pottery

    Size, temperature range, power requirements, and safety all matter and getting those fundamentals right from the start saves time, money, and frustration.

    For most beginners, a compact electric kiln with digital controls is the most practical and versatile entry point into home studio pottery.

    Take ventilation and electrical installation seriously, buy from a supplier who can offer ongoing support, and invest time in learning basic firing schedules.

    The ceramics community in Australia is thriving, and with the right kiln setup, there’s no reason you can’t be a part of it.

  • Apilco Pasta Bowls

    You’ve just crafted the perfect carbonara, its silky sauce glistening with promise.

    But as you go to plate this masterpiece, you realize your regular dinner plate isn’t doing justice to this Italian revelation.

    This is where the magic of Apilco pasta bowls enters the scene.

    Just as a frame enhances a painting, these French-crafted vessels elevate your pasta from mere sustenance to a dining experience worthy of a Parisian bistro or Roman trattoria.

    What makes these bowls so special? Why do professional chefs and home cooks alike swear by them? And could they be the missing piece in your culinary arsenal?

    Let’s dive into the world of these remarkable bowls that have been gracing tables from the bustling streets of New York to the intimate cafés of the French Riviera.

    THE APILCO LEGACY: WHERE FRENCH CRAFTSMANSHIP MEETS ITALIAN TRADITION

    When it comes to dinnerware that marries form and function, few brands command the respect that Apilco does.

    Apilco Pasta Bowls

    Since the 19th century, this French company has been crafting porcelain that graces both professional kitchens and sophisticated homes.

    If you’re already familiar with their Apilco cereal bowls or their elegant Apilco espresso cups, you’ll know the level of quality we’re talking about.

    WHAT SETS APILCO PASTA BOWLS APART?

    1. Professional-Grade Durability:

       – Chip-resistant porcelain construction

       – Commercial-grade glazing

       – Thermal shock resistant

       – Microwave and dishwasher safe

    2. Thoughtful Design Elements:

       – Wide rim for easy handling

       – Perfect depth-to-width ratio

       – Elegant white finish that showcases food

       – Stackable design for practical storage

    Examples of Apilco pasta bowl patterns include Classic Whiteware, Tres Grande, Beaded Hemstitch, and Apilco Tuileries.

    Gibson Home Porcelain Pasta Bowl

    They mostly have a glossy finish, perfect for all occasions, mostly contemporary style designs of white porcelain with either impressed, stamped, or printed Apilco porcelain France Logo at the bottom.

    Here are our top pick alternatives that you will love, giving you the same desired outcome as the Apilco brand:

    Sweese Large Porcelain Pasta Bowl

    Sweese Large Porcelain Pasts Bowl

    Malacasa Large Soup/ Pasta Porcelain Bowl

    Gibson Home Porcelain chip-resistant Pasta and Soup Serving Bowls

    Mora Ceramic Large Bowl

    Leratio Reactive Glaze Pasta ceramic Bowl for Salad, dessert, pizza, fruit, etc.

    THE SCIENCE BEHIND THE SHAPE: WHY PASTA BOWLS MATTER

    Mora Ceramic Perfect Size Pasta Bowl Set For Salad, Soup And Dessert

    According to pasta experts, the shape of your pasta bowl isn’t just about aesthetics – it’s about the entire dining experience. The typical Apilco pasta bowl features:

    • 23-25cm diameter
    • 4-5cm depth
    • Gently sloped sides
    • Pronounced rim
    Malacasa Porcelain Serving Soup Bowls

    This design isn’t arbitrary. A study by the International Journal of Gastronomy and Food Science found that bowl shape significantly impacts temperature retention and sauce distribution.

    TRADITIONAL PASTA BOWL VS. SOUP BOWL: UNDERSTANDING THE DIFFERENCE

    FEATUREPASTA BOWLSOUP BOWL
    Diameter23 – 25cm18 – 20cm
    Depth4 – 5cm7 – 8cm
    ShapeWide, shallowDeep, narrow
    Primary UseLong Pasta, dressed dishesBroths, soups
    Temperature RetentionModerateHigh

    THE VERSATILITY OF APILCO PASTA BOWLS

    While these bowls excel at serving pasta, their utility extends far beyond Italian cuisine. They’re perfect for:

    1. Asian Noodle Dishes

    2. Grain

    3. Salads

    4. Risotto

    5. One-Bowl Meals

    THE ITALIAN CONNECTION: HOW ITALIANS USE PASTA BOWLS

    In Italy, the pasta bowl (known as “piatto fondo” or “fondina”) is considered essential.

    According to Chef Massimo Bottura (Osteria Francescana), proper pasta serving requires:

    • Room for the pasta to breathe
    • Space for sauce distribution
    • Adequate depth for tossing
    • Temperature maintenance

    SIZE GUIDE: CHOOSING THE RIGHT APILCO PASTA BOWL

    Different pasta dishes require different sizes. Here’s a quick guide:

    – Individual Serving: 23cm

    – Family Style: 28cm

    – Professional Kitchen: 30cm

    CARE AND MAINTENANCE

    To ensure your Apilco French bowls maintain their excellence:

    1. Cleaning

       – Dishwasher safe

       – Hand washing is recommended for optimal longevity

       – Avoid extreme temperature changes

    2. Storage

       – Stack carefully with protective layers

       – Store in a dry cabinet

       – Avoid excessive weight on the bottom bowls

    HEALTH AND SAFETY CONSIDERATIONS

    Apilco pasta bowls are manufactured according to strict European Union safety standards, ensuring:

    – Lead-free porcelain

    – Food-safe glazing

    – Non-toxic materials

    – Heat-resistant construction

    MAKING THE MOST OF YOUR APILCO PASTA BOWLS

    Perfect Pairings:

    Long pasta varieties: Spaghetti, Linguine, Fettuccine

    Short pasta: Penne, Fusilli, Farfalle

    Sauced dishes: Carbonara, Alfredo, Arrabbiata

     “The white porcelain of Apilco bowls creates the perfect canvas for pasta presentation. The depth allows for proper sauce coating, while the width ensures the pasta doesn’t get crowded.”

    • Professional Tips: According to most renowned Chefs

    INVESTMENT VALUE

    While Apilco pasta bowls represent a premium investment, their durability and versatility make them cost-effective over time; the same applies to other French Porcelain brands.

    According to hospitality industry statistics, professional-grade porcelain typically lasts 5-7 years longer than standard dinnerware.

    COMPREHENSIVE GUIDE TO PASTA BOWL QUESTIONS

    Question: Are pasta bowls healthy?

    Answer: Pasta bowls themselves are healthy to use when made from food-safe materials like porcelain or ceramic. However, their design can influence portion control:

    – The typical 23cm pasta bowl helps with proper portion sizing

    – Wide rim design prevents overflow and messy eating

    – The shallow depth discourages oversized portions

    – Food-grade materials like porcelain are non-toxic and won’t leach chemicals

    Question: What is the difference between pasta and soup bowls?

    Answer: Key differences include:

    – Depth: Pasta bowls are shallower (4-5cm) while soup bowls are deeper (7-8cm)

    – Diameter: Pasta bowls are wider (23-25cm) compared to soup bowls (18-20cm)

    – Shape: Pasta bowls have gently sloping sides; soup bowls have steeper sides

    – Rim: Pasta bowls typically have a wider rim for easier handling

    – Purpose: Pasta bowls are designed for tossing and sauce distribution; soup bowls are designed to contain liquid

    Question: What are pasta bowls used for?

    Answer: Pasta bowls are versatile and can be used for:

    1. Long pasta dishes (spaghetti, linguine, fettuccine)

    2. Short pasta varieties (penne, fusilli)

    3. Grain bowls and rice dishes

    4. Large salads

    5. Noodle dishes from various cuisines

    6. One-bowl meals

    7. Risotto and other creamy dishes

    Question: What is another name for a Pasta Bowl?

    Answer: Pasta bowls are known by several names:

    – Piatto fondo (Italian)

    – Fondina (Italian)

    – Pasta plate

    – Deep plate

    – Coupe Bowl

    – Low Bowl

    – Bistro Bowl

    Question: Should pasta be served on a plate or a bowl?

    Answer: According to Italian culinary tradition, pasta should be served in a bowl-like vessel because:

    – Bowls retain heat better than flat plates.

    – The shape allows for better sauce distribution.

    – It’s easier to twirl pasta with the sloped sides.

    – The depth prevents the sauce from spilling.

    – The design facilitates proper eating technique with a fork and spoon.

    Question: What is the ideal size of a pasta Bowl?

    Answer: The ideal size varies by use:

    – Individual serving: 23-25cm diameter.

    – Family-style serving: 28-30cm diameter.

    – Professional restaurant use: 30-32cm diameter.

    – Depth: Generally, 4-5cm.

    – Rim width: Usually 2-3cm.

    Question: How many types of pasta dishes do we have?

    Answer: There are hundreds of pasta dishes, but they generally fall into these categories:

    1. Long pasta dishes (spaghetti, linguine, etc.)

       – Carbonara

       – Bolognese

       – Alfredo

    2. Short pasta dishes (penne, fusilli, etc.)

       – Arrabbiata

       – Vodka sauce

       – Baked dishes

    3. Filled pasta dishes (ravioli, tortellini)

    4. Fresh pasta dishes

    5. Baked pasta dishes

    6. Cold pasta dishes

    7. Seafood pasta dishes

    Question: What does a Pasta Bowl look like?

    Answer: A typical pasta bowl has these characteristics:

    – Wide circular shape

    – Shallow depth

    – Gently sloping sides

    – Pronounced rim

    – Usually white or neutral color

    – Smooth interior surface

    – Elegant, simple design

    – Stackable form

    Question: Do Italians use Pasta bowls?

    Answer: Yes, Italians traditionally use pasta bowls (piatto fondo) because:

    – It’s considered the proper way to serve pasta.

    – The design facilitates traditional Italian eating methods.

    – Helps maintain proper temperature.

    – Allows for the correct presentation.

    – Enables proper sauce distribution.

    – Part of authentic Italian dining culture.

    Question: What is the point of a Pasta Bowl?

    Answer: The pasta bowl’s design serves multiple purposes:

    1. Temperature Management: Maintains heat better than flat plates

    2. Sauce Distribution: Allows sauce to pool naturally

    3. Eating Mechanics: Facilitates twirling pasta and gathering sauce

    4. Presentation: Creates an appealing visual presentation

    5. Portion Control: Helps with appropriate serving sizes

    6. Practicality: Prevents spillage and mess

    7. Versatility: Works for multiple dish types

    Question: What is a pasta bowl with holes called?

    Answer: A pasta bowl with holes is called a:

    – Colander bowl

    – Draining the pasta bowl

    – Berry bowl (when smaller)

    – Strainer bowl

    These are typically used for:

    – Draining freshly cooked pasta

    – Washing vegetables

    – Serving berries

    – Rinsing small ingredients

    Question: How is pasta traditionally eaten in Italy?

    Answer: Traditional Italian pasta-eating customs include:

    1. Using proper pasta bowls (piatto fondo)

    2. Eating with a fork only (spoon is optional)

    3. Twirling pasta against the bowl’s sides

    4. Never cut long pasta

    5. Serving moderate portions

    6. Eating pasta as a first course (primo)

    7. Keeping pasta and sauce properly combined

    Question: Why are pasta bowls shaped like that?

    Answer: The distinctive shape of pasta bowls is designed for:

    1. Functionality:

       – Allows proper twirling of pasta

       – Enables even sauce distribution

       – Prevents spillage

    2. Temperature Control:

       – Deep enough to retain heat

       – Wide enough to allow steam to escape

    3. Ergonomics:

       – Wide rim for easy handling

       – Comfortable eating angle

       – Stable base prevents tipping

    4. Presentation:

       – Shows off the dish properly

       – Creates appealing visual depth

       – Maintains proper portion appearance

    WHERE TO FIND AUTHENTIC APILCO PASTA BOWLS

    Authorized retailers

    Selected department stores

    Professional kitchen suppliers

    Direct from Apilco’s website

    Ready to elevate your dining experience? Start with the foundation – a set of perfectly crafted Apilco pasta bowls that will serve you well for years to come.

    CONCLUSION

    Apilco French bowls represent more than just dinnerware – they’re an investment in your culinary journey.

    Whether you’re a professional chef or a home cooking enthusiast, these bowls offer the perfect balance of form and function.

    Their timeless design, exceptional quality, and versatility make them an essential addition to any kitchen that takes food presentation seriously.

  • Apilco Cereal Bowls

    Rise and shine, my friends. As the sun’s first golden rays peek through the curtains, it’s time to start your day right – with a bowl of satisfying cereal that’s as stylish as it is.

    The Apilco Cereal Bowls are designed with you in mind, revolutionizing your breakfast routine.

    You see, Apilco isn’t your average kitchenware brand. These folks have been perfecting the art of porcelain-making for over a century, and it shows in every exquisite detail of their cereal bowls.

    But don’t just take my word for it—let’s explore why Apilco is the crème de la crème when it comes to elevating your morning meal.

    THE HISTORY AND PRESTIGE OF APILCO PORCELAIN

    Apilco’s roots can be traced back to the 1920s when the Pillivuyt family established their porcelain factory in the Limousine region of France.

    This area has long been renowned for its high-quality kaolin, the primary ingredient in true porcelain.

    Over the decades, Apilco has perfected the art of porcelain production, earning a reputation for unparalleled durability, chip resistance, and a signature translucent sheen.

    But what truly sets Apilco apart is its commitment to time-honored French craftsmanship.

    Each piece, including their iconic cereal bowls, is meticulously hand-finished to ensure flawless quality.

    The brand’s attention to detail and dedication to excellence have solidified its status as one of the most prestigious porcelain manufacturers in the world.

    THE VERSATILITY OF APILCO CEREAL BOWLS

    Apilco cereal bowls are designed to be more than just functional; they are the canvas upon which you can elevate your daily breakfast rituals.

    Apilco Cereal Bowls

    Their generous size and classic, yet contemporary silhouette make them ideal for a wide range of uses, from serving hearty oatmeal to refreshing overnight chia puddings.

    However, the versatility of Apilco bowls extends beyond the breakfast table.

    Sweese Cereal Porcelain Soup Microwave Safe Bowl Sets

    Their durable construction and microwave-safe design allow them to be used for everything from reheating leftovers to serving delectable homemade soups.

    When it comes to entertaining, Apilco bowls made with high-fired porcelain seamlessly transition from the kitchen to the table, adding a touch of elegance to your presentations.

    Mora Ceramic Bowl For Cereal, Salad, Pasta, Soup And Dessert

    For those who prefer the style of Apilco’s pasta bowls or espresso cups, be sure to check out our previous articles on those products as well.

    In addition, one thing I enjoy and like about this versatile porcelain dinnerware is that it can comfortably accommodate hearty portions.  

    Selamica Blue And White Porcelain Cereal Bowl Set For Salad And Pasta

    Do you own a restaurant? Yeah, you can get them for your chefs, perfect for fine dining and it is designed to help chefs showcase the textures and colours of various foods.

    Popular collections of Apilco cereal bowls are:

    Apilco Tuileries Porcelain cereal bowl

    Classic whiteware bowl

    Apilco Tradition Porcelain Bowl

    Apilco Tres Grande Porcelain Cereal Bowl

    While the 5 best alternatives are:

    Sweese Cereal / Soup Chip-resistant Porcelain Bowls

    Mora ceramic bowl for Cereal Pasta, Dessert and Salad

    Vicrays Ceramic Bowl for Rice, dessert, Cream, etc.

    Selamica Blue and White Porcelain Bowl

    Morandi Large Ceramic Bowl set for Serving nuts, pasta, soups, fruits, and ramen.

    THE BEAUTY AND FUNCTIONALITY OF APILCO PORCELAIN

    Apilco’s commitment to quality is evident in every detail of their cereal bowls.

    The brand’s signature porcelain is renowned for its exceptional durability, resisting chips, cracks, and stains with ease.

    Morandi Large Ceramic Cereal Bowl Set For Serving Nut, Pasta And Soup

    This makes Apilco bowls not only a pleasure to use but also a long-lasting investment in your kitchen.

    Beyond their practical benefits, Apilco cereal bowls possess an undeniable aesthetic appeal.

    The brand’s classic, minimalist designs complement a wide range of kitchen decor styles, from modern and sleek to rustic and cozy.

    With a range of colors and finishes to choose from, you can easily find the perfect set to suit your taste.

    CARING FOR YOUR APILCO CEREAL BOWLS

     Maintaining the pristine condition of your Apilco cereal bowls is a breeze.

    The porcelain is dishwasher-safe, making cleanup a quick and effortless task.

    Vicrays Ceramic Porcelain Soup, Dessert, Cream And Salad Bowl Set

    Unlike some ceramic or stoneware options, Apilco porcelain bowls are microwave-safe, allowing you to reheat your morning oatmeal or last night’s leftovers with ease.

    For an extra layer of protection, it’s recommended to avoid using metal utensils when serving or eating from your Apilco bowls.

    This helps preserve the bowls’ smooth, glossy finish and prevents any potential scratches or damage.

    ELEVATING YOUR BREAKFAST EXPERIENCE

    Apilco cereal bowls are more than just functional kitchen essentials; they are the foundation for creating a truly memorable breakfast experience.

    Whether you’re savoring a bowl of crunchy granola, indulging in a creamy yogurt parfait, or enjoying a heartwarming bowl of oatmeal, Apilco’s elegant design and exceptional quality will elevate your morning ritual.

    For those looking to explore alternative options, Pillivuyt porcelain is another premium French Porcelain brand that offers a wide range of high-quality cereal bowls and other kitchen essentials.

    FREQUENTLY ASKED QUESTIONS

    Question: Can I put my porcelain bowl in the oven?

    Answer: Yes, Porcelain bowls are oven-safe, allowing you to use them for baking and cooking. Just be sure to avoid sudden temperature changes, which could cause the porcelain to crack or shatter.

    Question: Does porcelain get too hot in the microwave?

    Answer: No, Porcelain is microwave-safe, meaning you can safely reheat your morning oatmeal or last night’s leftovers without worrying about the bowl becoming too hot to handle.

    Question: Can you cook with porcelain on the stove?

    Answer: While porcelain bowls are oven-safe, they are not recommended for direct stovetop cooking. The high heat can potentially damage the porcelain over time.

    Question: Can you put cold porcelain in the microwave?

    Answer: Yes, you can safely place cold porcelain bowls in the microwave, but based on my experience, you should allow them to cool or thaw because, depending on the Porcelain brand, sudden temperature changes may cause damage.

    Question: Is Porcelain made from Bone China?

    Answer: No, porcelain and bone china are distinct materials. Porcelain, like the kind used in Apilco’s products, is made from a combination of kaolin, feldspar, and quartz, while bone China contains bone ash, which gives it a more translucent appearance.

    Question: Is Porcelain China Clay?

    Answer: Yes, porcelain is primarily made from a type of clay called kaolin, which is the main ingredient in most high-quality porcelain brands.

    CONCLUSION

    In the world of breakfast, the right bowl can make all the difference.

    Apilco French Porcelain cereal bowls, with their unparalleled craftsmanship, versatility, and timeless style, are the perfect companions for elevating your morning routine.

    Invest in the beauty and functionality of Apilco, and transform your breakfast into a truly remarkable experience, one spoonful at a time.