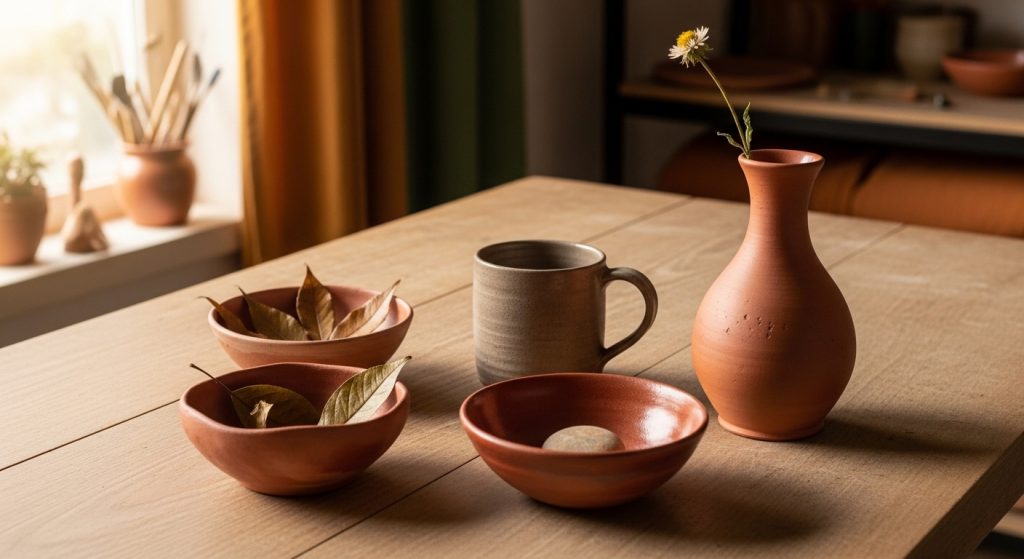
You’ve shaped something with your own hands, something real, something yours. But there it sits on the table, fragile, raw, and nowhere near finished.
You know it needs to be fired, but the idea of a professional studio kiln feels out of reach. What if you could do this at home?
Home clay firing is more accessible than most beginners think, and people are doing it every day — in their backyards, garages, and even kitchen ovens.
There are multiple methods: kiln firing, pit firing, and oven firing. Each one has its own rules, its own magic, and its own results.
But which method is right for you, and how do you do it without ruining your work? Join me, let’s find out.
What Is Clay Firing?
Firing is the process of applying heat to clay to permanently harden it. Without it, your clay piece remains soft, fragile, and water-soluble, essentially useless for any practical purpose.
Fire is what transforms a delicate clay shape into durable pottery.
The Science Behind Firing Clay
When clay is heated, several chemical changes happen that can’t be undone.
First, all the physical water trapped between clay particles evaporates. Then, as temperatures rise further, chemically bonded water inside the clay molecules is driven out too.
At even higher temperatures, typically above 1,000°C, a process called vitrification begins, where the clay particles fuse together, and the structure becomes glass-like and dense.
This is what gives fired pottery its hardness and strength.
Why Clay Must Be Fired
Unfired clay will simply dissolve or crumble the moment it contacts water.
Firing locks in the shape permanently, dramatically increases durability, and makes the piece suitable for everyday use, like holding water, food, or serving as a decorative object that will last decades.
Can You Fire Clay at Home?
Yes, absolutely, but with some important caveats. Your options and success depend heavily on the type of clay you’re using and the firing method available to you.
Some clays are purpose-built for home firing; others simply aren’t.
Types of Clay Suitable for Home Firing
Earthenware clay is the most beginner-friendly option. It fires at relatively low temperatures (around 1,000–1,150°C), which makes it achievable with a small home kiln or even a pit fire.
Air-dry clay doesn’t require any firing at all; it hardens on its own, though it’s not waterproof or food-safe.
Low-fire clay is another solid choice, designed specifically for lower temperature ranges that home setups can handle.
Clay That Cannot Be Fired at Home Easily
High-fire stoneware and porcelain clay both require temperatures well above 1,200°C — sometimes reaching 1,400°C.
These temperatures are beyond the reach of most small home kilns, ovens, and pit fires.
Attempting to fire them without proper equipment usually results in undercooked, brittle pottery. Stick to low-fire clays when you’re setting up at home.
Methods for Firing Clay at Home
There’s more than one way to fire clay at home, and each method produces different results. The right one depends on your budget, space, and the kind of finish you’re going for.
Home Clay Firing for Beginners
If you’re just starting, the learning curve doesn’t have to be steep.
The most important things to get right from the beginning are: choosing the correct clay, drying your piece completely before firing, and understanding your temperature limits.
Most beginners do best starting with small, simple pieces using low-fire earthenware clay.
Mistakes are easier to recover from at smaller scales, and the materials are affordable.
Using a Kiln at Home
A dedicated kiln is the most reliable way to fire clay at home. Electric kilns are the most popular choice for home potters. They’re clean, controllable, and relatively safe when used properly.
Small tabletop kilns are also available for those with limited space. They’re ideal for small jewellery, tiles, or test pieces.
The key advantage of any kiln is temperature control; you can program precise firing schedules and hold temperatures at exact stages.
If you’re serious about home pottery, visiting a resource like home pottery wheel and kiln can help you understand what equipment setup works best for your space and budget.
Home Clay Firing Process
Whether you’re using a kiln, pit, or oven, the process follows a similar structure.

You start with completely dry clay (bone dry, not just surface dry), move through a slow initial heat phase to remove any remaining moisture, then bring the temperature up to the target firing range.
Cooling must also be done gradually, as cracking pottery is often the result of cooling too fast, not just firing issues.
Home Clay Firing Techniques
Beyond the basic kiln method, there are several alternative techniques worth knowing.
Pit firing uses an open ground pit filled with combustible materials.
Raku firing involves pulling pottery from a hot kiln and placing it into a container of combustible material for a dramatic reduction effect.
Saggar firing uses a protective container inside a larger firing chamber to create localised atmospheric effects.
Each technique produces a unique surface aesthetic.
How to Fire Clay in an Oven
A regular kitchen or craft oven can fire certain types of clay, specifically polymer clay and some specially formulated air-dry clays that require low baking temperatures (around 110–130°C).
However, a standard oven cannot reach the temperatures needed for earthenware or stoneware.

If you’re using polymer clay, follow the manufacturer’s instructions closely.
Place pieces on a parchment-lined tray, bake at the correct temperature, and avoid opening the oven door mid-bake.
It’s a practical starting point, but know its limits.
How to Fire Pottery Without a Kiln at Home
No kiln? No problem — there are real alternatives. Pit firing, barrel firing, and raku-style setups can all be done without a professional kiln.
You can also look into community studio access or mobile kiln rental if you want occasional kiln-fired results without owning one.
For those in Australia, checking out available Pottery kilns Australia resources can point you toward local options and suppliers that cater to home potters.
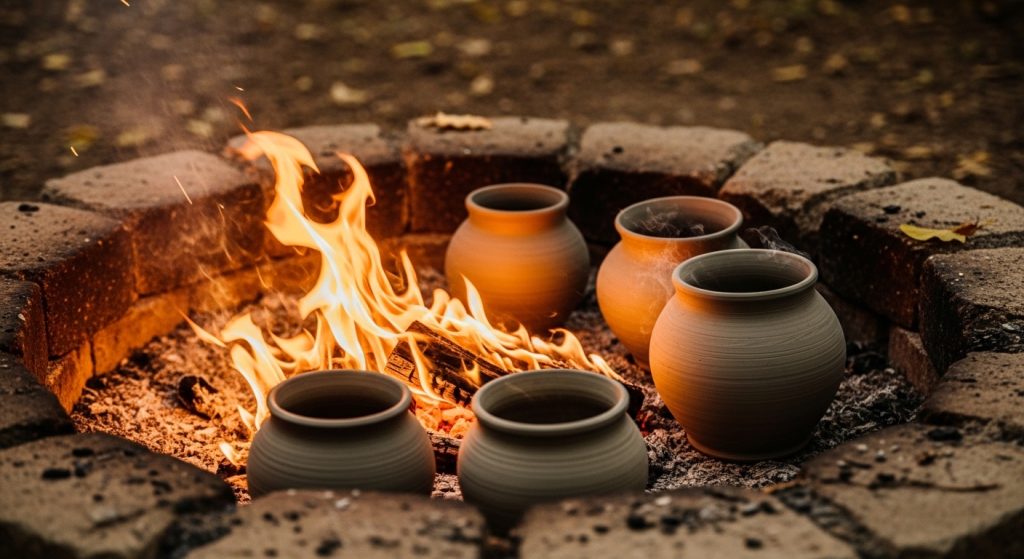
Pit Firing Pottery at Home
Pit firing is one of the oldest firing methods in human history, and it’s surprisingly achievable in a backyard.
Dig a pit roughly 60–90cm deep, line the bottom with combustible material (wood, sawdust, newspaper), place your bone-dry pieces inside, layer more combustibles on top, and light it.
The fire burns for several hours and reaches temperatures of around 600–900°C.
Pit-fired pieces are not waterproof, but the surface patterns produced by the smoke and flames are genuinely beautiful.
Pit Firing Clay
For successful pit firing, the clay prep matters as much as the fire itself.
Use low-fire or earthenware clay with an open, grogged body (clay mixed with fired clay particles) this helps withstand the uneven heat of an open fire.
Burnishing the surface before firing gives a smoother, shinier result.
Adding materials like salt, banana peel, or copper carbonate into the pit creates colour variations and unique surface effects that no kiln can replicate.
How to Build a Brick Kiln for Pottery
Building a simple brick kiln at home is entirely possible with basic materials.
You’ll need fire bricks (not regular bricks — they crack under high heat), a metal grate for air circulation, and a heat source such as a wood fire or propane burner.
Stack the bricks in a rectangular structure with gaps for airflow, create a shelf area for your pottery, and cap it loosely with a brick lid that allows some heat escape.
A basic thermometer or pyrometer is essential so you know what temperature you’re reaching inside.
How to Build a Kiln for Wood
A wood-fired kiln is a step up from a simple pit but still manageable as a DIY project.
The structure needs to be built from firebricks with a dedicated firebox at one end where wood burns, and a chamber where pottery sits.
Ash from the wood settles on the pottery during firing and melts at high temperatures to form a natural glaze, a characteristic that many potters love.
Wood kilns require sustained stoking over many hours and some practice to reach even firing temperatures throughout the chamber.
How to Make Ceramics at Home Without a Kiln
If you don’t have access to a kiln at all, your best options are air-dry clay or polymer clay.
Air-dry clay is available at most craft stores, hardens at room temperature over 24–48 hours, and can be painted or sealed afterwards.
Polymer clay can be cured in a regular oven. Neither produces waterproof, food-safe pottery, but both are perfectly suited for decorative pieces, practice work, and sculptural projects.
They’re also excellent for building skills before investing in firing equipment.
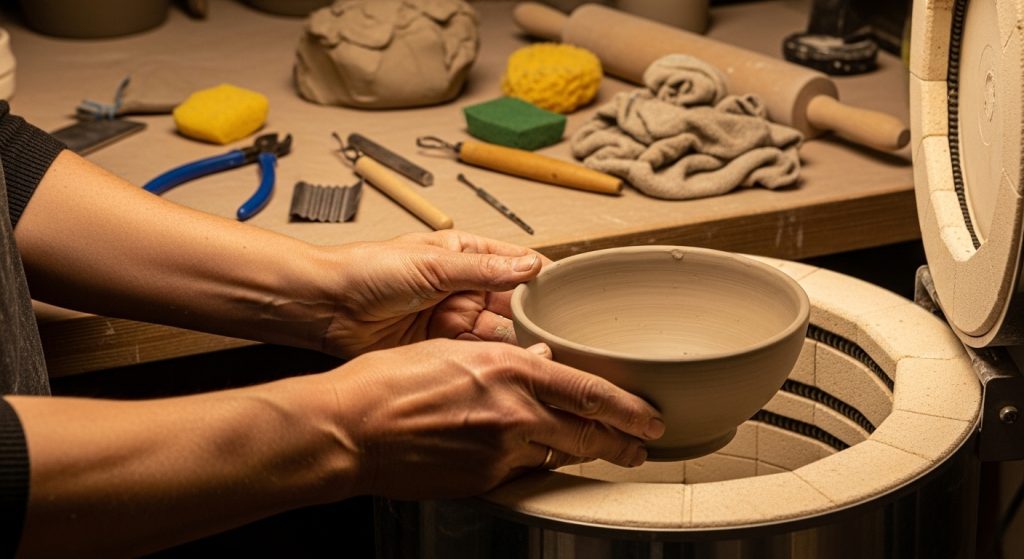
Equipment Needed for Home Clay Firing
Essential Tools
At minimum, you need a firing vessel (kiln, pit, or barrel), a pyrometer or thermometer to monitor temperature, and heat-resistant gloves.
You should also have a timer or firing schedule written out before you start.
Optional Equipment
Kiln shelves allow you to stack multiple pieces efficiently. Stilts prevent glazed pottery from sticking to the shelf surface during glaze firing.
Protective eyewear, a fire extinguisher nearby, and a kiln vent or exhaust fan are all worth having for safety and consistency.
Step-by-Step Process for Firing Clay at Home
Step 1 – Drying the Clay Completely
This is non-negotiable. Any moisture trapped inside clay will turn to steam during firing, and steam expands rapidly — causing pieces to crack or literally explode.
Leave your pieces to dry for at least 24–72 hours in a well-ventilated space. For thicker pieces, drying time can extend to a week or more.
The clay should feel room temperature (not cool) to the touch when completely dry.
Step 2 – Bisque Firing
Bisque firing is the first firing stage. The goal is to fire the clay high enough to permanently harden it and drive out any remaining chemically bonded moisture, but not so high that it vitrifies before you’ve had a chance to apply glaze.
Earthenware bisque firing typically happens around 1,000°C. The result is a porous, chalky surface that’s perfect for accepting glaze.
Step 3 – Glaze Firing
Once bisqued and glazed, the piece goes into a second firing — the glaze firing — at a higher temperature.
The glaze melts and fuses to the clay surface, creating a smooth, glass-like coating.
The exact temperature depends on the glaze type and clay body.
Always fire pieces on stilts or leave the base unglazed to prevent them from fusing permanently to kiln shelves.
Temperature Guide for Home Clay Firing
Low-Fire Temperature Ranges
Earthenware fires between 1,000°C and 1,150°C (cone 06–1). This is the most accessible range for home firing setups. Most small electric kilns comfortably reach these temperatures.
Polymer clay and air-dry clay operate at much lower temperatures — 110–175°C — within reach of a standard oven.
Signs the Clay Is Properly Fired
A properly fired piece will have changed colour (earthenware typically turns from grey/tan to a warm terracotta red or buff).
Tapping a fired piece produces a clear, resonant ring — unfired or underfired clay sounds dull and thuddy.
The piece will also feel notably harder and denser than the unfired version.
Safety Tips for Firing Clay at Home
Fire and Heat Safety
Ventilation is critical. Firing clay releases gases and particulates — especially during glaze firing.
Always work outdoors or in a well-ventilated space with an exhaust fan. Never leave an active pit fire or kiln unattended.
Use heat-resistant gloves when handling anything near the fire, and keep a fire extinguisher nearby.
Let all pieces cool completely inside the kiln or pit before attempting to remove them.
Common Firing Mistakes to Avoid
The most common mistake is firing clay that isn’t fully dry — this leads to cracking or explosions.
Overheating is another frequent issue, particularly in pit fires where temperature is difficult to control precisely.
Poor airflow in a kiln or pit results in uneven firing and cold spots. Always go slow, especially during the initial heating phase, and don’t rush the cool-down.
Common Problems in Home Clay Firing
Cracking Pottery
Cracking usually happens for one of two reasons: the clay wasn’t dry before firing, or the temperature changed too quickly.
Heat the kiln or pit slowly at the start to allow even temperature distribution throughout the piece.
Exploding Clay Pieces
Explosions happen when trapped moisture or air pockets inside the clay expand rapidly under heat.
Ensure your clay is completely bone dry and that you’ve wedged it thoroughly to remove air bubbles before shaping.
Uneven Firing Results
In open fires and pit firings, uneven heat distribution is common.
Rotating pieces when possible, ensuring good airflow throughout the firing chamber, and not overcrowding pieces help achieve more consistent results.
Tips for Beginners Firing Clay at Home
Start with Small Projects
Small pieces dry faster, heat more evenly, and are much easier to manage when you’re learning.
Coasters, small bowls, pinch pots, and tiles are all excellent starting projects. Keep wall thickness consistent — uneven thickness causes uneven drying and firing.
Use Low-Fire Clay
Low-fire earthenware clay is your best friend as a beginner. It’s forgiving, widely available, and compatible with the temperature ranges achievable by most home setups.
Once you’ve mastered the basics, you can experiment with mid-fire and high-fire clays using better equipment.
Practice Temperature Control
Temperature control is the skill that separates consistent results from frustrating ones.
Invest in a basic pyrometer, keep a firing log, and take notes on what worked and what didn’t after every session.
Over time, you’ll develop an intuition for your specific setup.
Conclusion
Home clay firing is a genuinely achievable craft, one that rewards patience, preparation, and curiosity.
Whether you’re using a small electric kiln, digging a backyard pit, or working with air-dry clay in your living room, the fundamentals remain the same: dry your clay completely, respect your temperature ranges, and keep safety front of your mind.
Beginners should start small, use low-fire clay, and build confidence before scaling up.
The process isn’t always perfect; cracking and uneven results are part of learning, but every firing teaches you something. Pick your method, prepare well, and start creating.